Using An Impact Driver For Drilling Holes
Welcome to the world where power meets precision, and DIY projects look less daunting thanks to the mighty impact driver. If you’ve ever wondered whether your trusty impact driver could take on the task of drilling holes, you’re in the right place. Today I am focusing on a versatile tool that’s often underestimated in its drilling capabilities: the impact driver. Specifically, I am diving into the use of an Impact Driver for Drilling Holes.
In this guide, I am not just talking about any drilling, I am focusing on how impact drivers can be your go-to tool for creating perfect holes with ease and precision. From selecting the right bits to mastering the technique, I will cover everything you need to know to make your impact driver a drilling powerhouse. So, let’s gear up and drill down into the details of using an Impact Driver for Drilling Holes.

Step-by-Step Guide: Using Your Impact Driver for Drilling Holes
Mastering the use of your impact driver for drilling tasks can significantly enhance your project outcomes, offering both speed and precision. This step-by-step guide will walk you through preparing your impact driver and employing the right technique to drill holes effectively.
Preparing Your Impact Driver
Before you start drilling, a little preparation goes a long way in ensuring a smooth and successful operation.
Checking Battery Life
An impact driver’s performance is directly linked to its battery life. Begin by ensuring your impact driver’s battery is fully charged. A well-charged battery provides consistent power, preventing any loss in torque or speed midway through your task. Most modern impact drivers come with indicators for battery life, so make use of these to avoid any surprises.
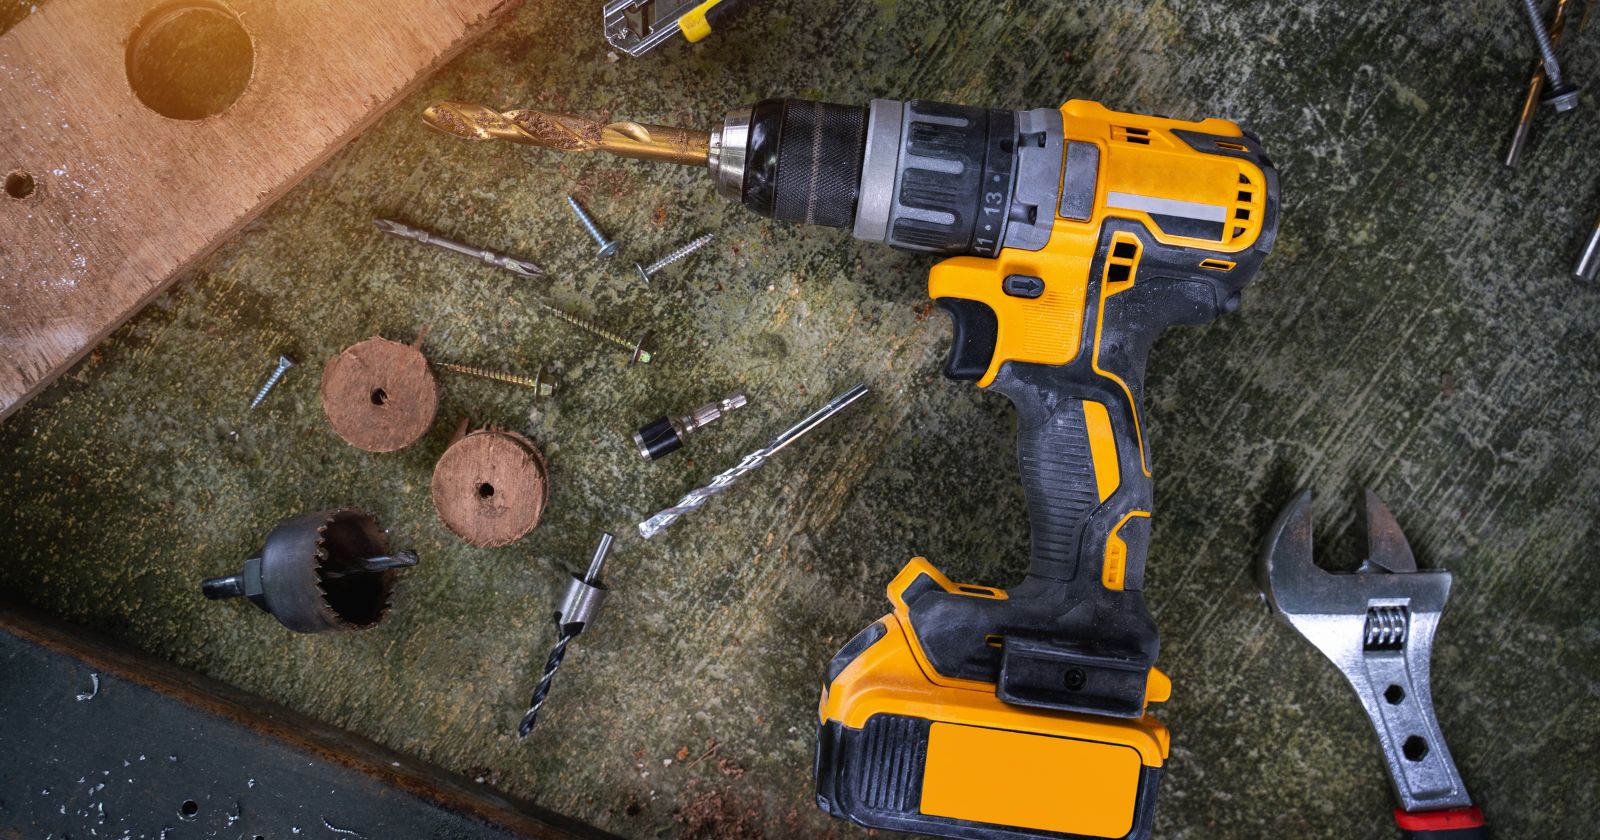
Selecting the Correct Bit
Choosing the right bit is crucial for the task at hand. Refer to the material you’re working with and the size of the hole you wish to drill. Ensure the bit is compatible with impact drivers, as regular drill bits may not withstand the tool’s torque. Securely fasten the bit into the chuck, making sure it’s tight and properly aligned to avoid any wobbling or slipping during drilling.
Drilling Technique
With your impact driver ready, employing the correct technique will ensure your drilling is both effective and precise.
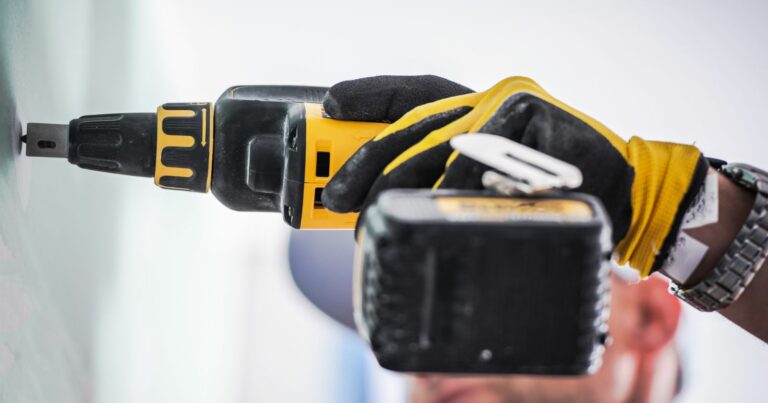
How to Position the Impact Driver
Positioning is key. Hold the impact driver firmly with both hands, if possible. Your dominant hand should grip the handle, using your index finger to control the trigger, while your other hand supports the base or the side of the tool. Ensure a comfortable stance and align the bit with the drilling point at a 90-degree angle to the surface. This positioning helps in applying even pressure and maintaining control throughout the drilling process.
Controlling Speed and Torque
Impact drivers often come with variable speed settings, allowing you to control the speed based on the task. Start at a lower speed to establish the hole, gradually increasing the speed as you drill deeper. The torque, or rotational force, of your impact driver is typically adjusted automatically based on resistance. However, being mindful of the pressure you apply is important. Too much pressure can lead to fast wear of the bit or even breakage, while too little may not penetrate the material effectively.
Tips for Clean and Precise Holes
- Pilot Holes: For larger holes, starting with a smaller pilot hole can guide the larger bit and reduce the chance of it wandering.
- Peck Drilling: Periodically withdrawing the bit from the hole helps clear out debris, preventing overheating and ensuring a cleaner hole.
- Use Tape: Placing a piece of painter’s tape over your drilling point can help prevent the bit from slipping, especially on smooth surfaces like tile or metal.
- Cool Down: For extensive drilling tasks, especially in hard materials, allow your bit to cool down periodically to preserve its sharpness and reduce wear.
By following these preparatory and technique focused steps, you’ll be able to harness the full potential of your impact driver for drilling holes. Whether you’re working on a quick home repair or a complex project, these guidelines will help you achieve clean, precise holes with minimal effort and maximum efficiency.

Impact Driver for Drilling Holes: When and Why?
Impact drivers are not traditionally the first tool you might reach for when planning to drill holes. However, their unique capabilities and features make them surprisingly versatile for such tasks. Understanding when and why to use an impact driver for drilling can help you make the most of this tool, especially for specific projects and materials.
The Versatility of Impact Drivers in Drilling
Impact drivers can be remarkably effective for drilling holes, provided you use them in the right context and with the appropriate attachments.
Types of Drilling Tasks Suitable for Impact Drivers
- Pilot Holes: Perfect for creating pilot holes for screws or nails, especially in hardwood or dense materials where precision and preventing splitting are crucial.
- Large Diameter Holes: When equipped with spade bits or hole saws, impact drivers can efficiently bore large holes through wood, making them ideal for tasks such as running cables or fitting pipes.
- Deck Building: For constructing decks or outdoor structures, impact drivers can quickly drill holes and drive fasteners into treated lumber.
- Drywall Installation: While not the primary tool for the job, impact drivers can be used to drill holes for anchors in drywall installations.
Material Considerations
- Wood: Impact drivers work exceptionally well on wood, handling everything from soft pine to hard oak.
- Metal: With the right bits, such as high-speed steel (HSS) or titanium-coated bits, impact drivers can drill through metal, albeit with more care needed to prevent overheating.
- Masonry: While not a replacement for a hammer drill, impact drivers can tackle light masonry work with masonry bit attachments for small or medium-sized holes.
Pros and Cons
Understanding the advantages and limitations of using impact drivers for drilling is key to maximizing their potential.
Pros
- Speed and Efficiency: Impact drivers drill holes quickly, especially in tasks like creating pilot holes or when working with large-diameter bits.
- Precision and Control: The tool’s design and the impact mechanism offer greater control, reducing the likelihood of bit slipping and ensuring cleaner holes.
- Less Wrist Strain: The impact action translates to less torque reaction felt by the user, reducing wrist strain during prolonged use.
Cons
- Not Ideal for Delicate Materials Without Proper Bits: Impact drivers can be too powerful for delicate materials like thin plastics or ceramics, risking damage without the use of specialized bits.
- Noise Level: The impact mechanism generates more noise compared to standard drills, which might be a consideration in noise sensitive environments.
Impact drivers offer a unique set of capabilities that can extend beyond their conventional use of driving screws. For drilling holes, they provide a combination of speed, efficiency, and control that can enhance various projects. However, understanding the tool’s pros and cons ensures that you use it effectively, achieving optimal results while mitigating any potential drawbacks.
Watch This Video You Will Learn About Using An Impact Driver For Drilling Holes
Impact Driver for Drilling Holes: Expert Tips and Tricks
Unlocking the full potential of your impact driver for drilling tasks not only enhances your efficiency on the job but also ensures the longevity and durability of your tool. Here are some expert tips and tricks to help you achieve professional results and maintain your impact driver in top condition.
Ensuring Long-lasting Durability of Your Tool
- Regular Inspection: Before each use, inspect your impact driver for any signs of wear or damage. Check the chuck and battery connections to ensure they are clean and functioning properly.
- Proper Storage: Store your impact driver in a clean, dry place. If it came with a case, use it to protect the tool from dust and moisture, which can lead to corrosion and electrical issues.
- Battery Care: To maintain battery life, follow the manufacturer’s instructions for charging and storage. Avoid leaving the battery in the charger once it’s fully charged, and store it in a cool, dry place when not in use.
- Avoid Overloading: While it’s tempting to push your tool to its limits, consistently overloading your impact driver can lead to premature wear. Use the correct tool for the job and avoid using your impact driver for tasks it’s not designed for.
Advanced Techniques for Professional Results
- Depth Control: For projects requiring precise depth, such as when countersinking, use a drill stop or a piece of tape on the bit to mark the desired depth. This ensures uniformity across multiple holes.
- Angle Drilling: When drilling at an angle, start by making a guide mark with a smaller bit to prevent the larger bit from wandering. Gradually increase the angle as you drill to maintain control and accuracy.
- Material-Specific Speeds: Different materials require different drilling speeds. Harder materials like metal require slower speeds to prevent overheating, while softer materials like wood can be drilled at higher speeds. Experiment with speed settings to find the optimal performance for each material.
- Cooling Bits: For extensive drilling in hard materials, periodically withdraw the bit from the hole to allow it to cool. You can also lightly dip the bit in water or use a specialized cooling spray to reduce heat buildup.
By incorporating these expert tips and tricks into your routine, you can elevate your use of an impact driver for drilling holes to a professional level. Remember, achieving superior results is not just about having the right tools but also about applying the right techniques and ensuring diligent care and maintenance of your equipment. Whether you’re working on a personal DIY project or a professional job site, these insights will help you work smarter, not harder, with your impact driver.

Troubleshooting Common Issues
Even with the best preparation and technique, you might encounter some challenges while using your impact driver for drilling. Knowing how to troubleshoot these common issues can save time and prevent damage to both your tool and the work material.
Overcoming Challenges
What to Do If the Bit Gets Stuck
A stuck bit can be frustrating and potentially harmful to your project. If your bit gets stuck:
- Stop Immediately: Continuing to run the driver can damage the bit, the tool, or the workpiece.
- Reverse Function: Most impact drivers have a reverse function. Use it to gently back out the bit. If resistance is felt, stop and proceed to the next step.
- Manual Removal: If the bit remains stuck, disconnect the battery (for safety) and use pliers to gently twist and pull the bit out. Applying a penetrating oil can also help loosen it.
How to Avoid Splitting or Damaging Materials
Splitting or damaging your material can turn a simple project into a complicated repair job. To avoid this:
- Use the Correct Bit: Make sure you’re using a bit suited for the material and the type of hole you’re drilling.
- Pilot Holes: Especially in wood, pilot holes can prevent splitting by reducing stress on the material.
- Control Speed: Start slowly to establish the hole, then increase speed as needed. High speeds can cause excessive heat and damage.
- Support the Material: If possible, support the backside of the material to reduce blowout as the bit exits.
Maintenance Tips
Proper maintenance ensures your impact driver and its accessories remain in top condition, ready for your next project.
Regular Cleaning and Lubrication
Dust and debris can accumulate in your tool, affecting its performance. After each use:
- Clean: Blow out any dust from the tool, especially around the chuck and ventilation slots. Wipe down the exterior with a clean cloth.
- Lubricate: Apply a light machine oil to moving parts periodically. Consult your tool’s manual for specific lubrication points and recommended products.
Bit Replacement and Care
Bits wear out over time, and using worn bits can lead to poor performance and damaged materials.
- Inspect Bits Regularly: Look for signs of wear, such as dull edges or damage. Replace bits that are no longer sharp or are damaged.
- Storage: Store bits in a dry, organized manner. Many bits come with cases or holders that protect them from damage and corrosion.
- Quality Matters: Investing in high-quality bits can improve your drilling experience and reduce the frequency of replacements.
By addressing challenges promptly and adhering to regular maintenance practices, you can extend the life of your impact driver and ensure it remains a reliable tool for all your drilling needs. Whether you’re a seasoned professional or a DIY enthusiast, understanding how to troubleshoot common issues and maintain your equipment is essential for successful projects.

Wrapping Up Using An Impact Driver For Drilling Holes
Throughout this comprehensive guide, I’ve explored the versatility and power of the impact driver, particularly when it comes to drilling holes. From understanding the basics of impact drivers and how they differ from standard drills, to selecting the right bits and mastering the drilling technique, we’ve covered the essential knowledge needed to harness this tool’s potential fully. I’ve also delved into troubleshooting common issues and provided expert tips to ensure your impact driver and bits remain in peak condition, ensuring long-lasting durability and professional results.
I’d love to hear about your experiences using an impact driver for drilling holes. What challenges did you face, and how did you overcome them? Do you have any tips or tricks that you’ve found particularly useful? Share your stories and questions in the comments below. Your insights not only enrich our community but also help others tackle their projects with confidence and creativity.
Thank you for joining me on this deep dive into using impact drivers for drilling holes. Here’s to many successful and satisfying projects ahead!