Impact Driver Techniques For Drywall Installation
When embarking on any drywall project, whether you’re hanging new sheets in a renovation or making repairs around the home, the significance of using the correct tools and techniques cannot be overstated. Drywall installation and repair are arts that require precision, patience, and the right equipment to ensure a smooth, seamless finish. Among the arsenal of tools at your disposal, one stands out for its efficiency and effectiveness: the impact driver. Mastering Impact Driver Techniques for Drywall can transform an arduous task into a manageable one, significantly improving your workflow and the quality of your results.
This post is dedicated to unlocking the secrets of effective impact driver use in drywall projects. From selecting the right bit to adjusting the torque settings for optimal performance, I w[ll cover all you need to know to make your drywall work not just easier, but also more professional and satisfying. Join me as I dive into the essential techniques and tips that will elevate your DIY projects from good to great, ensuring that every screw is perfectly placed and every panel is precisely positioned.

Why Use an Impact Driver for Drywall?
Using an impact driver for drywall projects offers several compelling benefits over traditional tools like drills or manual screwdrivers:
- Precision and Control: The impact mechanism of an impact driver allows for precise control over the driving depth and torque, critical when working with drywall to prevent overdriving or damaging the material.
- Efficiency: Impact drivers are faster and more efficient, allowing you to complete tasks more quickly without sacrificing accuracy. This is especially beneficial in projects involving a large number of screws.
- Reduced Fatigue: Thanks to the tool’s design, which absorbs much of the torque, users experience less wrist and hand fatigue, enabling longer work periods with greater comfort.
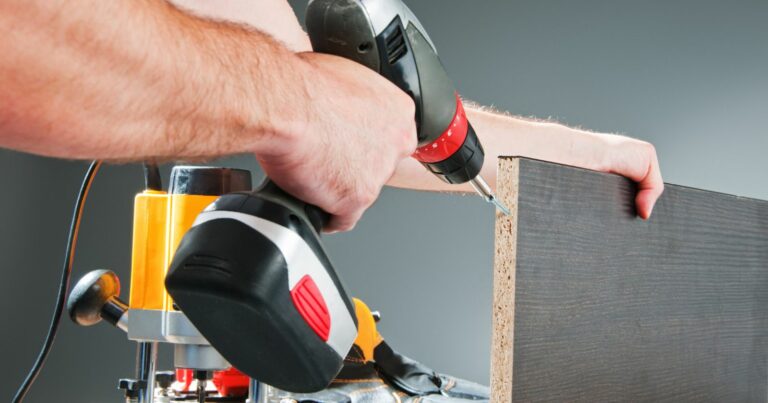
- Versatility: Although we’re focusing on drywall, the impact driver’s versatility makes it a valuable addition to any tool collection, capable of handling tasks ranging from construction projects to furniture assembly.
- Improved Performance in Tight Spaces: The compact size of impact drivers makes them ideal for working in tight or awkward spaces, a common scenario when installing drywall in corners or near ceilings.
For anyone involved in drywall projects, whether a professional contractor or a DIY enthusiast, the impact driver is not just a tool but a game changer. It enhances efficiency, precision, and comfort, making it a preferred choice for those seeking to achieve professional quality results in their drywall installations and repairs.

Essential Impact Driver Techniques for Drywall
Mastering the use of an impact driver for drywall requires more than just knowing how to pull the trigger. The key to achieving professional grade results lies in understanding and applying a few critical techniques. These include choosing the right bit, setting the correct torque, and adjusting the depth setting. Let’s dive into each of these areas to ensure your drywall projects are not only efficient but also flawlessly finished.
Choosing the Right Bit
The first step in ensuring your impact driver serves you well in drywall projects is selecting the appropriate bit. This choice is crucial, as the right bit will prevent stripping screws and damaging the drywall surface.
- Phillips #2 Bit: The most common type used for drywall screws, providing a good grip and reducing slip-out.
- Magnetic Bit Holder with Phillips Head: Offers additional stability and makes it easier to handle and drive screws, especially in tight spaces.
- Drywall Screw Setter Bit: Specifically designed for drywall, these bits have a collar to automatically stop the screw at the right depth, preventing overdriving.
Setting the Correct Torque
Torque control is vital when working with drywall to avoid damaging the material or the screw. Too much torque can tear through the drywall paper, weakening the hold of the screw, while too little torque might leave the screw too proud, making it difficult to achieve a smooth finish.
- Start Low: Begin with a lower torque setting and gradually increase until you find the sweet spot where the screw is flush with the drywall surface without breaking the paper.
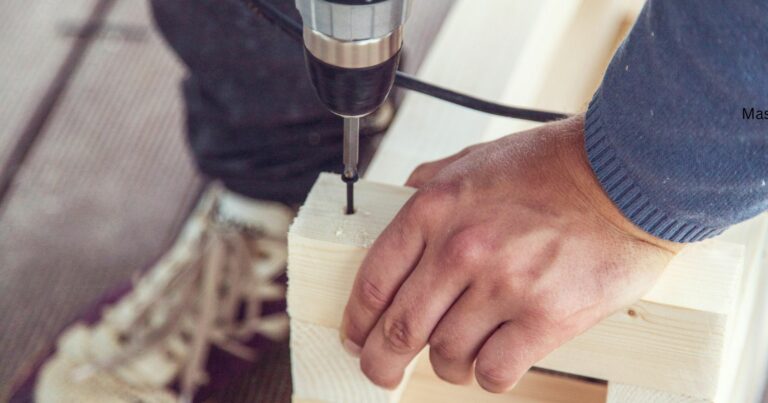
- Use Variable Speed: If your impact driver has variable speed control, start slow to ensure the screw begins straight, then speed up once it’s securely in the material.
- Listen and Feel: Pay attention to the sound and the resistance. As you become more experienced, you’ll be able to sense the right torque level by the feedback the impact driver provides.
Depth Setting for Drywall
Depth setting is another critical technique to master. It ensures that screws are driven to the correct depth – not too shallow and not too deep. Getting this right is essential for the integrity of the drywall installation.
- Use a Drywall Nosepiece: Some impact drivers come with or allow attachment of a drywall nosepiece, designed to help set the screw at the perfect depth.
- Practice on Scrap Pieces: Before starting on the actual workpiece, practice driving screws into a scrap piece of drywall to get a feel for the correct depth.
- Adjust as Necessary: Even with the right settings, different materials or screw lengths might require slight adjustments. Always be prepared to tweak your depth setting based on the results you’re getting.
Implementing these essential techniques will significantly improve your efficiency and effectiveness when using an impact driver for drywall projects. The right bit, combined with precise torque and depth settings, will ensure that every screw is perfectly placed, leaving you with a professional finish every time.
Watch This Video And Learn About Impact Driver Techniques For Drywall Installation
Advanced Techniques and Tips
Even with a solid grasp of the basics, there’s always room to refine your technique and learn a few more tricks to enhance your drywall projects. Advanced techniques can help you avoid common pitfalls, achieve greater precision, and work more efficiently. Let’s explore some of these advanced tactics, including how to sidestep typical mistakes, control your impact driver’s speed for optimal precision, and utilize drywall screw adapters for enhanced efficiency.
Avoiding Common Mistakes
Working with an impact driver on drywall can sometimes lead to mistakes that affect the quality of your project. Here are a few common ones and how to avoid them:
- Overdriving Screws: This can damage the drywall paper and compromise the screw’s hold. Always use a screw setter bit or a drywall nosepiece to prevent this.
- Stripping Screw Heads: Apply steady pressure and make sure you’re using the right bit size to avoid stripping the screw heads.
- Using Damaged Bits: Worn or damaged bits can slip and damage the screw head or drywall. Replace bits regularly to maintain efficiency.
- Ignoring Depth Setting: Not adjusting the depth setting for different types of screws or drywall can lead to inconsistent finishes. Practice and adjust as needed.
Speed Control for Precision
One of the most critical skills in mastering an impact driver is controlling its speed. This control allows for more precise screw placement, essential in achieving a flawless drywall finish.
- Start Slow: Begin driving each screw at a slower speed to ensure accurate placement and prevent slipping.
- Increase Speed Gradually: Once the screw is correctly positioned, gradually increase the speed to drive the screw to the desired depth efficiently.
- Use a Variable Speed Trigger: If your impact driver has a variable speed trigger, use it to finely control the driving speed based on the feel and the resistance of the material.
Using Drywall Screw Adapters
Drywall screw adapters can greatly enhance your efficiency and accuracy when working with an impact driver. These adapters are designed to help manage screw depth and placement with greater precision.
- Drywall Screw Setter: This adapter sets the screw at the perfect depth every time, preventing overdriving and damage to the drywall.
- Magnetic Bit Holder: While not exclusively for drywall, a magnetic bit holder can keep screws in place as you position the impact driver, especially helpful in tight spaces or when working at awkward angles.
- Pivoting Bit Tip Holder: Ideal for reaching difficult angles or tight spaces, this adapter allows the bit to pivot up to 20 degrees, providing flexibility without sacrificing stability or control.
By incorporating these advanced techniques and tools into your workflow, you’ll minimize mistakes, improve precision, and enhance efficiency in your drywall projects. Whether you’re a seasoned professional or a dedicated DIYer, these tips can help elevate your work to the next level, ensuring every project is completed with the high standards of quality and craftsmanship.

Impact Driver Maintenance for Optimal Performance
Ensuring your impact driver remains in top condition is crucial for maintaining its performance, longevity, and safety. Regular maintenance, including cleaning, battery care, and bit management, can significantly impact its efficiency and reliability. Let’s dive into the essential maintenance practices that will keep your impact driver working like new.
Regular Cleaning
Dust, debris, and drywall compound can accumulate in your impact driver, affecting its function. Follow these steps to keep it clean:
- Disconnect the Battery: Safety first. Always remove the battery before cleaning to prevent accidental start-up.
- Use Compressed Air: Blow away dust and debris from the ventilation slots, chuck, and trigger area. Compressed air is effective in removing particles without pushing them further into the tool.
- Wipe Down the Exterior: Use a clean, dry cloth to wipe the exterior of the impact driver. For stubborn grime, a cloth dampened with mild soap can be used, but ensure no moisture gets into the tool’s interior.
- Check for Wear: Inspect the tool for any signs of wear or damage during cleaning. Addressing issues early can prevent more significant problems down the line.
Battery Care and Storage
The battery is the heart of your cordless impact driver. Proper care and storage are key to extending its life and performance:
- Avoid Extreme Temperatures: Store batteries in a cool, dry place, away from direct sunlight and extreme temperatures which can degrade battery life.
- Maintain Charge Levels: Keep lithium-ion batteries with a partial charge when not in use. Fully depleting or charging to full can shorten their lifespan.
- Regular Use and Charging: Regular use and charging help maintain battery health. Avoid leaving the battery dormant for extended periods.
- Use the Right Charger: Always use the manufacturer-provided charger or one specifically designed for your battery to prevent damage.
Bit Replacement and Care
Bits are critical for the impact driver’s performance. Keeping them in good condition ensures efficiency and precision:
- Inspect Bits Regularly: Look for signs of wear, such as dullness or damage. Worn bits can make your work harder and potentially damage materials.
- Clean Bits After Use: Remove any debris or buildup. A quick wipe with a clean cloth or a brush can keep them in good condition.
- Store Bits Properly: Use a bit holder or case to prevent loss and damage. Keeping bits organized also makes it easier to find the right one for the job.
- Know When to Replace: If a bit is showing signs of wear or slipping frequently, it’s time for a replacement. Using sharp, intact bits makes your work more efficient and safer.
By adhering to these maintenance routines, you can ensure that your impact driver continues to perform at its best, project after project. Regular cleaning, proper battery care, and diligent bit management not only prolong the life of your tool but also contribute to the quality and efficiency of your work.

Impact Driver Safety Tips
Using an impact driver, like any power tool, requires a focus on safety to prevent accidents and ensure a productive work environment. Adhering to safety guidelines, including the use of personal protective equipment PPE and following safe handling practices, is essential. Let’s explore the necessary steps to safely operate an impact driver.
Personal Protective Equipment (PPE)
The right safety gear can make a significant difference in preventing injuries. When operating an impact driver, consider the following PPE:
- Safety Glasses: Protect your eyes from flying debris, dust, and particles that can result from driving screws into drywall or other materials.
- Hearing Protection: Although impact drivers are not the loudest tools, prolonged use, especially in enclosed spaces, can affect your hearing. Earplugs or earmuffs are recommended.
- Work Gloves: Durable gloves can protect your hands from abrasions and provide a better grip on the tool, reducing the chance of slips.
- Dust Mask: When working in environments with drywall dust or other particulates, a dust mask or respirator can help prevent inhalation of potentially harmful particles.
Safe Handling Practices
Beyond wearing the appropriate PPE, how you handle and operate the impact driver plays a crucial role in safety. Keep these practices in mind:
- Read the Manual: Familiarize yourself with the tool’s features, adjustments, and safety warnings before use.
- Check the Tool Before Use: Inspect the impact driver for any signs of damage or wear that could affect its safety or performance. Ensure the battery is correctly installed and the bits are securely fastened.
- Maintain a Firm Grip and Stance: Use both hands when possible, and keep a balanced stance to manage the torque effectively. This prevents the tool from twisting unexpectedly.
- Be Aware of Surroundings: Keep your work area clean and free of obstacles that could cause trips or falls. Be mindful of others who may enter the area.
- Disconnect When Not in Use: Remove the battery when the tool is not in operation, especially during cleaning, adjustment, or when changing bits.
- Store Safely: When not in use, store the impact driver and accessories in a secure place, out of reach of children and unauthorized users.
By adhering to these safety tips, including the proper use of PPE and safe handling practices, you can ensure a safer work environment. Remember, safety is not just a practice but a responsibility, ensuring that every project is not only successful but also conducted in the safest manner possible.

Wrapping Up Impact Driver Techniques For Drywall Installation
Mastering the use of an impact driver for drywall projects is an invaluable skill that can significantly enhance the quality and efficiency of your work. Throughout this guide, I’ve explored essential techniques, from selecting the right bit and adjusting torque and depth settings, to advanced tips that help avoid common mistakes and improve precision. I’ve also emphasized the importance of regular maintenance to ensure your tool remains in optimal condition and highlighted crucial safety practices to protect yourself and others during use.
Join our community . Stay up-to-date with the latest trends, techniques, and tools that can make all the difference in your work. Together, let’s build a space where knowledge is shared, questions are welcomed, and achievements are celebrated.
Your next project is an opportunity for greatness. Let’s make it remarkable!