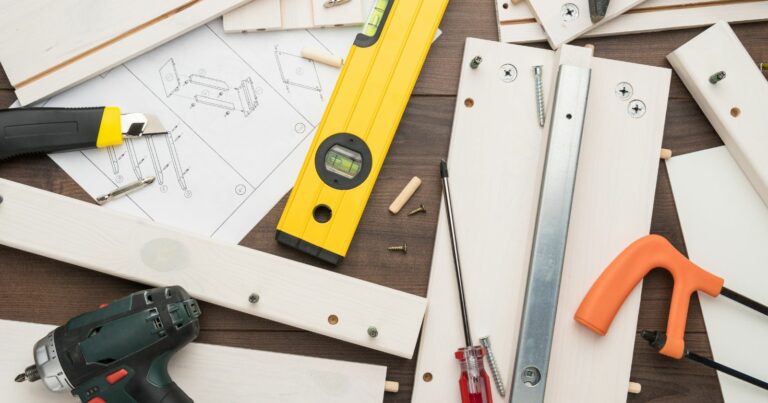
Mastering The Basics: How To Hold An Impact Driver
Welcome to the ultimate guide on How To Hold An Impact Driver, your first step towards mastering this powerful tool with confidence and precision. Whether you’re a seasoned contractor or a tool enthusiast embarking on DIY projects, understanding the correct way to hold an impact driver is crucial. This seemingly simple technique can significantly impact your work’s efficiency, accuracy, and safety. An impact driver, known for its ability to drive screws into dense materials with ease and strip fewer screws in the process, becomes an extension of your hand.
Thus, a proper grip not only enhances control over this dynamic tool but also minimizes the risk of injury and fatigue, allowing for longer, more productive work sessions. In the following sections, I will dive deep into the ergonomics, the step by step process, and advanced techniques to ensure you’re holding your impact driver the right way every time. Let’s get started and turn you into a pro at handling one of the most versatile tools in your arsenal.

How To Hold An Impact Driver Properly
Mastering the correct way to hold an impact driver is fundamental to maximizing its potential while ensuring your safety and comfort. Let’s break down the process into manageable steps, from the right grip to the optimal stance, and finally, controlling the trigger for precision and power.
The Right Grip
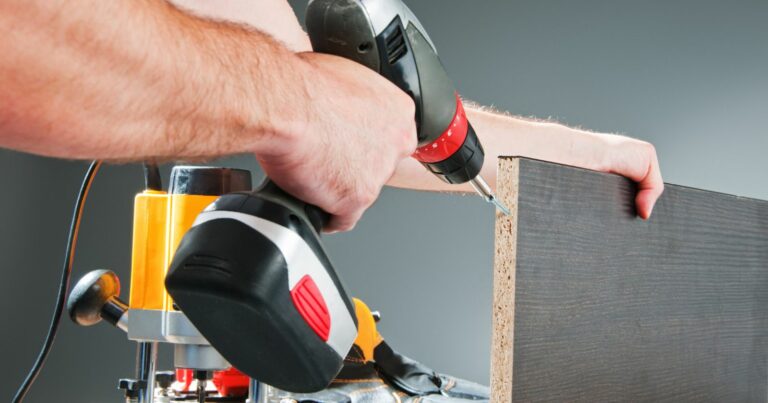
The way you grip your impact driver can significantly affect your control and the outcome of your work. Follow this step by step guide to ensure you’re holding it correctly:
- Position Your Hand: Wrap your dominant hand around the handle so that it fits comfortably in the curve of your grip. Your hand should be positioned so the trigger is easily accessible with your index finger.
- Thumb and Finger Placement: Place your thumb on one side of the handle and your fingers around the other side. Your index finger should rest lightly on the trigger, ready to press it, while the rest of your fingers secure the grip.
- Firm but Relaxed Grip: Your grip should be firm enough to maintain control over the impact driver, especially under torque, but not so tight that it causes strain. A relaxed grip reduces the risk of fatigue and allows for better maneuverability.
- Support with Your Other Hand: If your impact driver has a side handle (especially common in models designed for heavy-duty tasks), use your other hand to stabilize and guide the tool. If there’s no side handle, lightly support the body of the driver or the battery pack for additional control.
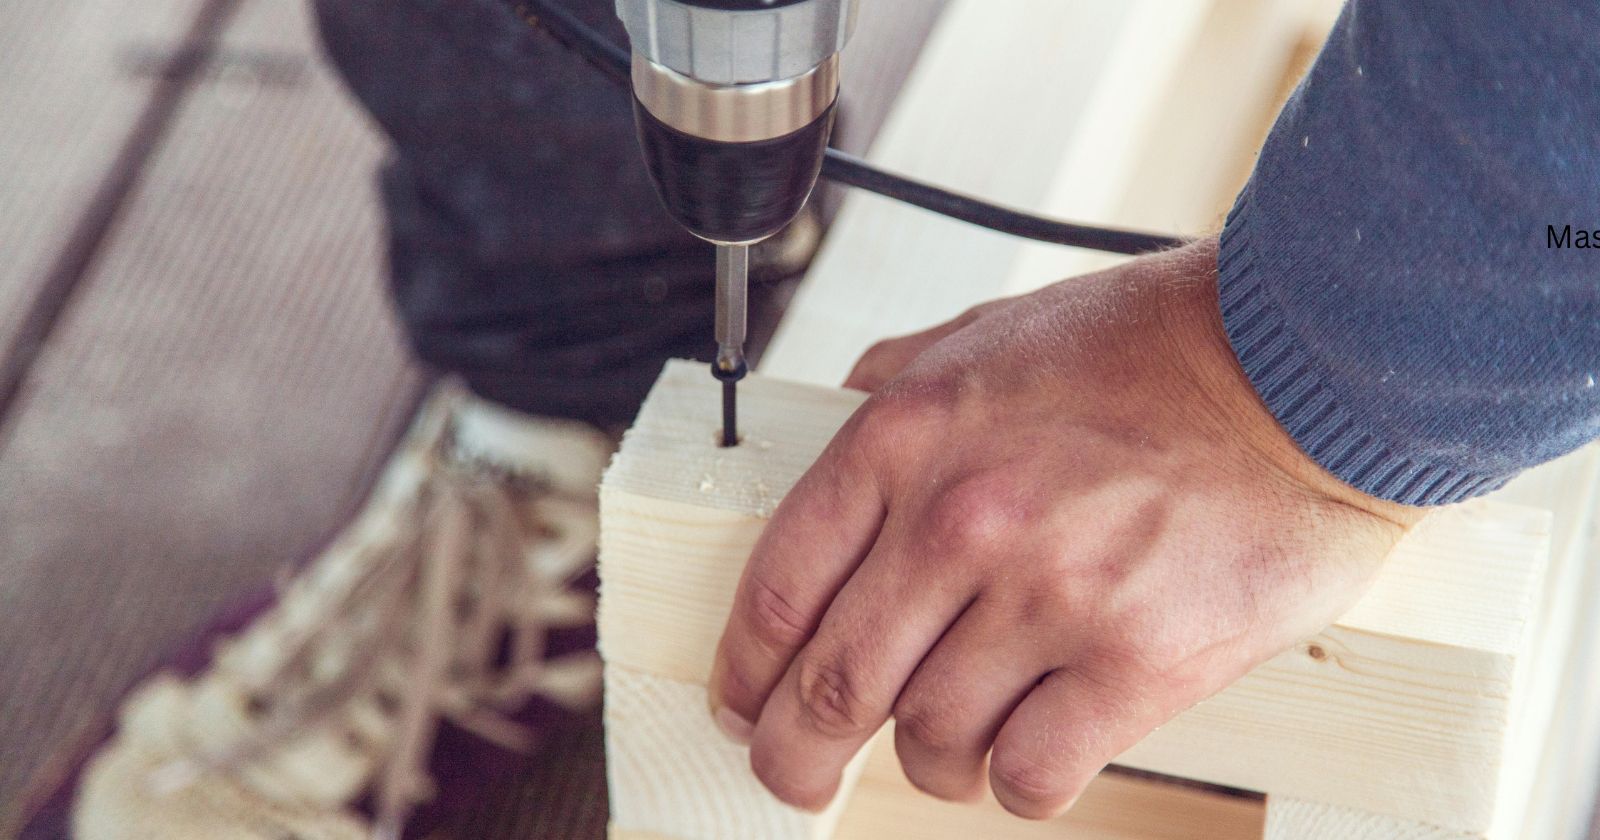
Stance and Position
Your body stance plays a crucial role in how effectively you can use your impact driver. Here’s how to position yourself for optimal control and balance:
- Feet Shoulder-Width Apart: Stand with your feet shoulder width apart to provide a stable base. This stance helps distribute your weight evenly and allows for better balance.
- Slight Bend in the Knees: Keep a slight bend in your knees to maintain flexibility and absorb any reactive forces from the impact driver. This position also reduces strain on your back.
- Lean in Slightly: Lean slightly towards the impact driver, aligning your shoulder with your hand for a straight, more controlled push. This alignment ensures that you’re applying force directly and efficiently.
Activating the Trigger
Controlling the trigger is key to managing the speed and torque of your impact driver:
- Start Slowly: Begin by gently pressing the trigger to start the driver at a low speed. This initial control helps prevent the bit from slipping off the screw head and allows for adjustments.
- Increase Pressure Gradually: As the screw begins to engage, gradually increase pressure on the trigger to speed up. This gradual increase gives you more control over the driving process.
- Maintain Steady Pressure: Once the screw is driving smoothly, maintain a steady pressure on the trigger to continue at a consistent speed. Adjust as needed based on the material’s resistance and the screw’s depth.
By following these steps to grip your impact driver correctly, position your body for stability, and control the trigger with precision, you’ll enhance your ability to tackle projects with confidence and efficiency. This proper technique not only improves the quality of your work but also contributes to a safer, more enjoyable experience with your tool.

Preparing To Use Your Impact Driver
Before you power on your impact driver and start tackling those projects, it’s imperative to prepare yourself and your tool properly. Safety measures and selecting the right bit are not just preliminary steps; they are foundational to ensuring a successful and injury-free work session.
Safety First
When it comes to using power tools, safety should always be your top priority. The right safety gear can protect you from potential hazards associated with driving screws and drilling holes. Here are essential safety gear recommendations:
- Gloves: Wear a pair of high-quality work gloves to protect your hands from blisters, cuts, and the vibration of the tool. Gloves should provide a good grip without sacrificing sensitivity and dexterity.
- Goggles: Eye protection is non-negotiable. Flying debris, dust, or even a broken bit can cause severe eye injury. Use safety goggles or glasses that wrap around the sides to provide comprehensive protection.
- Hearing Protection: Though not always mentioned, the noise from an impact driver can be harmful over time, especially in enclosed spaces. Earplugs or earmuffs can help safeguard your hearing during prolonged use.
Equipping yourself with these safety essentials can significantly reduce the risk of accidents and injuries, making your work environment safer and more comfortable.
Choosing the Right Bit
Selecting the appropriate bit for your project is crucial for achieving desired results and extending the life of your impact driver. Here are some tips to ensure you choose the right bit:
- Match the Bit to the Fastener: The most common mistake is using a bit that doesn’t fit the screw head properly. A good fit reduces the chance of stripping the screw and improves efficiency.
- Consider the Material: Different projects require different bits. For instance, woodworking projects might call for different bits than metalworking ones. Ensure the bit is designed for the material you’re working with.
- Quality Matters: Investing in high-quality bits can make a significant difference in performance and longevity. Look for bits made from durable materials like high-speed steel (HSS), carbide, or titanium.
- Keep a Variety: Having a set of bits in various sizes and shapes ensures you’re prepared for any task. Hex shank bits are preferred for impact drivers due to their quick-change capability and reduced slippage.
By taking the time to properly prepare yourself with the right safety gear and selecting the appropriate bit for your project, you’re setting the stage for a smoother, safer, and more efficient workflow. This preparation not only enhances your overall experience with the impact driver but also contributes to the quality of your work.
Watch This Video And Learn About Mastering The Basics: How To Hold An Impact Driver
Practicing With Your Impact Driver
Getting comfortable with your impact driver involves hands-on practice. Starting with simple projects can build your confidence and skill level, allowing you to gradually tackle more complex tasks. This section outlines a progression path from beginner-friendly projects to more advanced applications.
Simple Projects To Start
Beginning with straightforward tasks is an excellent way to familiarize yourself with the impact driver’s handling, controls, and capabilities. Here are a few projects that are perfect for novices:
- Assembling Flat-Pack Furniture: This task helps you get used to the impact driver’s torque and learn how to control the depth and speed of driving screws without damaging the material.
- Building a Birdhouse or Simple Shelf: Working on small woodworking projects can teach you how to handle the tool in different orientations and angles, improving your grip and control.
- Installing Wall Hooks or Hardware: Such tasks require precision and provide a good opportunity to practice using the impact driver in tight spaces, enhancing your ability to maneuver the tool.
These projects can help you master the basics of operating your impact driver, from adjusting the speed to changing bits, all while completing useful tasks around the home.
Graduating to More Complex Tasks
As you grow more confident in your skills, challenging yourself with more demanding projects can further enhance your proficiency. Here are ideas to take your impact driver skills to the next level:
- Deck Building or Repair: Working on a deck involves driving a large number of screws into harder materials, which can help you become adept at managing torque and learning how to apply consistent pressure over longer periods.
- Constructing a Workbench: This project requires precision and strength, allowing you to practice drilling into thick materials and using different types of fasteners, from screws to lag bolts.
- Home Renovation Tasks: Whether it’s installing cabinets, laying hardwood floors, or framing, renovation projects present a variety of challenges that will test and improve your ability to adapt your grip, stance, and technique to different scenarios.
By progressively moving from simple to more complex projects, you’ll not only expand your DIY capabilities but also deepen your understanding of how to leverage your impact driver’s full potential. Practice makes perfect, and each project completed is a step forward in your journey to becoming a proficient user of this versatile tool. Remember, the key is to start with the fundamentals, build your skills gradually, and always prioritize safety and precision in your work.

Maintenance and Care For Your Impact Driver
Proper maintenance and care are essential to keeping your impact driver in top working condition, ensuring its longevity and optimal performance. Regular upkeep not only extends the life of your tool but also maintains its efficiency and safety. Here are some routine maintenance tips and advice on when to seek professional help.
Keeping Your Tool in Top Shape
Following a consistent maintenance routine can prevent common issues and preserve your impact driver’s functionality. Here are key practices to adopt:
- Clean After Use: Dust, debris, and particulates can accumulate and affect your tool’s performance. Use a clean, dry cloth to wipe down the impact driver after each use. Compressed air can blow out dust from hard-to-reach places.
- Check and Tighten Loose Parts: Vibration from regular use can loosen parts over time. Periodically check screws, bolts, and moving parts to ensure they’re tight and secure.
- Lubricate Moving Parts: Some impact drivers may require occasional lubrication of certain components to keep them moving smoothly. Consult your tool’s manual for specific recommendations.
- Inspect and Replace Bits Regularly: Dull or damaged bits can strain your impact driver. Inspect them regularly and replace as needed to maintain efficiency and reduce wear on the tool.
- Battery Care: For cordless models, proper battery maintenance is crucial. Follow the manufacturer’s guidelines for charging and storing batteries to maximize their lifespan and performance.
When To Seek Professional Help
While regular maintenance can prevent many issues, there are times when professional servicing is necessary. Here are signs that your impact driver needs expert attention:
- Decreased Performance: If your tool is not performing as well as it used to despite proper maintenance, internal components may be worn or damaged.
- Unusual Noises: Grinding, squealing, or any other unusual noises during operation can indicate internal problems that require professional diagnosis.
- Excessive Heat: It’s normal for power tools to get warm during use, but if your impact driver becomes excessively hot, it could be a sign of electrical issues or overworked components.
- Battery Issues: If batteries are not holding a charge or the tool operates erratically, the problem might be with the battery or the tool’s electrical system.
Recognizing when to tackle maintenance yourself and when to call in professionals is key to ensuring your impact driver continues to serve you well on projects big and small. Regular care and being attentive to your tool’s performance can help you catch and address potential issues before they lead to significant problems or safety hazards.

Wrapping Up Mastering The Basics: How To Hold An Impact Driver
Mastering the use of an impact driver is an invaluable skill for any DIY enthusiast or professional contractor. Throughout this guide, I’ve covered the essentials of properly holding and operating your impact driver, from understanding its anatomy and the importance of ergonomics to preparing for use with the right safety gear and bit selection.
So, don’t miss out, follow us for the latest posts, and become part of a growing community dedicated to the art and science of working with tools. Together, let’s build, fix, and create something amazing.
Your next project awaits, and we can’t wait to see what you’ll accomplish. Happy building, and remember, the best tool in your arsenal is knowledge and a bit of practice!