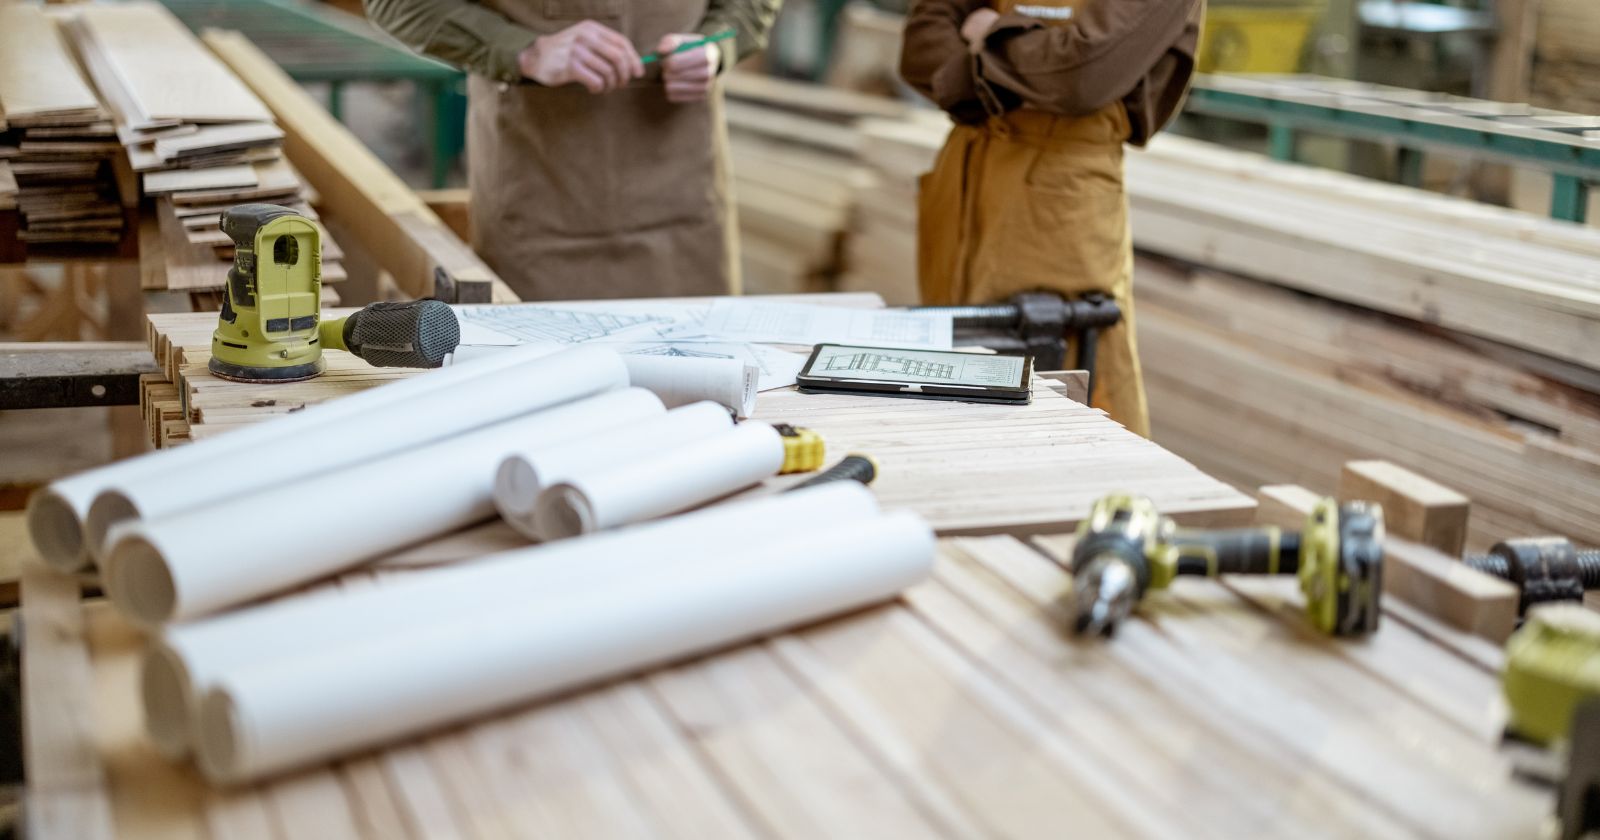
Tips For Driving Screws Into Hardwood With An Impact Driver
Embarking on a woodworking or construction project involves a myriad of skills, one of which is the seemingly simple task of driving screws. However, when it comes to working with hardwoods, this task can quickly become a test of both patience and technique. Driving screws into hardwood is a fundamental skill that every craftsman should master. Hardwoods, renowned for their strength and beauty, are a popular choice for everything from fine furniture to durable decking.
Yet, their dense nature poses unique challenges, particularly when it comes to fastening. Whether you’re assembling a bespoke piece of furniture, laying a hardwood floor, or tackling any project in between, understanding how to effectively drive screws into these tough materials is crucial. This guide aims to arm you with the knowledge and tips needed to navigate these challenges, ensuring your projects are not only structurally sound but also executed with the precision of a seasoned professional.


Understanding Hardwood
Characteristics of Hardwood
When I talk about hardwoods, we’re diving into the world of some of the most durable and sought after materials in woodworking and construction projects. The hallmark of hardwood is its density a direct result of the slow growth of deciduous trees from which it comes. This density isn’t just a measure of its weight or hardness; it’s a testament to the wood’s durability and longevity, making it an ideal choice for everything from elegant furniture to robust flooring.
Among the vast array of hardwoods, a few stand out for their common use in projects due to their unique properties and aesthetic appeal. Oak is celebrated for its strength and the beautiful grain patterns it offers, making it a top choice for pieces that demand both durability and visual interest. Maple, with its lighter color palette and fine grain, lends a subtle elegance to projects, along with exceptional hardness. Walnut is prized for its rich, dark tones and workability, ideal for statement pieces that draw the eye. Each type of hardwood brings its character to a project, allowing craftsmen to choose materials that best fit the vision and requirements of their work.
Challenges of Working with Hardwood
Despite the desirable qualities of hardwood, its very nature introduces specific challenges, particularly when it comes to fastening components with screws. The primary concern is the potential for splitting. The density that makes hardwood so valuable also makes it less forgiving when driving screws. Without the right preparation, the force exerted by the screw can cause the wood to crack, compromising both the aesthetic and structural integrity of the piece.
Moreover, the difficulty in driving screws stems from this density. Hardwood does not easily yield to the threads of a screw as softer woods might. Driving a screw without the proper technique and preparation such as drilling pilot holes can be frustrating and may result in damaged wood or even broken screws.
Understanding these challenges is the first step toward overcoming them. With the right knowledge and tools, working with hardwood can be a rewarding experience, offering results that are not only beautiful but built to last. In the following sections, I’ll dive into the essential tools and techniques needed to drive screws into hardwood successfully, ensuring your projects come together smoothly and stand the test of time.

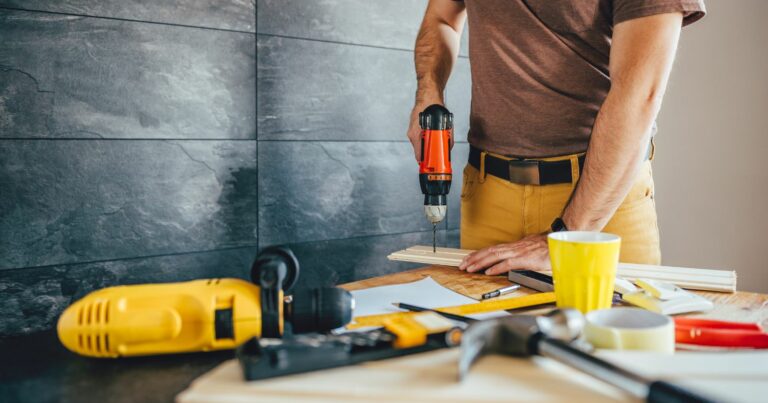
Essential Tools for Driving Screws Into Hardwood
Working with hardwood is an art that requires not just skill but also the right set of tools. When it comes to fastening, the choice of screws and drilling equipment can make a significant difference in the ease of the task and the quality of the final product. Let’s delve into the essentials for driving screws into hardwood, ensuring your projects are both beautiful and durable.
Choosing the Right Screw
Not all screws are created equal, especially when it comes to working with hardwood. The type of screw you choose can greatly influence the integrity and finish of your project.
- Auger Screws: These are designed specifically for drilling into hard materials. With their deep, wide threads, auger screws are able to bite securely into hardwood, providing a strong hold without requiring excessive force that could split the wood.
- Self-tapping Screws: These screws are a boon for hardwood projects as they feature a sharp point that essentially allows them to drill their own pilot holes. The design minimizes the risk of splitting the wood and can save a step during preparation.
The importance of screw length and gauge cannot be overstated. A screw that’s too short may not provide sufficient hold, while one that’s too long can protrude from the other side, marrying your project’s appearance. Similarly, the gauge, or thickness, of the screw should be chosen based on the strength required for the joint and the density of the hardwood. A thicker screw offers more strength but increases the risk of splitting the wood if not properly installed.
Watch This Video And Learn About Tips For Driving Screws Into Hardwood With An Impact Driver
Preparing to Drive Screws
Before diving into the actual process of driving screws into hardwood, proper preparation is key. This stage sets the groundwork for a successful and smooth installation, ensuring your project’s structural integrity and aesthetic appeal. Let’s break down the essential steps of marking, measuring, and drilling pilot holes.
Marking and Measuring
The accuracy of your screw placement can significantly impact the final outcome of your project. Careful planning, measurement, and marking are crucial for precise execution.
- Planning Screw Placement: Consider the load each joint will bear and the distribution of screws to optimize strength and stability. Ensure that screws are spaced evenly and positioned to provide maximum support without compromising the wood’s integrity.
- Tips for Precise Measurement and Marking: Use a sharp pencil or marking knife for accuracy. A combination square or measuring tape can ensure that your marks are both straight and evenly spaced. When marking, always double-check measurements before proceeding to the next step. For visibility, especially on darker woods, a marking knife can create a fine indent, providing a precise guide for drilling.
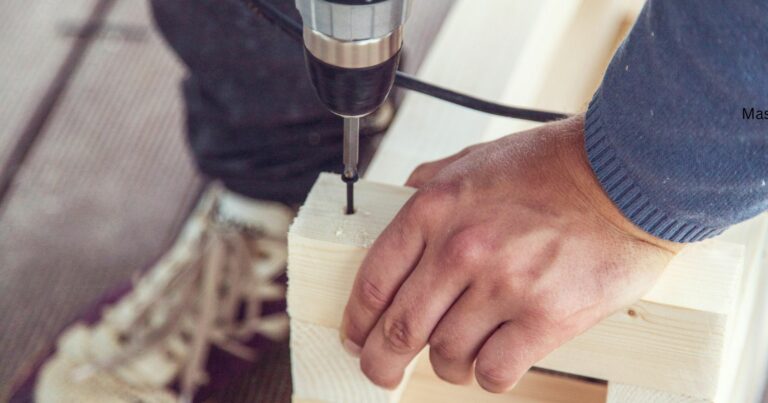
Drilling Pilot Holes
Drilling pilot holes is an essential step when working with hardwood. These preparatory holes help to guide the screw and reduce the risk of splitting the wood. Here’s how to drill pilot holes effectively:
- Select the Right Drill Bit: Choose a bit that matches the inner diameter of the screw’s body, excluding the threads. This ensures the screw fits snugly without applying undue pressure on the wood.
- Mark the Depth: Use a piece of tape on the drill bit to mark the depth of your pilot hole. This ensures you don’t drill too deep, maintaining the structural integrity of the wood.
- Drill with Steady Pressure: Position the drill perpendicular to the wood’s surface. Apply steady pressure as you drill, allowing the bit to do the work without forcing it. This prevents the wood from cracking or the bit from breaking.
- Clean the Hole: After drilling, remove any wood shavings or debris from the hole. A clean pilot hole ensures the screw can be driven smoothly.
How Pilot Hole Size Affects Screw Driving
The size of your pilot hole is crucial for successful screw driving in hardwood. A hole that’s too small may not alleviate enough pressure, leading to difficulties in driving the screw and increasing the risk of splitting the wood. Conversely, a hole that’s too large may not provide enough grip for the screw, compromising the joint’s strength. Finding the right balance ensures the screw can be inserted with minimal resistance while maintaining a strong hold in the wood.
Proper preparation, from marking and measuring to drilling pilot holes, lays the foundation for a smooth and successful screw driving experience in hardwood. This attention to detail not only makes the process easier but also enhances the durability and appearance of your final project. Next, I’ll dive into the techniques for driving screws into hardwood, ensuring your work is not only strong but also showcases the beauty of the material.
Step-by-Step Guide to Driving Screws Into Hardwood
Successfully driving screws into hardwood requires more than just the right tools and materials; it requires a meticulous approach and attention to detail. This step by step guide will walk you through the process from setting up your tools to the actual driving of the screw, ensuring a smooth, efficient, and mistake-free execution.
Setting Up Your Tools
Before you start driving screws into hardwood, ensuring your tools are correctly set up is crucial for a successful outcome.
- Adjusting Drill Torque and Speed: Most drills come with adjustable torque settings and speed controls. For hardwood, setting your drill to a lower speed but higher torque can provide the control and power needed to drive the screw without stripping the head or overheating the drill bit. Experiment with settings on a scrap piece of wood to find the optimal balance for your specific project.
- Choosing the Right Drill Bit for Pilot Holes: Selecting the correct drill bit size for your pilot holes is critical. The bit should be slightly smaller than the diameter of the screw’s core to ensure the threads can grip into the wood effectively. A bit that’s too large will make the screw loose, while one that’s too small may not prevent splitting. Refer to the screw manufacturer’s recommendations or use a drill bit sizing chart as a guide.
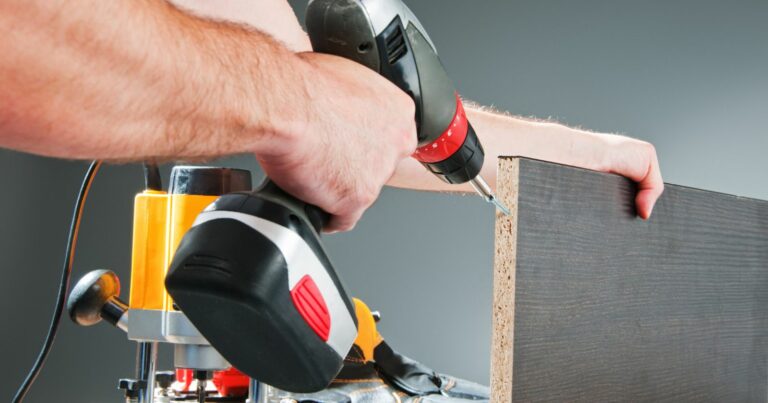
The Driving Process
With your tools set up and pilot holes drilled, you’re now ready to drive the screw into the hardwood. Following these steps will help ensure a smooth and efficient process:
- Align the Screw: Place the screw into the pilot hole, ensuring it’s perfectly perpendicular to the surface. Any angle can cause the screw to enter incorrectly, risking splitting or an insecure fit.
- Start Slow: Begin driving the screw at a slow speed to establish control and ensure the screw is threading correctly. This initial control can prevent slippage that might damage the screw head or the wood surface.
- Increase Speed Gradually: Once the screw has started to bite, you can gradually increase the speed, maintaining steady pressure to drive the screw home. Be attentive to the resistance from the wood; if it becomes too difficult to drive, reduce the speed to prevent breaking the screw.
- Finish with Precision: As the screw head approaches the surface, slow down again to ensure a clean finish. If you’re countersinking, be careful not to overdrive the screw, which could damage the wood or the screw head.
How to Avoid Common Mistakes
- Stripping the Screw Head: This often occurs when the drill’s torque setting is too high, or the driver bit does not fit the screw head properly. Ensure you’re using a bit that matches the screw head exactly and adjust the torque setting as needed.
- Splitting the Wood: To avoid splitting, always drill pilot holes and consider using a slightly larger bit for dense hardwoods. Also, avoid driving screws too close to the edge of the wood where it’s more prone to splitting.
By following these detailed steps and being mindful of common pitfalls, you can master the art of driving screws into hardwood. This process, while requiring a bit more effort and attention to detail than working with softer woods, will yield strong, durable, and beautiful results in your woodworking projects.
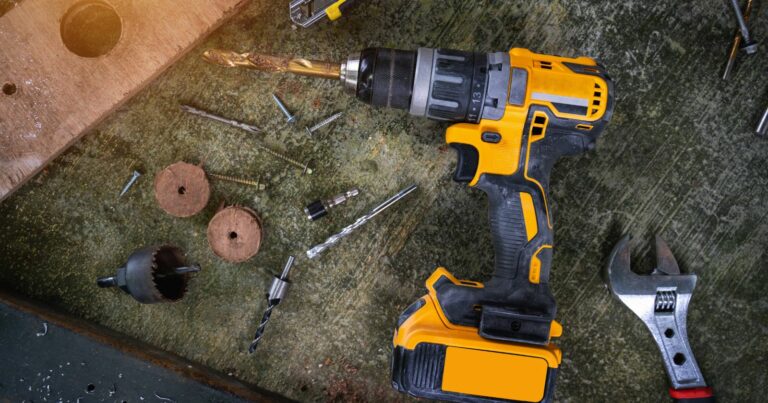
Choosing the correct drill and drill bits is just as crucial as selecting the right screws.
- Impact Drivers vs. Traditional Drills: For hardwood, an impact driver is often the better choice over a traditional drill. Impact drivers apply a combination of rotational force and concussive blows, driving screws more efficiently and with less effort. This means less strain on both the user and the hardwood, reducing the risk of damage.
- Selecting Drill Bits for Pilot Holes: Before driving screws into hardwood, it’s advisable to drill pilot holes. This step can significantly reduce the risk of splitting the wood. The drill bit size should match the inner diameter of the screw’s body, not including the threads. This ensures the screw can grip the wood without undue pressure. For hardwoods, consider using a slightly larger bit for the pilot hole to account for the wood’s density, allowing the screw to cut through more easily.
Equipped with the right screws and drilling tools, you’re well on your way to mastering the art of fastening in hardwood. The correct equipment not only makes the process smoother but also ensures that your projects are built to last, with a professional finish that showcases the beauty of the hardwood. In the next sections, we’ll explore the preparation and techniques that bring all these elements together for successful screw driving in hardwood.

Tips for Perfect Finishing
Achieving a flawless finish in your woodworking projects isn’t just about joining pieces together securely; it’s also about the attention to detail in how those connections are made and finished. When it comes to driving screws into hardwood, the final steps countersinking, counterboring, filling, and finishing can dramatically enhance the appearance and durability of your piece. Let’s dive into how you can achieve that perfect finish.
Countersinking and Counterboring
When and How to Use Countersinking for a Clean Finish
Countersinking is a technique used to allow the head of a screw to sit flush with, or slightly below, the surface of the wood. This is particularly useful in woodworking projects where a smooth, uninterrupted surface is desired. To countersink a screw, you’ll need to use a special drill bit that not only drills the pilot hole but also creates a conical opening at the top to accommodate the screw head. When driving the screw, adjust your pressure and speed as you near the surface to ensure the head sits perfectly within the countersunk hole.
The Difference Between Countersinking and Counterboring
While countersinking creates a conical hole for the screw head, counterboring is the process of drilling a wider, cylindrical hole that allows both the screw head and a portion of the screw shaft to sit below the wood surface. Counterboring is typically used for larger screws or when a wooden plug will be used to cover the screw head. The choice between countersinking and counterboring depends on the specific needs of your project, such as the type of finish desired and the structural requirements.
Filling and Finishing
Options for Filling Screw Heads
After countersinking or counterboring, you may choose to leave the screw heads visible for a rustic look or fill them for a more refined finish. Several options are available for filling screw heads:
- Wood Filler: Ideal for painting or when an exact wood match isn’t necessary. Wood filler is easy to use and sands smooth, making it a versatile option.
- Wooden Plugs: Best for a seamless look, wooden plugs can be glued into counterbored holes and then trimmed and sanded flush with the wood surface. Choose plugs made from the same wood species for the best match.
- Sawdust and Glue: Mixing fine sawdust from your project with wood glue creates a custom filler that closely matches the original wood. This method is perfect for small imperfections and offers a natural finish once sanded and stained.
Sanding and Finishing the Wood Surface
The final step in achieving a perfect finish is sanding and applying a finish to the wood surface. Start with a coarse grit sandpaper to smooth any rough areas and work your way up to a fine grit for a silky finish. Remove all dust with a tack cloth before applying your chosen finish, whether it be oil, varnish, or stain. Apply the finish according to the manufacturer’s instructions, allowing adequate drying time between coats. Sand lightly between coats if necessary, to achieve a smooth, durable finish that highlights the natural beauty of the wood.
By incorporating these finishing techniques into your woodworking projects, you can achieve a level of craftsmanship and aesthetic appeal that sets your work apart. Whether you’re aiming for a rustic charm or a sleek, modern look, the right finishing touches make all the difference.

Wrapping Up Tips For Driving Screws Into Hardwood With An Impact Driver
Mastering the art of driving screws into hardwood is a cornerstone skill for any serious woodworker or DIY enthusiast. As I’ve explored throughout this guide, the key to success lies not just in the action itself but in the meticulous preparation and understanding of the materials and tools at hand. Proper technique, from selecting the right screws and drill bits to preparing the wood and executing the drive, ensures not only the structural integrity of your projects but also their aesthetic appeal.
I invite you to share your own stories, tips, and questions in the comments below. Whether you’ve discovered a foolproof method for avoiding split wood or have a question about selecting the right lubrication for your screws, your insights are invaluable to fellow craftsmen and enthusiasts alike.