The 3 Best Drills Under $ 100
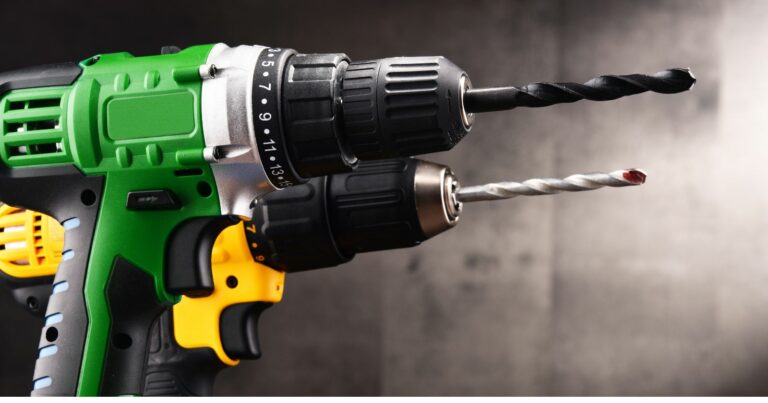
Welcome to a place, where you’ll find valuable insights on all things tool-related. In this article, I’ll personally guide you through the process of finding the best drills under $100. As a fellow DIY enthusiast, I understand the importance of having a reliable and affordable drill that can handle a variety of projects. So, let’s dive in together and find that perfect drill that won’t break the bank!
What is the Most Common Use Drill?

When it comes to common household tasks, having the right drill is crucial. It’s essential to consider factors such as power, torque, drill size, weight, battery life, and charging options. By understanding the average homeowner’s needs, we can find the ideal drill for everyday use. Whether you’re hanging shelves, assembling furniture, or handling minor repairs, a versatile and efficient drill will be your best friend.
| # | Image Preview | Product | Rating |
|---|---|---|---|
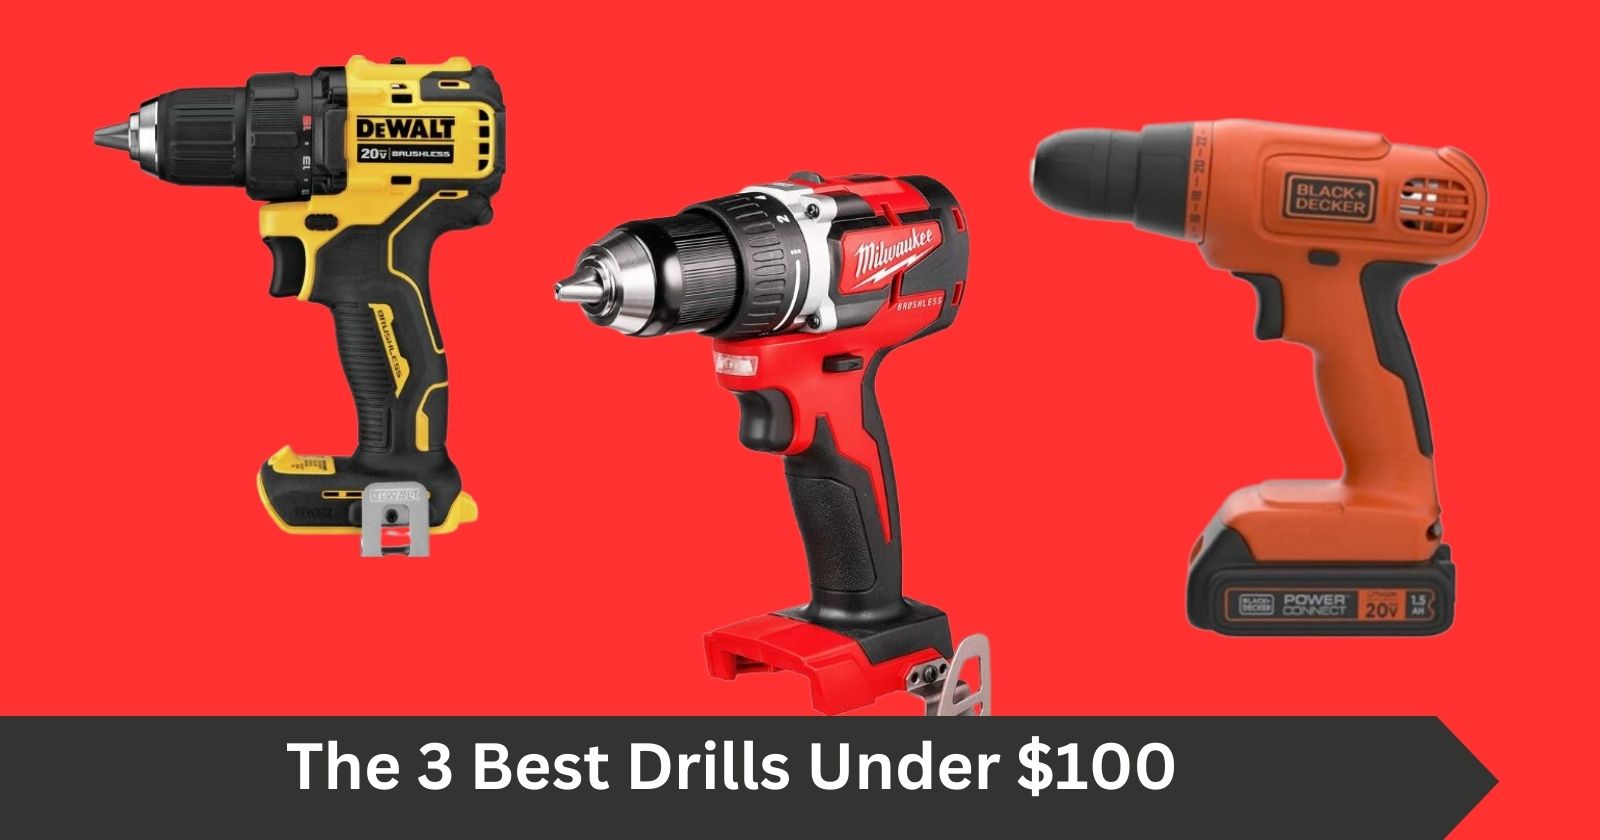
| 1 | 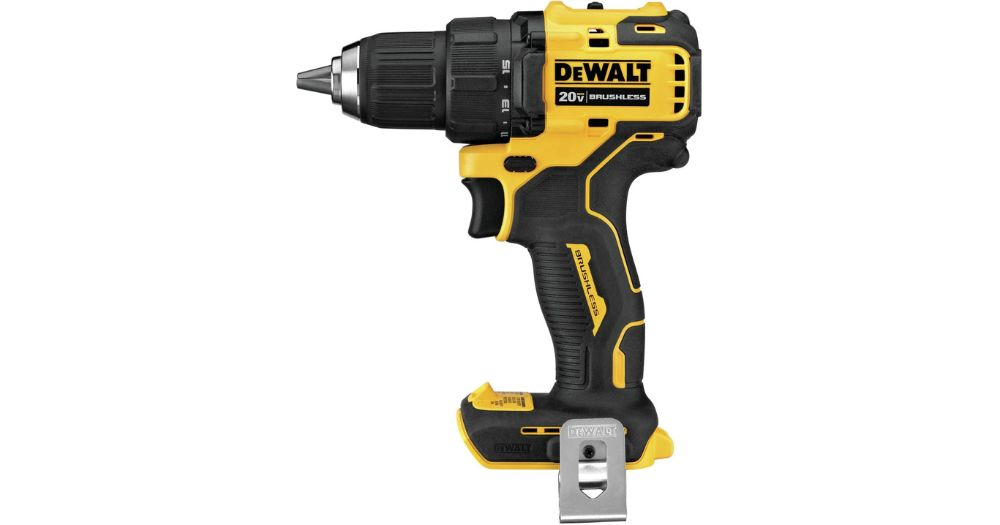 | DEWALT ATOMIC 20V MAX | 4.5/5 |
| 2 |  | Milwaukee M18 | 4/5 |
| 3 |  | BLACK+DECKER 20V MAX | 3/5 |
What Size Drill is Best for Home Use?
Choosing the right drill size is important to ensure optimum performance and convenience. Let’s explore the three main sizes and their applications:
Compact Drills:
These lightweight and maneuverable drills are perfect for tight spaces and light-duty tasks.
They are ideal for DIY projects and occasional use around the house.
Their compact size allows for easy handling and storage.
Mid-Sized Drills:
Offering a balance between power and maneuverability, mid-sized drills are versatile tools for a wide range of home improvement tasks.
They can handle drilling into various materials and provide enough torque for most projects.
With ergonomic designs and improved battery life, these drills ensure comfortable and efficient operation.
Full-Sized Drills:
When it comes to heavy-duty projects and professional use, full-sized drills are the way to go.
With maximum power and performance, they can tackle demanding tasks effortlessly.
These drills are ideal for construction projects, renovations, and other extensive applications.

What Type of Drill is Most Versatile?
Versatility is a key factor when selecting a drill. Let’s explore the different types of drills and their applications:
Cordless Drills:
Cordless drills offer the advantage of portability and freedom of movement.
With advancements in battery technology, they provide ample power for most household tasks.
Consider factors such as battery runtime and charging options when choosing a cordless drill.
Corded Drills:
Corded drills provide a constant power supply, ensuring uninterrupted operation for demanding tasks.
They are generally more powerful than their cordless counterparts and suitable for heavy-duty applications.
Keep in mind that corded drills limit mobility due to their reliance on a power source.
Hammer Drills:
Hammer drills are designed for drilling into masonry and concrete surfaces.
They combine drilling and hammering actions to penetrate tough materials effectively.
If you frequently work with stone, brick, or concrete, a hammer drill is a valuable addition to your toolkit.
Comprehensive Maintenance Tips for My Drill
Proper maintenance of my drill is crucial for ensuring its longevity, optimal performance, and safety. Whether I’m a DIY enthusiast or a professional contractor, taking care of my drill helps me get the most out of my investment. Here are some in-depth maintenance tips to keep my drill in top shape:
Regular Cleaning: After each use, I clean my drill to remove any dust, debris, or grease that may have accumulated. I use a soft cloth or brush to gently wipe down the exterior of the drill. For hard-to-reach areas, I use compressed air to blow away any debris. I avoid using harsh chemicals or abrasive materials that could damage the drill. I pay special attention to the vents, as accumulated dust can cause the drill to overheat.
Proper Storage: I store my drill in a cool, dry place away from direct sunlight and extreme temperatures. If my drill came with a carrying case, I use it to protect the drill from dust and moisture. If I don’t have a case, I wrap the drill in a clean cloth or place it in a plastic bag to keep it clean. Proper storage also includes organizing my drill bits and accessories in a way that prevents them from getting lost or damaged.
Battery Care: If my drill is cordless, proper battery care is crucial. I always follow the manufacturer’s instructions for charging and storing the battery. I avoid overcharging the battery, as this can reduce its lifespan. I store the battery in a cool, dry place away from heat sources. If I’m not going to use the drill for an extended period, I remove the battery and store it separately. Additionally, I avoid using the drill until the battery is completely drained, as this can shorten the battery’s life.
Check the Chuck: The chuck is the part of the drill that holds the drill bit in place. I regularly check the chuck for any signs of wear or damage. If the chuck is loose or wobbly, it may need to be tightened or replaced. I make sure the chuck is clean and free of debris before inserting a drill bit. Periodically, I also check the chuck’s jaws for alignment and ensure that they close evenly.
Lubricate Moving Parts: Some drills may require periodic lubrication of the moving parts, such as the chuck and gearbox. I consult the manufacturer’s manual for specific instructions on lubrication. I use the recommended lubricant and apply it sparingly to avoid attracting dirt and debris. Proper lubrication reduces friction, prevents wear, and ensures smooth operation.
Inspect the Cord: If my drill is corded, I regularly inspect the power cord for any signs of damage, such as fraying or exposed wires. If the cord is damaged, I do not use the drill until it has been repaired or replaced by a qualified technician. Additionally, I avoid wrapping the cord tightly around the drill, as this can cause the cord to kink or break over time.
Replace Worn Parts: Over time, some parts of the drill may become worn or damaged. I regularly inspect the drill for any signs of wear, such as a worn-out chuck or dull drill bits. I replace any worn parts as needed to ensure optimal performance and safety. I keep spare parts on hand, such as drill bits, brushes, and chucks, to quickly address any issues that arise.
Avoid Overloading: I avoid pushing the drill too hard or using it for tasks that exceed its capacity. Overloading the drill can cause it to overheat and damage the motor. I follow the manufacturer’s guidelines for the drill’s maximum capacity and recommended usage. If the drill starts to feel hot or if I notice a decrease in performance, I give it a break to cool down.
Consult the Manual: I always keep the manufacturer’s manual handy and refer to it for specific maintenance instructions, troubleshooting tips, and safety precautions. The manual provides me with valuable information tailored to my specific drill model.
By following these comprehensive maintenance tips, I can extend the life of my drill, ensure its optimal performance, and prevent costly repairs or replacements. Proper care and maintenance also enhance my drilling experience, making my projects more enjoyable and efficient.
Essential Safety Tips for Using My Drill
Using a drill can be an empowering experience for me, allowing me to create, repair, and build with ease. However, it’s crucial for me to prioritize safety when operating any power tool, including my drill. Here are some expanded safety tips I keep in mind when using my drill:
Wear Protective Gear: Before I start drilling, I make sure to wear the appropriate protective gear. Safety goggles are a must for me to shield my eyes from flying debris, dust, or splinters. I use ear protection, such as earplugs or earmuffs, to help reduce noise exposure, especially during prolonged drilling sessions. Gloves protect my hands from sharp edges, hot surfaces, or splinters. If I’m working in a dusty environment or drilling materials that produce fine particles, I consider wearing a dust mask or respirator to prevent inhalation of harmful substances.
Keep the Work Area Clean and Organized: A tidy work area reduces my risk of accidents and allows me to focus on the task at hand. I remove any unnecessary tools, materials, or clutter from my workspace. I ensure that my work surface is stable, level, and free of obstacles that could cause tripping or loss of balance. If I’m working with wood or other materials that produce dust or shavings, I sweep or vacuum the area regularly to prevent slipping or respiratory irritation.
Follow the Manufacturer’s Instructions: I take the time to read and understand the manufacturer’s instructions for my specific drill model. The manual provides me with essential information on proper usage, maintenance, and safety precautions. I adhere to any warnings, recommendations, or guidelines provided by the manufacturer to ensure safe and effective operation.
Inspect the Drill and Accessories Before Use: Before using the drill, I conduct a thorough inspection to identify any signs of damage, wear, or malfunction. I check the power cord for fraying, cuts, or exposed wires. I ensure that the chuck is securely attached and that the drill bits are in good condition. I address any issues or replace damaged parts before starting my project.
Use the Right Drill Bit for the Material: I select the appropriate drill bit for the material I’m working with, whether it’s wood, metal, masonry, or plastic. Using the wrong drill bit can lead to poor drilling results, damage to the material, or even injury. I ensure that the drill bit is sharp, clean, and free of rust or debris. Dull or damaged drill bits can cause excessive friction, leading to overheating or kickback.
Secure the Material Being Drilled: When drilling, I make sure the material I’m working on is securely clamped, held in a vice, or otherwise stabilized. This prevents the material from moving, spinning, or shifting during drilling, reducing the risk of accidents and ensuring a more precise and clean drilling result.
Maintain Proper Body Position and Posture: I stand with my feet shoulder-width apart and maintain a stable, balanced stance. I hold the drill with both hands, keeping my arms and wrists straight and aligned with the direction of drilling. I avoid overreaching, leaning too far forward, or placing myself in awkward positions, as this can compromise my balance and control over the drill.
Start Slowly and Gradually Increase Speed: When starting to drill, I begin at a slow speed to establish a stable drilling position and prevent the drill bit from slipping or walking across the material. I gradually increase the speed as I proceed, adjusting based on the material’s hardness and the size of the drill bit.
Be Mindful of My Surroundings: I stay aware of my surroundings when using my drill. I keep children, pets, and bystanders away from the work area. I’m cautious of potential hazards, such as electrical wires, pipes, or other obstacles that may be hidden behind walls, ceilings, or under surfaces. I use a stud finder or other detection tools to locate and avoid these hazards.
Disconnect the Drill When Not in Use or Changing Accessories: Whenever I’m finished with my drilling project, need to change the drill bit, or am taking a break, I always disconnect the drill from the power source. This simple precaution prevents accidental activation of the drill and reduces the risk of injury.
Stay Alert and Focused: When using my drill, I stay alert and focused on the task at hand. I avoid distractions, fatigue, or rushing, as these can lead to mistakes or accidents. I take breaks as needed to rest and maintain my concentration.
By following these expanded safety tips, I can enjoy a productive and safe drilling experience. Prioritizing safety, using the right tools and techniques, and following the manufacturer’s instructions help me achieve successful results while minimizing risks. Happy drilling!

DIY Project Ideas Using My Drill: Expanded Edition
My drill is a versatile and indispensable tool for any DIY enthusiast like me. With my drill in hand, the possibilities for creative and functional projects are virtually limitless. Whether I’m a seasoned DIYer or just starting, here are some expanded DIY project ideas that I can accomplish using my drill:
Build a Custom Bookshelf: I can create a personalized bookshelf to organize my favorite books, display cherished items, or add a decorative touch to my living space. I can choose materials like reclaimed wood, plywood, or even metal for a unique look. I use my drill to attach the shelves to the vertical supports and secure the entire unit to the wall for added stability. I customize the size, shape, and finish to match my decor and personal style. I can add decorative brackets, molding, or paint to enhance the design.
Hang Picture Frames and Artwork: I use my drill to hang picture frames, artwork, or mirrors on my walls with precision and ease. I measure and mark the desired location for the hanger, then drill a hole and insert a wall anchor for added support. I secure the hanger to the wall anchor, and I’m ready to hang my frame. This method ensures a sturdy and reliable hold, especially for heavier items. I can create a gallery wall by arranging multiple frames in a cohesive design.
Build a Cozy Birdhouse: I can create a welcoming home for my feathered friends by building a birdhouse. I use wood, screws, and my drill to assemble the birdhouse. I drill a hole for the entrance and add some smaller holes for ventilation. I paint or decorate the birdhouse with weather-resistant materials to protect it from the elements. I hang it in my garden or backyard and enjoy watching the birds come and go.
Make a Multi-Tiered Plant Stand: I can showcase my favorite plants with a custom plant stand. I use wooden planks, dowels, or metal pipes to create a multi-tiered stand that can accommodate various plant sizes. I use my drill to attach the shelves and legs, and finish with a coat of paint or stain for added protection. I place my plant stand indoors or outdoors to add a touch of greenery to my space. I can incorporate wheels for easy mobility or add decorative elements for a unique touch.
Create a Versatile Pegboard Organizer: I can organize my tools, craft supplies, or kitchen utensils with a pegboard organizer. I use my drill to attach the pegboard to the wall and insert pegs or hooks into the holes. I arrange my items on the pegboard for easy access and a clutter-free space. I customize the pegboard with paint, stencils, or decorative elements to match my decor. I can add shelves, bins, or baskets for additional storage options.
Build a Raised Garden Bed: I can grow my favorite vegetables, herbs, or flowers in a raised garden bed. I use wooden boards, screws, and my drill to assemble the bed. I fill it with nutrient-rich soil, and I’m ready to start planting. A raised bed offers better soil drainage, easier access, and fewer weeds. I customize the size, shape, and height to suit my gardening needs. I can add a trellis for climbing plants or incorporate a watering system for convenience.
Make a Stylish Wooden Bench: I can add seating to my garden, patio, or entryway with a wooden bench. I use wooden planks, screws, and my drill to build the bench. I customize the size, shape, and finish to suit my needs. I can add cushions or pillows for added comfort. I can incorporate storage options, such as a hinged seat or built-in shelves, to maximize functionality. I can enhance the design with decorative elements, such as carved details or unique leg designs.
Assemble a Modern Wine Rack: I can store and display my wine collection with a custom wine rack. I use wooden boards, dowels, or metal pipes to create the rack. I use my drill to attach the pieces and create slots for the wine bottles. I finish with a coat of paint or stain to match my decor. I can incorporate additional features, such as glass holders, a serving tray, or LED lighting, for added functionality and style.
Craft a Functional Coat Rack: I can keep my coats, hats, and bags organized with a coat rack. I use wooden planks, dowels, or metal pipes to create the rack. I use my drill to attach the pieces and add hooks for hanging. I place the coat rack in my entryway or mudroom for easy access. I can customize the design with decorative hooks, a built-in shelf, or a mirror for added functionality.
Design a Unique Custom Headboard: I can upgrade my bedroom with a custom headboard. I use wooden boards, fabric, or any other material of my choice. I use my drill to attach the headboard to the bed frame or wall. I customize the size, shape, and finish to create a unique and stylish focal point in my bedroom. I can add features such as built-in lighting, storage compartments, or upholstered panels for added comfort and functionality.
These expanded DIY project ideas showcase the versatility and potential of my drill in transforming ordinary materials into functional and decorative pieces. I let my creativity run wild and explore new ways to use my drill for innovative and personalized projects. Happy DIYing!
Watch This Video And Learn About The 3 Best Drills Under $100
Factors to Consider When Choosing a Drill Under $100
When shopping for a drill under $100, there are several important factors to consider:
Quality and Durability:
- Look for drills with sturdy construction and durable materials.
- Check customer reviews and ratings to ensure reliability and longevity.
Performance and Power Output:
- Evaluate the drill’s power output in terms of voltage or wattage.
- Consider the torque settings and speed options for versatile performance.
Included Accessories and Additional Features:
- Some drills come with extra accessories, such as drill bits or carrying cases.
- Look for additional features like LED lights, adjustable handles, or built-in levels for added convenience.
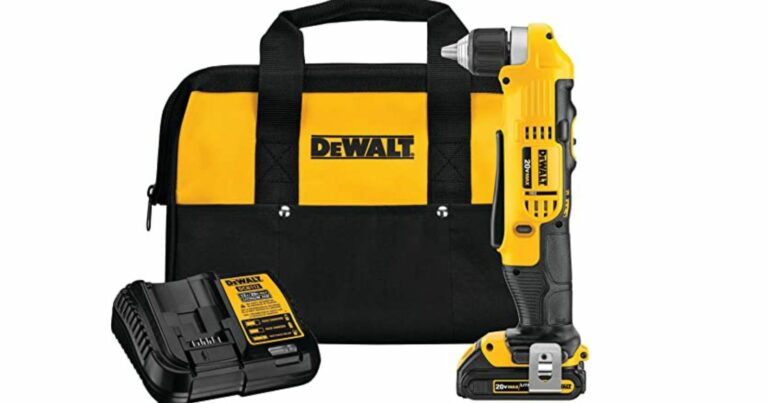
1.DEWALT ATOMIC 20V MAX* Cordless Drill
I’m excited to introduce the DEWALT DCD708B 20V MAX* Brushless Compact 1/2 in. Drill/Driver, a powerful and versatile tool ideal for both professional and DIY projects. This battery-powered drill offers a maximum rotational speed of 1750 RPM and a 13-millimeter chuck, suitable for various drilling and driving tasks.
It features a variable speed setting and a compact design, measuring 8″L x 7″W x 2.5″H and weighing only 2.4 pounds, making it easy to handle and maneuver. The drill, in a striking black and yellow color, comes with a belt clip for easy carrying. It’s powered by a lithium-ion battery (not included) and has a maximum power output of 300 watts. The drill includes a 3-year limited warranty, 1-year free service contract, and 90-day money-back guarantee.
Pros:
- Powerful Performance: With a maximum rotational speed of 1750 RPM and a maximum power output of 300 watts, I find this drill capable of handling a wide range of drilling and driving tasks with ease.
- Variable Speed: The variable speed setting allows me to adjust the speed to suit the specific task at hand, giving me greater control and precision.
- Compact and Lightweight: The compact design and lightweight construction make this drill easy for me to handle and maneuver, even in tight spaces.
- Durable Construction: Made from durable materials, I find this drill built to withstand the rigors of regular use.
- Convenient Belt Clip: The included belt clip allows me to easily carry the drill with me, keeping it within reach at all times.
Cons:
- Battery Not Included: The drill is powered by a lithium-ion battery, which is not included in the package. I had to purchase the battery separately.
- Material: The material used in the construction of the drill is not specified, which raised questions for me about its durability and longevity.
- Limited Speed Settings: The drill offers only two-speed settings, which may not be sufficient for me when I require more speed options for different tasks.
2. Milwaukee M18
I’m thrilled to introduce the Milwaukee 2801-20, a powerful and compact drill/driver ideal for professionals and DIY enthusiasts like myself. This battery-powered drill boasts a maximum rotational speed of 1800 RPM and a maximum chuck size of 6.35 millimeters, making it versatile for various drilling and driving tasks.
I love its compact, cordless design, measuring only 4.21″L x 7.32″W x 9.69″H and weighing a mere 2.5 pounds, which allows me to easily handle and maneuver it, even in tight spaces. The drill’s striking red color and availability as a bare tool let me use my existing Milwaukee batteries. It offers an impressive maximum torque of 500 inch-pounds and a maximum power output of 800 watts. The drill, powered by a lithium-ion battery (not included), has a speed of 1800 RPM. The voluntary 30-day return guarantee from Amazon adds to my confidence in this purchase.
Pros :
- Powerful Performance: With a maximum rotational speed of 1800 RPM, a maximum torque of 500 inch-pounds, and a maximum power output of 800 watts, I find this drill capable of handling a wide range of drilling and driving tasks with ease.
- Compact and Lightweight: The compact design and lightweight construction make this drill easy for me to handle and maneuver, even in tight spaces.
- Cordless Design: The cordless design allows for greater freedom of movement and eliminates the need for extension cords, making it more convenient for me to use.
- High Customer Ratings: With a 4.7 out of 5-star rating from over 1,300 customers, this drill has been well-received by users like me and is a trusted choice for both professionals and DIY enthusiasts.
- Return Guarantee: The drill comes with a voluntary 30-day return guarantee from Amazon, giving me peace of mind with my purchase
Cons:
- Battery Not Included: The drill is powered by a lithium-ion battery, which is not included in the package. I had to purchase the battery separately or use my existing Milwaukee batteries.
- Bare Tool Only: The package includes only the drill, with no additional accessories such as drill bits or a carrying case.
- Smaller Chuck Size: The maximum chuck size of 6.35 millimeters may be limiting for me when I require a larger chuck size for certain tasks.
3. BLACK+DECKER 20V MAX Drill

I’m thrilled to share my thoughts on the BLACK+DECKER BDCD120VA, a versatile drill/driver ideal for professionals and DIY enthusiasts like me. This battery-powered drill, with a max rotational speed of 650 RPM and a 10mm chuck, is great for various tasks. I love the variable speed setting and its compact design (13.31″L x 4.06″W x 8.59″H, 4.77 pounds), which makes it easy to handle. It comes in a striking orange color with a 34pc Project Kit, storage bag, battery, and charger. With a max power of 1800 watts and a 24-hour battery life, it’s a reliable tool. Plus, it comes with a 2-year limited warranty.
Pros:
- Powerful Performance: With a maximum rotational speed of 650 RPM and a maximum power output of 1800 watts, I can handle a wide range of drilling and driving tasks with ease.
- Variable Speed: The variable speed setting allows me to adjust the speed to suit the specific task at hand, giving me greater control and precision.
- Compact and Lightweight: The compact design and lightweight construction make this drill easy for me to handle and maneuver.
- Comprehensive Project Kit: The drill comes with a 34pc Project Kit, including a variety of tools and accessories, making it a great value for money.
- Battery Included: The drill comes with a lithium-ion battery and charger, so I can start using it right away.
- Long Battery Life: The lithium-ion battery has an average battery life of 24 hours, allowing me to work for extended periods without needing to recharge.
Cons:
- Single Speed Setting: The drill offers only one-speed setting, which may not be sufficient for some users who require more speed options for different tasks.
- Heavier Weight: The drill weighs 4.77 pounds, which may be heavier than some other models on the market.
FAQs Best Drills Under $100:
Can I find a high-quality drill under $100?
Absolutely! There are several reputable brands that offer reliable drills within this price range. By considering factors like construction quality, performance, and included features, you can find a drill that meets your needs without exceeding your budget.
What is the lifespan of a drill?
For those who use a drill regularly, expect the get about five to ten years out of the drill. You will probably need to buy a few new batteries, but the drill should still be functioning well with proper care.
How do I choose the right drill if I’m a beginner?
As a beginner, it’s essential to prioritize ease of use, versatility, and safety features. Choosing a drill with adjustable speed settings, ergonomic design, and clear instructions. Consider starting with a compact or mid-sized drill that offers a balance of power and maneuverability.
Suggested Reading: Best Glass Drill Bits
Wrapping Things Up About The 3 Best Drills Under $100
Finding the best drill under $100 doesn’t mean compromising on quality or performance. By understanding your specific needs and considering factors like drill size, type, and overall value, you can make an informed decision. Remember to prioritize durability, power output, and additional features that suit your projects. With the right drill by your side, you’ll be ready to tackle any task that comes your way. Happy drilling!
More Drill Resources:
Before You Go Off And Drill Somethings With Your New Found Information Have A Look At Other Drill Guides Below