How To Use An Impact Driver To Remove Screws – In 5 Easy Steps
As a tool enthusiast, I know that removing screws can be a frustrating task, especially if you’re using the wrong tool. Luckily, an impact driver can make this job much easier. In this post, I will guide you through the steps for How to use an impact driver to remove screws-In 5 Easy Steps.
Can an Impact Driver Remove Screws?
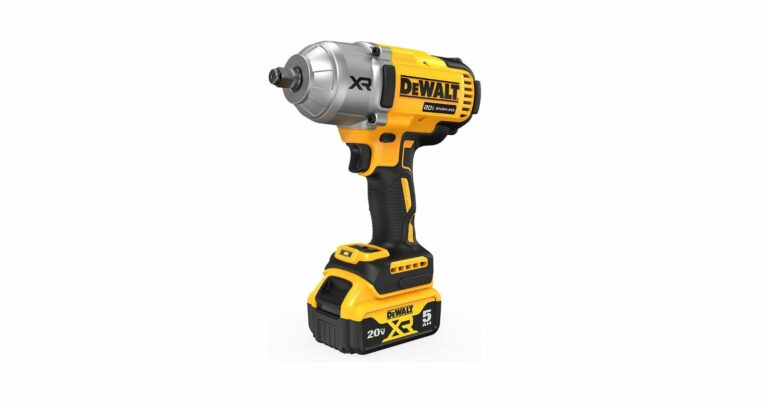
As an experienced contractor, I can confidently say that an impact driver is not only capable of removing screws, but it’s also one of the most efficient tools for the job. The unique design of an impact driver combines rotational force with concussive blows, a combination that can loosen even the most stubborn screws.
A Word of Caution
While an impact driver is a powerful tool, it’s important to use it correctly to avoid damaging the screw or the material it’s embedded in. Always start with a low speed and increase as necessary, and never force the tool. Remember, the impact driver is designed to deliver the power you need, so let it do its job.
Now let me walk you through on how to use an impact driver for removing screws.
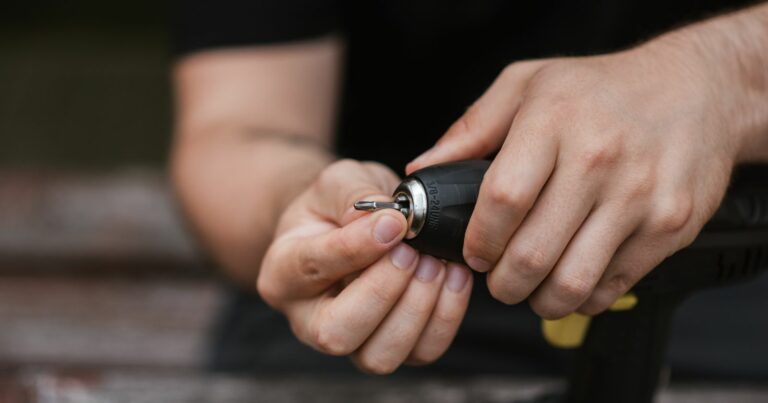
Step 1: Choose the Right Impact Driver Bit
Before you can use an impact driver to remove screws, you need to choose the right bit. There are many types of impact driver bits available, including Phillips, Torx, and hex bits. Each type of bit is designed for a specific type of screw. For removing screws, the best bit to use is a Phillips bit. Make sure to choose the right size bit for the screw you’re removing. If you’re not sure what size to use, try a few different sizes until you find the one that fits snugly in the screw head.
For a helpful resource, click here.

Step 2: Prepare the Screw and Impact Driver
Once you have the right bit, it’s time to prepare the screw and impact driver. First, make sure the screw is clean and free of debris. Next, set your impact driver to the correct torque setting for the screw you’re removing.To use an impact driver, insert the bit into the chuck and tighten it securely. Then, hold the impact driver with one hand and place the bit into the screw head with the other hand.
Step 3: Use the Impact Driver to Remove the Screw
Now that you’re ready to remove the screw, it’s important to use the correct technique. With the impact driver turned on, press the bit firmly into the screw head and apply steady pressure. The impact driver will start to turn the screw, and the sudden bursts of torque will help loosen it. Continue to apply pressure until the screw is fully removed. It’s important to note that you shouldn’t apply too much pressure or force the screw out. This can damage the screw or strip the threads.
Step 4: Troubleshooting Tips for Difficult Screws
Sometimes, screws can be difficult to remove, even with an impact driver. If you encounter a stubborn screw, try these troubleshooting tips:
- Apply a penetrating oil to the screw to help loosen it
- Tap the end of the screwdriver with a hammer to help break up any rust or corrosion
- Use pliers or a wrench to help turn the screw if it’s stuck
- If the screw head is stripped, use a screw extractor tool to remove it
Watch This Video To Learn How To Use An Impact Driver To Remove Screws
Further Reading: When Not To Use An Impact Driver
Step 5: Safety Precautions
When using any power tool, it’s important to take safety precautions. When using an impact driver to remove screws, make sure to wear safety glasses and gloves to protect yourself from flying debris.After you’re done using the impact driver, make sure to store it and its accessories in a safe and secure location.
Tips for Efficient Screw Removal with My Impact Driver
An impact driver is a versatile and powerful tool that can make screw removal a breeze. Whether I’m a seasoned DIY enthusiast or a professional tradesperson, knowing how to use my impact driver efficiently can save me time and effort on various projects. In this section, we’ll explore some expert tips to optimize the efficiency of using my impact driver for screw removal.
Choose the Right Impact Driver Bits
Selecting the right impact driver bit is crucial for effective screw removal. Different screw types and materials require specific bits for optimal performance. I should invest in high-quality bits made from durable materials like hardened steel, as they are less likely to wear out or strip screws. Magnetic bits are also beneficial, as they help to hold screws securely during insertion and removal.
Apply Adequate Pressure
When using my impact driver to remove screws, I should apply consistent and firm pressure to maintain a good grip on the fastener. Too much pressure can cause the bit to slip and damage the screw head, while too little pressure might lead to inefficient removal. Finding the right balance is essential for smooth and effective screw extraction.
Use Impact Driver in Reverse Mode
My impact driver has a reverse mode, which is incredibly useful for unscrewing fasteners. When engaging the reverse mode, the impact driver applies a series of rapid, short bursts of force in the opposite direction. This feature is especially handy when dealing with stuck or rusted screws that are challenging to remove manually.
Handle Different Screw Types with Care
Various screw types require different techniques for efficient removal. For Phillips or slotted screws, I should ensure the driver bit fits snugly into the screw head to prevent slipping. For Torx or hex screws, I need to use the appropriate bits and apply even pressure during extraction. If I’m unsure about the screw type, I’ll take the time to identify it correctly before proceeding.
Use Extension Bars for Tight Spaces
In confined or hard-to-reach areas, an extension bar can be a lifesaver. It allows me to access screws in narrow gaps and tight corners where the impact driver might not fit directly. I’ll choose extension bars of different lengths to accommodate various space constraints and maintain a steady grip during screw removal.
Optimize Battery Life
My impact driver is often cordless, relying on rechargeable batteries for power. To maximize battery life during screw removal, I’ll make sure my battery is fully charged before starting my project. If I’m working on an extensive task, I’ll consider having a spare battery on hand to avoid interruptions. Additionally, I’ll store batteries in a cool, dry place when not in use to prolong their lifespan.
Lubricate Stuck Screws
For stubborn or rusted screws, a little lubrication can go a long way in facilitating smooth removal. I’ll apply a penetrating oil or a rust-dissolving agent to the screw and allow it to sit for a few minutes before attempting to remove it with the impact driver. The lubricant will help reduce friction and make the extraction process easier.
By incorporating these expert tips into my screw removal process, I can harness the full potential of my impact driver and tackle projects with confidence. I’ll always prioritize safety, wear appropriate protective gear, and follow manufacturer guidelines for my specific impact driver model. Happy DIYing!
Alternate Methods for Stubborn Screws: Overcoming the Toughest Fasteners
Encountering stubborn or damaged screws can be a frustrating roadblock in my projects. These relentless fasteners seem determined to thwart my efforts, leaving me wondering if there’s a way to salvage the situation. Fear not, for in this section, we’ll explore some effective alternate methods for removing these difficult screws, ensuring I don’t have to abandon my project midway. Let’s dive in and discover how to conquer the challenge of stubborn screws:
1. Using a Screw Extractor:
When I come across a firmly stuck screw or one with a stripped head, I turn to a screw extractor for help. This specially designed tool assists in removing stubborn screws by drilling into the screw’s center and then turning it counterclockwise. Here’s how to use a screw extractor effectively:
- I select the right-sized drill bit: Choosing a drill bit slightly smaller than the screw’s shaft, I carefully drill a hole into the center of the screw.
- I insert the screw extractor: I carefully insert the screw extractor into the drilled hole, ensuring it fits snugly.
- I turn counterclockwise: Using a wrench or pliers, I turn the screw extractor counterclockwise. The extractor’s reverse threading should grip onto the screw, allowing me to remove it effortlessly.
2. Applying Penetrating Oil:
For stubborn screws that seem corroded or rusted in place, I rely on a penetrating oil to work its magic. Penetrating oils, like WD-40 or Liquid Wrench, have powerful properties that break down rust and lubricate the screw, making it easier to remove. Here’s how to apply penetrating oil effectively:
- I spray the oil generously: Directly spraying the penetrating oil onto the stuck screw, ensuring it reaches the threads and the surrounding area.
- I allow time for penetration: Giving the oil some time to work its magic, I let it sit for at least 15 to 30 minutes, or as per the manufacturer’s instructions.
- I apply pressure while turning: Using my impact driver or a screwdriver, I apply steady downward pressure while turning the screw counterclockwise. The lubrication from the oil should aid in breaking the rust’s grip, facilitating smooth extraction.
3. Using Pliers or Vice Grips:
In situations where the screw’s head is damaged or stripped, I resort to using pliers or vice grips to provide the extra grip needed for removal. Here’s how to use pliers or vice grips effectively:
- I position the tool: Securing the pliers or vice grips firmly on the screw head, ensuring a firm grip.
- I turn counterclockwise: With a strong grip, I turn the pliers or vice grips counterclockwise to remove the screw. The added grip should help turn the screw despite its damaged head.
4. Tapping with a Hammer:
For screws that are stuck due to being overtightened or embedded too deeply, I rely on tapping the screw with a hammer to help loosen it. Here’s how to use this method effectively:
- I position the screwdriver: Placing the screwdriver securely into the screw head.
- I tap the screwdriver: Using a hammer, I gently tap the back of the screwdriver in a counterclockwise direction. The tapping should help release the screw’s grip, making it easier to turn and remove.
5. Applying Heat:
In situations where the screw is stuck due to adhesives or paint, I find that applying heat can be beneficial. Here’s how to use heat effectively:
- I use a heat source: Utilizing a heat gun or a small torch, I apply heat to the stuck screw for a few seconds. I am cautious not to overheat the surrounding material.
- I turn counterclockwise: With the screw warmed up, I attempt to turn it counterclockwise using an impact driver or a screwdriver. The heat should help loosen any adhesives or paint, allowing for easier removal.
I always proceed with caution when using alternate methods, as some techniques can cause damage to the surrounding material or make the situation worse if not done properly. If all else fails, I know that seeking professional help from a skilled handyman or technician is always a viable option.
By employing these alternate methods for stubborn screws, I can overcome the most challenging fasteners and keep my projects on track. I remind myself to be patient and take my time to ensure the best possible outcome. Happy screw removal!
FAQs : How To Use An Impact Driver To Remove Screws -In 5 Easy Steps
Impact driver drills are versatile tools that can be used for many applications. Here are some common questions about using impact drivers to remove screws:
1. How do I choose the right impact driver for removing screws?
When selecting an impact driver for removing screws, consider the following factors:
- Power: Choose an impact driver with enough torque to handle the type of screws you will be removing.
- Speed: Look for an impact driver with adjustable speed settings, so you can control the speed of the driver based on the type of screw you are removing.
- Comfort: Make sure the impact driver is comfortable to hold and use, especially if you will be using it for extended periods.
2. Can I use an impact driver to remove stripped screws?
Yes, an impact driver can be an effective tool for removing stripped screws. The increased torque and hammering action of the impact driver can help break the screw loose from its threads. Use a screwdriver bit that fits snugly into the screw head and apply firm pressure to avoid damaging the surrounding material.
3. Are there any safety precautions I should take when using an impact driver to remove screws?
Yes, it’s important to follow proper safety precautions when using an impact driver to remove screws. Some things to keep in mind include:
- Always wear eye protection to prevent debris from getting in your eyes.
- Use a secure grip on the impact driver to prevent it from slipping or twisting in your hand.
- Avoid wearing loose clothing or jewelry that could get caught in the driver.
- Keep your hands and fingers away from the driver bit while it is in use.
I hope these FAQs were helpful! Let me know if you have any further questions.
For more information on impact drivers and other tools, click here.

Unlocking the Full Potential of Your Impact Driver for Screw Removal
Using an impact driver to remove screws can undoubtedly make our lives much easier, especially when tackling various DIY projects or professional tasks. The speed, power, and efficiency of this versatile tool can significantly streamline the screw removal process. However, it’s essential to use the correct techniques and observe safety precautions to ensure successful and hassle-free results. Throughout this post, we’ve explored expert tips and alternate methods to optimize the efficiency of our impact driver and conquer even the most stubborn screws. Now, let’s summarize the key takeaways and reinforce the importance of following the steps outlined in this guide.
The Power of Correct Technique: Proper technique is paramount when using an impact driver for screw removal. Selecting the right impact driver bits, applying adequate pressure, and understanding how to handle different screw types are fundamental principles to master. By doing so, we can minimize the risk of stripped screw heads and ensure smooth and efficient extraction.
Safety First: Safety should always be our top priority when using any power tool, including the impact driver. Wearing appropriate protective gear, such as safety goggles and gloves, is vital to shield ourselves from potential hazards. Additionally, carefully reading the manufacturer’s instructions and adhering to safety guidelines will keep us safe and prevent accidents.
Exploring Alternate Methods: In some instances, stubborn or damaged screws may pose a challenge even to the mighty impact driver. During such times, it’s valuable to know about alternative techniques like using a screw extractor, applying penetrating oil, using pliers or vice grips, tapping with a hammer, or applying heat. These methods can be the difference between success and frustration in our projects.
Patience and Persistence: Removing stubborn screws might require a bit of patience and persistence. Instead of giving in to frustration, we can approach the task calmly, allowing time for penetrating oil to work or trying various methods until we achieve the desired result. Staying composed and determined will pay off in the end.
Versatility in Projects: Our impact driver’s capabilities extend far beyond just screw removal. From furniture assembly and deck construction to automotive repairs and metalworking projects, this tool can be an invaluable asset in a wide range of tasks. Its versatility empowers us to take on various endeavors with confidence and efficiency.
Seeking Professional Help: While the impact driver is a potent tool, there may be instances where a stubborn screw proves insurmountable despite our best efforts. In such cases, it’s wise to seek professional assistance from a skilled handyman or technician. Their expertise and specialized tools can often save the day and keep our projects on track.
In conclusion, using an impact driver for screw removal offers unparalleled convenience and productivity. By following the expert tips and techniques presented in this post and considering the alternate methods when necessary, we can harness the full potential of our impact driver and confidently take on any screw removal challenge. Remember always to prioritize safety, exercise patience, and embrace the versatility of your impact driver as you embark on your next DIY adventure or professional project. With this newfound knowledge, you’re well-equipped to tackle any fastener that stands in your way. Happy DIYing and screw removal success!
More Troubleshooting Resources:
Since You’re Here Check Out Some More DIY Based Post I Wrote.