How To Sharpen A Wood Lathe: A Beginner’s Guide in 9 Steps
Hey there, fellow tool enthusiasts and woodturning wizards! If, like me, you’ve spent any time at all in the world of woodturning, you’ll know that the secret to those perfect, smooth cuts isn’t just in the skill of your hands, but also in the sharpness of your tools. There’s nothing quite like the feeling of a razor-sharp wood lathe tool gliding through a piece of wood, creating precise shapes and patterns as if it were as easy as slicing through butter. It’s a feeling that’s hard to beat, and it’s a testament to the power of a well-maintained tool.
But here’s the thing – maintaining that level of sharpness in our wood lathe tools isn’t always as straightforward as we’d like it to be. Tools dull with use, it’s an inevitable part of the process. And if we’re not on top of our maintenance game, we might find ourselves struggling with rough cuts, splintered wood, and a frustrating woodworking experience.
That’s where this guide on How To Sharpen A Wood Lathe comes in. Today, I’m going to delve deep into the world of wood lathe tools, focusing specifically on how to keep them sharp and efficient. We’ll be exploring everything from the signs that your tools need sharpening, to the tools you’ll need for the job, and of course, a step-by-step guide on how to actually sharpen your wood lathe tools.
Whether you’re a seasoned woodworker with years of experience under your belt, or a beginner just starting out on your woodturning journey, this guide on How To Sharpen A Wood Lathe is designed to equip you with the knowledge and techniques you need to keep your tools in top shape. After all, sharp tools don’t just ensure precision and beautiful results – they also contribute to safety and longevity in our woodworking projects.
So, let’s roll up our sleeves, put on our safety glasses, and dive into the fascinating world of How To Sharpen A Wood Lathe. Trust me, your tools (and your future woodworking projects) will thank you for it!
In this guide, I’ll cover the types of wood lathe tools and why keeping them sharp is essential. I’ll also discuss the signs that your tools need sharpening and the tools you’ll need for the job. Then, I’ll walk you through a step-by-step guide on How To Sharpen A Wood Lathe, followed by some safety tips and maintenance advice. By the end of this guide, you’ll have all the knowledge you need to keep your wood lathe tools sharp and efficient, ensuring precision, safety, and longevity in all your woodworking projects. So, without further ado, let’s get started!

Suggested Reading: How To Drill A Hole In Glazed Ceramic Pots
Understanding Wood Lathe Tools
As a seasoned woodworker and tool enthusiast, I can tell you that having the right tool for the job makes all the difference. It’s like having the right ingredients for a recipe – you can’t make a delicious cake without the right mix of flour, sugar, and eggs. Similarly, you can’t create a beautiful, smooth, and precise woodturning piece without the right set of wood lathe tools.
Wood lathe tools come in various shapes and sizes, each designed for specific tasks. Understanding these tools, their uses, and how they work is the first step in maintaining them properly. It’s like getting to know the members of a sports team – each player has a specific role, and understanding these roles is key to making the team work together efficiently. So, let’s take a closer look at these tools:
Gouges
Gouges are like the Swiss Army knives of woodturning tools. They come in various shapes and sizes, each designed for a specific task. These are primarily used for shaping and hollowing out areas on your wood piece.
There are different types of gouges, such as spindle gouges and bowl gouges. Spindle gouges are typically used for detailed work on smaller pieces, like creating intricate designs or patterns. On the other hand, bowl gouges, with their deeper flutes, are used for shaping larger, deeper areas, like hollowing out a bowl. The ‘U’ or ‘V’ shaped cutting edge of a gouge is perfect for making deep, round cuts in the wood, allowing you to create a variety of shapes and designs.
Skew Chisels
Next up, we have the skew chisels. These are used for smoothing and creating fine details. The skewed edge, hence the name, allows for precise, clean cuts. It’s a versatile tool that can be used for a variety of tasks, from creating beads and coves to smoothing out rough surfaces. Mastering the skew chisel can be a bit tricky, but once you get the hang of it, it’s a game-changer. It’s like learning to ride a bike – it might be a bit challenging at first, but once you get it, you’ll be zooming around in no time.
Parting Tools
Parting tools are the woodturner’s equivalent of a surgeon’s scalpel. They are used for cutting off the workpiece from the lathe or for creating patterns and details. The thin, pointed edge allows for precise cuts, making it perfect for defining boundaries and separating parts of the workpiece. It’s like having a precise, sharp knife when you’re cooking – it allows you to make clean, precise cuts, enhancing the presentation and quality of the dish.
Scrapers
Last but not least, we have the scrapers. These are used for refining surfaces and adding finishing touches. After all the shaping and cutting, a scraper is used to smooth out any rough patches and bring out the beauty of the wood. It’s like the polish that brings out the shine in a freshly cleaned car. It might not seem like much, but it makes a big difference in the final result.
Each of these tools plays a crucial role in the woodturning process, and understanding how they work is the first step in maintaining them. In the next section, we’ll delve into why keeping these tools sharp is so essential. So, stay tuned, and let’s continue this journey into the fascinating world of wood lathe tools together!
Why Sharpening Wood Lathe Tools is Essential
As a seasoned woodworker and a tool enthusiast, I can’t stress enough the importance of keeping your tools sharp. It’s like keeping your car well-maintained – it not only ensures a smooth ride but also prolongs the life of your vehicle. Similarly, sharp tools are not just about precision; they’re also about safety, efficiency, and longevity. Let’s delve deeper into why sharpening your wood lathe tools is so essential.
Precision in Your Craft
First and foremost, sharp tools are all about precision. They allow you to make clean, precise cuts, which is essential in woodworking. Imagine trying to slice a tomato with a dull knife – it’s frustrating, and the results are far from perfect. The same goes for woodworking. A dull tool will result in rough, uneven cuts, which can ruin the aesthetics of your piece. On the other hand, a sharp tool glides through the wood like a hot knife through butter, allowing you to create smooth, precise shapes and patterns with ease. It’s like having a well-tuned instrument – it allows you to hit the right notes every time, resulting in a beautiful symphony of shapes and patterns.
Safety First
Safety is another crucial aspect. A dull tool requires more force to cut, increasing the risk of accidents. It’s like trying to cut a piece of steak with a butter knife – you have to apply a lot of force, and there’s a high chance that the knife will slip, leading to potential injuries. With a sharp tool, you can make cuts with minimal force, reducing the risk of slips and accidents. It’s like driving with good brakes – it gives you better control and reduces the risk of accidents.
Enhancing Your Woodworking Experience
Sharp tools also enhance your overall woodworking experience. They make the process smoother and more enjoyable. There’s a certain satisfaction in seeing a sharp tool effortlessly shape a piece of wood, and it makes the entire woodworking process a lot more enjoyable. It’s like using a high-quality paintbrush – it makes the painting process smoother, allowing you to focus on your creativity rather than struggling with the tool. A sharp tool allows you to focus on the art of woodworking, transforming the process from a chore into a delightful experience.
Prolonging the Life of Your Lathe
Sharp tools also prolong the life of your lathe. A dull tool requires more force to cut, which can put unnecessary stress on your lathe. Over time, this can lead to wear and tear, reducing the lifespan of your lathe. On the other hand, a sharp tool cuts easily, reducing the stress on your lathe and prolonging its life. It’s like maintaining a good diet and exercise routine – it keeps your body healthy and prolongs your lifespan.
Cleaner Cuts
Finally, sharp tools make cleaner cuts, reducing tear-out and leaving a better surface on your workpiece. Tear-out is when chunks of wood get ripped out during the cutting process, leaving a rough, unsightly surface. This is more likely to happen with dull tools. Sharp tools, on the other hand, cut cleanly through the wood, reducing the chances of tear-out and leaving a smooth, clean surface. It’s like using a sharp pair of scissors to cut a piece of paper – it leaves a clean, smooth edge, enhancing the overall appearance of your work.
Keeping your wood lathe tools sharp is essential for precision, safety, and a satisfying woodworking experience. It’s an integral part of tool maintenance that should not be overlooked. So, let’s keep those tools sharp, and continue creating beautiful woodturning pieces with precision, safety, and joy!

Signs Your Wood Lathe Tools Need Sharpening
Just like a car that starts making strange noises or a plant that begins to wilt, your wood lathe tools will also show signs when they need a little TLC. If your tools are not performing as they used to, or if you’re exerting more effort than usual, it’s likely time for sharpening. But how do you know when your tools are crying out for a sharpening session? Here are some telltale signs:
Visible Nicks and Dents
The first sign to look out for is visible nicks and dents on the cutting edge of your tools. These imperfections can significantly affect the performance of your tools, making them less effective and more difficult to use. It’s like driving a car with a flat tire – you can still drive, but it’s going to be a bumpy ride. If you notice any nicks or dents on your tools, it’s a clear sign that they need some sharpening love.
Burn Marks
Another sign that your tools need sharpening is the presence of burn marks on your wood pieces. When a tool is sharp, it cuts through wood smoothly and efficiently, with minimal friction. However, a dull tool will create more friction as it struggles to cut through the wood, which can lead to burn marks. It’s like trying to cut a thick piece of steak with a dull knife – the increased friction can cause the steak to burn. If you’re noticing burn marks on your wood pieces, it’s time to sharpen your tools.
Rough Cuts
Are your cuts not as smooth as they used to be? Are you noticing more splintering or tearing in your wood pieces? These are signs that your tool might be dull. A sharp tool makes clean, smooth cuts, while a dull tool can cause rough, uneven cuts. It’s like cutting a piece of bread with a dull knife – instead of slicing through the bread, the knife tears it, leaving a rough edge. If your cuts are not as smooth and clean as they used to be, your tool might need sharpening.
Excessive Noise
If your tool is making more noise than usual, it might be struggling to cut due to dullness. A sharp tool cuts through wood with minimal effort and noise, while a dull tool can cause a lot of noise as it struggles to cut through the wood. It’s like a car with a bad engine – it makes a lot of noise and struggles to run smoothly. If you’re noticing an increase in noise when using your tools, it might be a sign that they need sharpening.
Increased Effort
Finally, if you’re finding that you need to apply more force to make cuts, this is another sign that your tool might be dull. A sharp tool cuts easily and effortlessly, while a dull tool requires more force. It’s like trying to open a can with a dull can opener – you need to apply a lot of force, and it’s a struggle. If you’re having to exert more effort than usual when using your tools, it’s time to give them a good sharpening.
If you notice any of these signs, it’s likely time to sharpen your tools. Regular maintenance and timely sharpening will keep your tools in top shape, ensuring precision, safety, and a satisfying woodworking experience. So, keep an eye on your tools, and don’t ignore these signs! Remember, a well-maintained tool is a joy to use, and it will help you create beautiful woodturning pieces with ease and precision.
Tools Needed for Sharpening Wood Lathe Tools
As a seasoned woodworker and a tool enthusiast, I can tell you that having the right tools for the job makes all the difference. When it comes to sharpening your wood lathe tools, there are a few key tools that you’ll need in your arsenal. Let’s take a closer look:
Sharpening Stones
Sharpening stones, also known as whetstones, are a must-have for any woodworker. They are the bread and butter of sharpening tools. They come in various types, each with its own set of pros and cons. The choice often comes down to personal preference, the specific needs of your tools, and your budget. Here’s a more detailed rundown of the different types of sharpening stones:
Water Stones
Water stones are a popular choice among many woodworkers, including myself. They’re easy to use and provide a very sharp edge, which is perfect for those detailed woodworking projects. However, they do have a couple of drawbacks. They wear down quickly, which means they need to be flattened regularly to maintain their effectiveness. Also, they require soaking in water before use, which can be a bit of a hassle. But the results they provide are often worth the extra effort.
Oil Stones
Oil stones are another option. These are durable and long-lasting, making them a good investment. They sharpen more slowly than water stones, but they also wear down more slowly, which means they don’t need to be flattened as often. However, they do require oil for lubrication, which can be a bit messy and adds an extra step to the sharpening process. But if you don’t mind the extra maintenance, oil stones can be a reliable choice.
Diamond Stones
Diamond stones are the most durable of the bunch. They stay flat forever, which eliminates the need for flattening. They also cut faster than both water stones and oil stones, making them a time-efficient option. However, they are also the most expensive. If you’re a professional woodworker or someone who uses their wood lathe tools frequently, investing in a diamond stone might be worth it. They provide excellent results and are built to last, making them a worthwhile investment.
Honing Guides
Honing guides are a handy tool that helps you maintain the correct angle while sharpening your tools. They’re especially useful for beginners who are still getting the hang of sharpening. It’s like having a personal trainer – they guide you and ensure you’re doing the exercise correctly. There are various types of honing guides available, from simple, affordable models to more advanced, adjustable ones. Choose one that fits your tools and your sharpening needs.
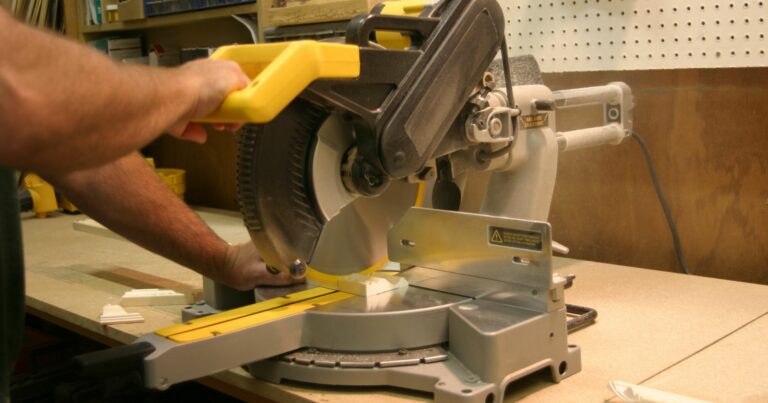
Grinder
A bench grinder or slow-speed grinder is another essential tool for sharpening your wood lathe tools. It’s like the heavy machinery of the sharpening world. Bench grinders are more common and affordable, but slow-speed grinders generate less heat, reducing the risk of overheating and damaging your tools.
When choosing a grinder, look for one with adjustable tool rests and a variable speed setting. This will give you more control over the sharpening process and help you achieve better results. Remember, the goal is to remove just enough material to restore the sharp edge, without removing more material than necessary.
Leather Strop
After sharpening your tools, it’s a good idea to give them a final polish with a leather strop. This helps to remove any remaining burrs and aligns the microscopic teeth on the edge of the tool, resulting in a sharper and smoother edge. Some woodworkers also use a honing compound on their strop to achieve an even sharper edge.
Having the right tools can make the sharpening process easier and more effective. So, invest in a good set of sharpening tools, and keep your wood lathe tools in top shape! Remember, a well-maintained tool is a joy to use, and it will help you create beautiful woodturning pieces with ease and precision.
Watch This Video And Learn How To Sharpen A Wood Lathe
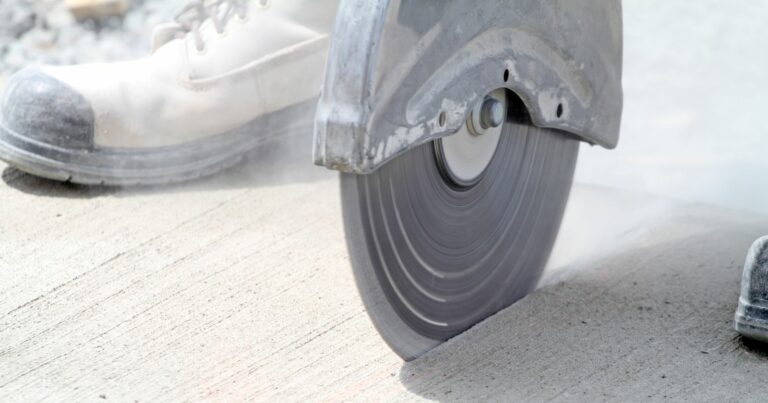
Suggested Reading: The 3 Best Drill Bits For Ceramic Pots
Step-by-Step Guide on How to Sharpen Wood Lathe Tools
Sharpening your wood lathe tools is an essential skill that every woodturner must master. It’s like tuning a musical instrument; it brings out the best performance. Here’s an expanded step-by-step guide on how to sharpen your wood lathe tools:
1. Preparing Your Tools
Before you even touch the sharpening stone, you need to prepare your tools. This is a crucial step that sets the stage for the entire sharpening process.
2. Cleaning
Use a wire brush to remove any rust, dirt, or debris from the tool. This ensures that you’re working with a clean surface, which makes the sharpening process more effective.
3. Inspecting
Inspect the tool for any major nicks or dents. If there are significant imperfections, you might need to reshape the tool on a grinder before sharpening. Think of it as fixing a dent in a car before painting it; you want a smooth surface to work with.
4. Sharpening Process
The sharpening process is where the magic happens. It’s where you bring your tools back to life. Here’s how to do it for each type of tool:
5. Sharpening a Gouge
- Positioning: Hold the gouge against the grinder with the flute facing up.
- Rotating: Rotate the gouge back and forth against the grinder, ensuring the entire edge contacts the stone.
- Checking: Regularly check the edge to ensure an even sharpening.
6. Sharpening a Skew Chisel
- Positioning: Hold the chisel flat against the grinder with the long edge touching the stone.
- Rolling: Roll the chisel side to side, keeping the edge on the stone at all times.
- Checking: Regularly check the edge to ensure an even sharpening.
7. Sharpening a Parting Tool
- Positioning: Hold the tool perpendicular to the grinder.
- Moving: Move it back and forth across the stone, ensuring an even sharpening.
- Checking: Regularly check the edge to ensure an even sharpening.
8. Sharpening a Scraper
- Positioning: Hold the scraper flat against the grinder.
- Moving: Move it back and forth across the stone, ensuring an even sharpening.
- Checking: Regularly check the edge to ensure an even sharpening.
9. Honing for a Fine Edge
Honing is like putting the finishing touches on a masterpiece painting. It refines the edge, making it sharper and more durable.
- Setting the Angle: Use a honing guide to set the correct angle for your tool.
- Moving the Tool: Move the tool back and forth across the sharpening stone until the edge is polished and shiny.
- Final Inspection: Check the edge to ensure it’s sharp and free of any imperfections.
Sharpening your wood lathe tools is a rewarding process that enhances your woodworking experience. It’s not just about restoring a sharp edge; it’s about understanding your tools and learning how to care for them. With practice, patience, and the right techniques, you can keep your tools in top shape, ensuring precision, safety, and beautiful results in all your woodworking projects. So grab your tools, roll up your sleeves, and let’s make some shavings!

Safety Tips When Sharpening Wood Lathe Tools
As a seasoned woodworker and tool enthusiast, I can’t stress enough the importance of safety when working with tools. Sharpening your wood lathe tools is a task that requires focus, patience, and a commitment to safety. Here are some expanded safety tips to keep in mind when sharpening your wood lathe tools:
Handle Your Tools with Care
Just like you wouldn’t run with scissors, always handle your tools with care, especially when they’re sharp. A moment of carelessness can lead to accidents. When sharpening your tools, hold them securely but not too tightly – you want to have control over the tool without straining your hand. Remember, a well-maintained tool is a joy to use, but only if handled correctly and safely.
Wear Protective Gear
When it comes to woodworking, protective gear is not just an option; it’s a must. This includes safety glasses to protect your eyes from sparks and debris, and gloves to protect your hands from sharp edges. You might also consider wearing a dust mask if you’re sensitive to dust and metal filings. Think of it as your personal armor when going into battle with dull tools.
Keep Your Workspace Clean and Well-Lit
A clean workspace is a safe workspace. Ensure your workspace is free of clutter and that you have enough light to see what you’re doing. This will help you avoid accidents and achieve better results. Also, a well-lit workspace can make the sharpening process more enjoyable. It’s like having a well-lit stage for your performance.
Don’t Rush the Process
Sharpening is a process that can’t be rushed. It’s like baking a cake; you can’t rush the baking time. Take your time, and focus on maintaining the correct angle and applying even pressure. Rushing can lead to mistakes and injuries, so remember – slow and steady wins the race!
Maintain Your Sharpening Tools
Your sharpening tools are your allies in the battle against dullness. Keep your sharpening stones clean and flat, and regularly inspect your grinder for any signs of wear or damage. A well-maintained sharpening tool is more effective and safer to use.
Take Breaks
Sharpening can be a physically demanding task, especially if you have a lot of tools to sharpen. Don’t forget to take breaks to rest and stretch your hands. This will help prevent hand fatigue and ensure you maintain good control over your tools. Remember, even the most seasoned woodworkers need to take a break!
Safety should always be your top priority when sharpening your wood lathe tools. By following these safety tips, you can ensure a safe and effective sharpening process. So, put on your safety glasses, roll up your sleeves, and let’s get sharpening!
Maintaining Your Wood Lathe Tools Post-Sharpening
Sharpening your wood lathe tools is just the first step in ensuring their longevity and performance. The real key to keeping your tools in top shape lies in how you maintain them after sharpening. Here’s a more detailed guide on how to take care of your wood lathe tools post-sharpening:
Proper Storage
The way you store your tools can significantly impact their lifespan. Proper storage is crucial to maintaining the sharpness and overall health of your tools. Here are some tips for storing your tools:
- Dry and Clean: Store your tools in a dry, clean place to prevent rust and damage. Moisture is the enemy of metal tools, so make sure your storage area is free of dampness.
- Individual Compartments: Consider investing in a tool rack or a tool chest with individual compartments for each tool. This not only keeps your tools organized but also prevents them from knocking against each other and causing damage.
- Cover the Edges: Protect the sharp edges of your tools by covering them with a protective sheath or a piece of cloth. This helps to maintain the sharpness and prevents accidental cuts.
Regular Inspection
Regular inspection is like a routine health check-up for your tools. It helps you catch any potential issues early and address them before they become bigger problems. Here’s what to look for during an inspection:
- Sharpness: Check the sharpness of your tools by testing them on a piece of scrap wood. If they’re not cutting as smoothly as they should, it’s time for a touch-up.
- Rust: Look for any signs of rust, especially if you live in a humid climate. If you spot rust, remove it immediately with a wire brush or a piece of steel wool.
- Damage: Inspect your tools for any signs of damage, such as cracks, chips, or major dents. If you find any, it’s best to get the tool repaired or replaced.
Timely Sharpening
Don’t wait for your tools to become completely dull before you sharpen them. Regular, timely sharpening ensures your tools are always ready for action and can perform at their best. It’s like keeping your car fueled up – you don’t want to wait until the tank is empty before you fill it up.
Cleaning After Use
Cleaning your tools after each use is a simple yet effective way to prolong their lifespan. Here’s how to do it:
- Remove Debris: Use a brush to remove any wood chips or debris from your tools.
- Wipe Down: Wipe your tools with a dry cloth to remove any moisture. This helps to prevent rust and keeps your tools in good working condition.
- Oil: Apply a thin layer of oil to your tools to protect them from rust. This is especially important if you live in a humid climate.
Maintaining your wood lathe tools post-sharpening is an ongoing process that requires attention and care. But the effort is well worth it. By taking good care of your tools, you can ensure they stay in top shape, ready for your next woodworking project. After all, as any seasoned woodworker will tell you, your tools are your best friends in the workshop. So, take care of your tools, and they’ll take care of you!

FAQs: How To Sharpen A Wood Lathe
As I wrap up my guide on how to sharpen wood lathe tools, I understand that you might still have a few questions. After all, it’s a comprehensive topic with many nuances. That’s why I’ve put together this FAQ section, where I address some of the most common questions that woodturners have about sharpening their tools. I hope this section will provide you with additional insights and help you become more confident in maintaining your tools.
How often should I sharpen my wood lathe tools?
The frequency of sharpening your wood lathe tools depends on how often you use them and the type of wood you’re working with. Hardwood tends to dull tools faster than softwood. As a rule of thumb, it’s best to sharpen your tools when they start to lose their edge and don’t cut as efficiently as they should. Regular, timely sharpening ensures your tools are always ready for action and can perform at their best.
Can I use a regular bench grinder to sharpen my wood lathe tools?
Yes, you can use a regular bench grinder to sharpen your wood lathe tools. However, keep in mind that bench grinders typically run at a high speed, which can generate a lot of heat and potentially overheat your tools, leading to loss of temper in the steel. If you choose to use a bench grinder, go slow and take frequent breaks to prevent overheating. Alternatively, consider using a slow-speed grinder or a wet stone grinder, which are less likely to overheat your tools.
What’s the best angle to sharpen my wood lathe tools?
The best angle to sharpen your wood lathe tools depends on the type of tool and its intended use. For example, a spindle gouge is typically sharpened at a 45-degree angle, while a bowl gouge might be sharpened at a 55 to 65-degree angle. It’s important to understand the purpose of each tool and sharpen it accordingly. When in doubt, refer to the manufacturer’s guidelines or consult with a seasoned woodturner.
Conclusion
As I bring this comprehensive guide to a close, I want to emphasize that learning how to sharpen wood lathe tools is more than just acquiring a new skill – it’s about embracing an art form. It’s a process that requires patience, precision, and a deep understanding of your tools. But once you’ve mastered it, you’ll find that it’s a game-changer for your woodworking projects.
With sharp tools in your arsenal, you’ll enjoy a safer, more efficient, and more satisfying woodturning experience. You’ll be able to create smoother cuts, more intricate details, and more beautiful pieces. Plus, you’ll prolong the life of your tools, saving you money in the long run and reducing waste – a win-win situation for both you and the environment.
But remember, sharpening your tools is just one part of the equation. To keep your tools in top shape, you also need to store them properly, inspect them regularly, and clean them after each use. It’s a commitment, but it’s one that pays off in the long run.
Proper tool maintenance is like taking care of a prized sports car. You wouldn’t let it rust or run on dull tires, would you? The same goes for your wood lathe tools. They are your prized possessions in the workshop, and they deserve your utmost care and attention.
So, keep those tools sharp, follow the safety tips, and take good care of your tools. Your future self (and your future woodworking projects) will thank you for it.
In the end, it’s all about creating a harmonious relationship between you, your tools, and the beautiful pieces you create. It’s about transforming a simple piece of wood into a work of art. And with sharp, well-maintained tools, there’s no limit to what you can create.
So, here’s to you, fellow woodturners! Let’s roll up our sleeves, sharpen those tools, and create some shavings. Let’s continue to create beautiful pieces, one turn at a time. Happy turning!
More Wood Lathe Resources:
Here Are Some Additional Guides And Content About Wood Lathe