Miter Saw Tricks For DIY
When I first ventured into the world of DIY projects, I quickly realized the indispensable role of the miter saw. It’s not just another tool in the shed; it’s a game-changer. From crafting picture frames to building furniture, the miter saw became my trusted companion. Its precision and adaptability made every cut a breeze. With the right Miter Saw Tricks For DIY, you can elevate your projects to a whole new level.
But here’s the thing: while a miter saw is incredibly versatile on its own, there are certain tricks that can truly unlock its full potential. Over the years, I’ve discovered that with the right techniques, this tool can be transformed from a simple cutting device to a multifaceted powerhouse. Whether you’re a seasoned DIY enthusiast or just starting out, understanding these tricks can elevate your projects to a whole new level.
So, if you’re as passionate about DIY as I am, stick around. I’m about to share some of my favorite miter saw tricks that have taken my woodworking projects from good to great!

Suggested Reading: Trouble Shooting Common Nail Gun Problems
Understanding the Basics of a Miter Saw
Before diving into the advanced tricks and techniques, let’s take a step back and revisit the basics. After all, a strong foundation is key to mastering any skill, and working with a miter saw is no different.
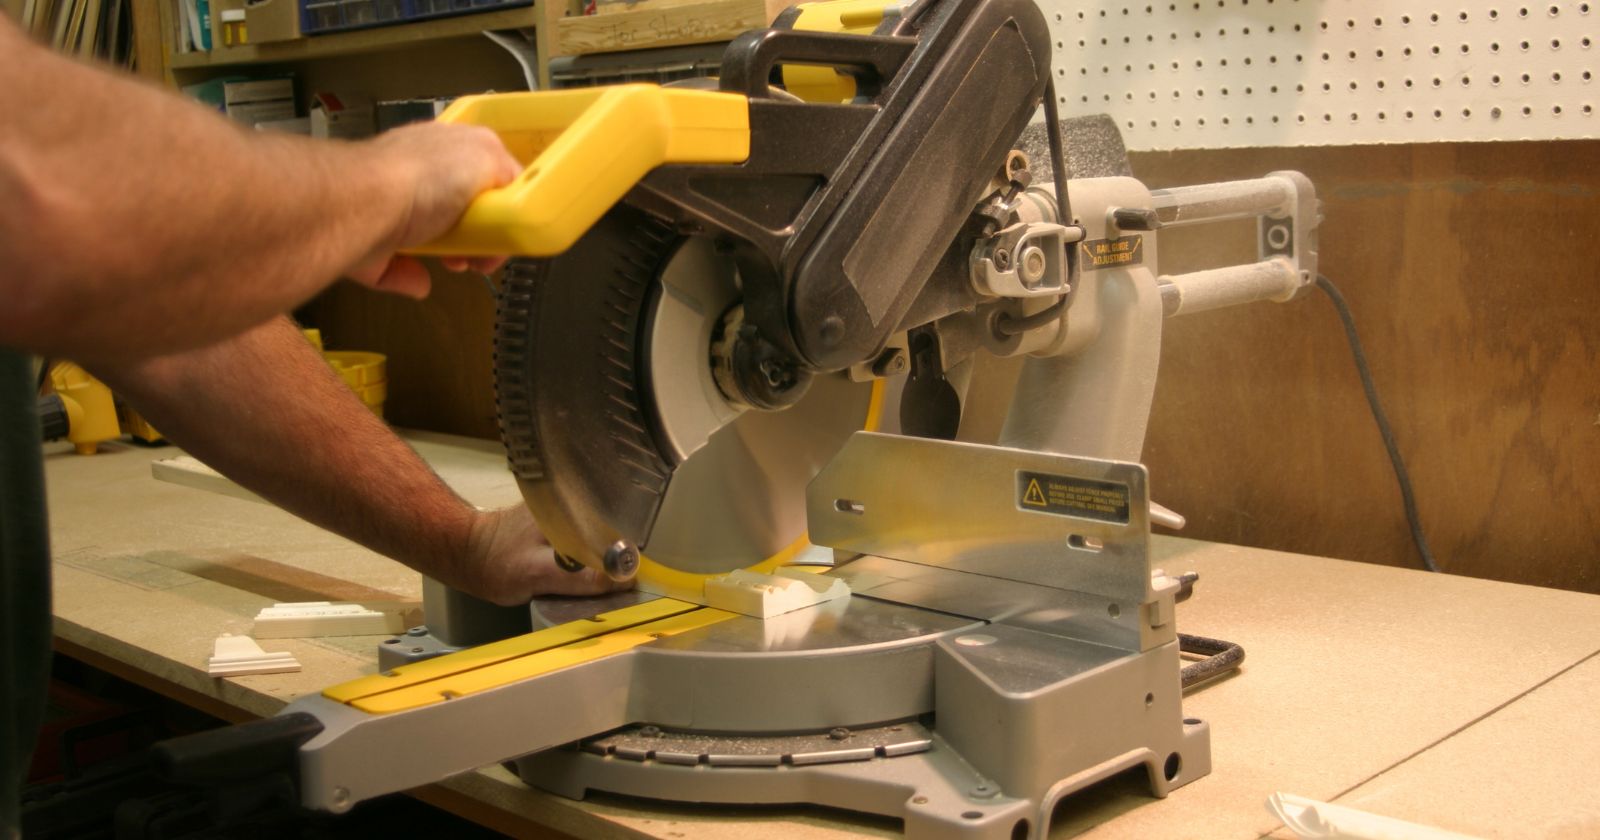
Anatomy of a Miter Saw
When I first laid my hands on a miter saw, I was both excited and a tad overwhelmed. There were so many parts, and I wanted to understand each one. Here’s a breakdown of the essential components:
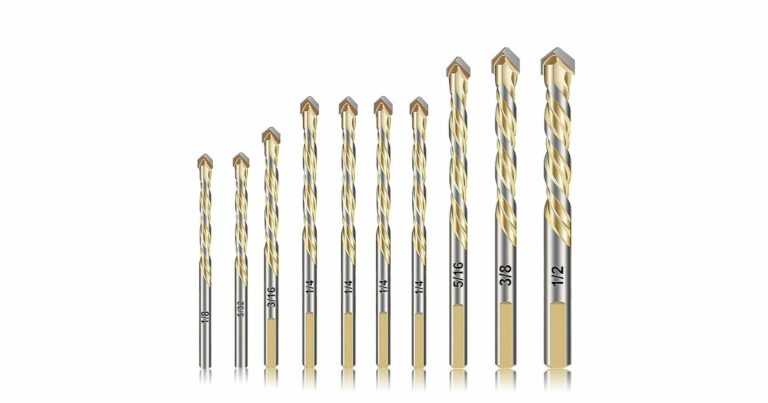
- Blade: This is the heart of the miter saw. It’s what does the cutting, and depending on its size and type, it can make a world of difference in the precision and finish of your cuts.
- Miter Gauge: Think of this as your guiding star. It helps in setting the angle for your cuts, ensuring you get that perfect 45° angle for your picture frame or that precise 30° for your shelving unit.
- Fence: This acts as a support system for whatever you’re cutting. It ensures your workpiece stays stable, giving you a clean cut every time.
- Handle: It’s more than just a grip. The handle is where you exert control, guiding the blade through the material.
- Safety Guard: As the name suggests, this is all about safety. It covers the blade, ensuring no accidental contact and protecting you from potential mishaps.
Safety First: Precautions to Take
I can’t stress this enough: safety is paramount. No project is worth risking an injury. Over the years, I’ve developed a safety checklist that I religiously follow:
- Proper Attire: Before I even switch on my miter saw, I ensure I’m dressed for the job. This means no loose clothing, wearing safety goggles, and ensuring I have ear protection on if I’m going to be working for an extended period.
- Blade Safety: Always check the blade before starting. Ensure it’s sharp, clean, and properly attached. A dull or dirty blade not only affects the quality of your cuts but can also be a safety hazard.
- Workspace Organization: My workspace is my sanctuary. I always make sure it’s organized, with no stray tools or materials lying around. A clutter-free environment means fewer distractions and fewer chances of accidents.
Remember, the miter saw is a powerful tool, and with great power comes great responsibility. Always prioritize safety, and you’ll ensure many happy hours of woodworking ahead!

Suggested Reading: The 5 Best Band Saws Under $500 In 2023
Advanced Miter Saw Tricks For DIY Projects
Alright, now that we’ve covered the basics, let’s dive into the good stuff. Over the years, I’ve picked up a few tricks that have truly elevated my DIY game. These aren’t just about making the job easier; they’re about achieving that professional finish that makes all the difference.
Achieving Perfect Angled Cuts
Angles can be tricky, but with the right approach, you can nail them every time:
- Using a Digital Protractor: I remember the days of struggling with manual protractors and the guesswork involved. Then I discovered digital protractors. These gadgets are a godsend, offering precise measurements that ensure your angles are spot on.
- The Importance of a Sharp Blade: It might sound obvious, but a sharp blade is crucial for clean angled cuts. I’ve learned the hard way that a dull blade can lead to chipping or rough edges, especially on trickier angles.
- Tips for Handling Beveled Cuts: Bevels add a touch of sophistication to any project. My go-to strategy? Always make sure the workpiece is securely clamped, and take the cut slowly, letting the blade do the work.
Tricks for Cutting Long Boards
Long boards can be a challenge, but with a few tricks up your sleeve, they become a breeze:
- Using Supports or Stands: I can’t tell you how many times supports have saved my projects. They ensure the board stays level with the saw, preventing any unwanted bends or warps in the cut.
- The Right Way to Mark and Measure: Measure twice, cut once – that’s my mantra. For long boards, I always use a straight edge or chalk line to mark the entire length, ensuring a straight cut from start to finish.
Ensuring Clean Cuts Every Time
There’s nothing more satisfying than a clean cut, and here’s how I achieve it every time:
- The Significance of a Zero-Clearance Insert: This was a game-changer for me. A zero-clearance insert ensures that the wood doesn’t splinter or tear, giving you a smooth finish every time.
- Blade Selection Based on Material: Not all materials are created equal, and neither are blades. I always ensure I’m using the right blade for the job, whether I’m cutting through hardwood, softwood, or even non-wood materials.
There you have it some of my favorite advanced tricks for the miter saw. Remember, it’s not just about having the right tools, but also about knowing how to use them to their fullest potential. Happy sawing!

Enhancing Your Miter Saw’s Capabilities
As I’ve journeyed through countless DIY projects, I’ve come to appreciate that a miter saw is more than just its basic functions. With a few tweaks and additions, you can truly enhance its capabilities, making your projects smoother and more efficient. Here’s how I’ve supercharged my miter saw over the years:
Using Stop Blocks for Repeated Cuts
If you’re like me and often find yourself making repeated cuts of the same length, then stop blocks will be your best friend:
- Setting up a Stop Block System: I remember the first time I set up my stop block system. It was a revelation. By simply attaching a block to my miter saw’s fence, I could ensure consistent cuts without the need to measure each time. It’s a simple setup that saves a ton of time.
- Benefits for Batch Projects: Whenever I’m working on batch projects, like making multiple frames or shelves, the stop block system ensures each piece is identical. It not only speeds up the process but also guarantees consistency across all pieces.
Dust Management Tricks
Let’s face it, woodworking can be messy. But with a few tricks, you can keep that dust in check:
- DIY Dust Collection Systems: I’ve experimented with a few DIY dust collection systems over the years, from simple shop vac attachments to more elaborate setups. The key is to ensure the system is efficient in collecting the majority of the sawdust, keeping your workspace clean.
- The Importance of Regular Cleaning: Even with a dust collection system, regular cleaning is essential. I make it a habit to clean my miter saw after every project. It not only keeps the tool in top shape but also ensures accuracy in future cuts.
Extending the Life of Your Saw Blade
A miter saw is only as good as its blade. Here’s how I ensure my blade stays sharp and efficient:
- Proper Cleaning Techniques: Over time, sap and resin can build up on your blade, affecting its performance. I use a simple blade cleaner to remove these residues, ensuring the blade remains sharp and efficient.
- When to Sharpen vs. When to Replace: This was a learning curve for me. Initially, I’d replace my blade at the first sign of dullness. But I’ve since learned that often, a good sharpening can bring it back to life. However, if the blade has chipped or damaged teeth, it’s time for a replacement.
In the world of DIY, your tools are your partners. And just like any partnership, the more you invest in understanding and enhancing their capabilities, the more rewarding the relationship becomes. So, take the time to get to know your miter saw, and I promise, it’ll serve you well in every project.
Watch This Video And Learn Miter Saw Tricks For DIY
Suggested Reading: How Do You Know If Wood Is Dry Enough To Split
Common Mistakes and How to Avoid Them
Ah, mistakes. We’ve all made them, especially when we’re just starting out. I’ve had my fair share of blunders with my miter saw, but each one has been a learning experience. Let me share some of the common pitfalls I’ve encountered and how you can steer clear of them:
Overreliance on the Laser Guide
When I first got a miter saw with a laser guide, I thought I’d hit the jackpot. It seemed like the perfect tool to ensure precision. But here’s the catch: while laser guides are undoubtedly helpful, they’re not infallible.
- My Experience: I once made a series of cuts, trusting the laser guide implicitly. To my dismay, the final piece was slightly off. That’s when I realized that laser guides can sometimes be misaligned or affected by dust and debris.
- The Fix: Always double-check your measurements. Use the laser guide as a reference, but trust your measurements and markings for the final cut.
Not Securing the Workpiece
I can’t stress this enough: a moving workpiece is a recipe for disaster. Not only can it ruin your cut, but it’s also a significant safety hazard.
- My Experience: Early in my DIY journey, I once tried to make a quick cut without clamping down a piece of wood. The result? A jagged cut and a near miss with the blade.
- The Fix: Always, always secure your workpiece. Whether it’s with clamps or a proper miter saw stand, ensure it’s stable before making the cut.
Forgetting to Check the Miter Saw’s Calibration
Accuracy is everything in woodworking. And for that, your miter saw needs to be perfectly calibrated.
- My Experience: I once spent hours on a project, only to find that the pieces didn’t fit together. The culprit? My miter saw was slightly out of calibration, leading to minute discrepancies in the cuts.
- The Fix: Make it a habit to check your miter saw’s calibration regularly. Even if it’s off by a fraction of a degree, it can make a world of difference in the final product.
Mistakes are a part of the learning process. But with a bit of caution and the lessons from my experiences, you can avoid these common pitfalls and ensure that your DIY projects are both safe and successful.

Additional Accessories to Enhance Your Miter Saw Experience
Over the years, I’ve come to realize that while my miter saw is a powerhouse on its own, the right accessories can truly elevate my woodworking game. It’s like adding a turbo boost to an already powerful engine. Let’s dive into some of the accessories I’ve found indispensable in my DIY journey:
Miter Saw Stands
When I first started, I used to work with my miter saw on any flat surface I could find. But then, I discovered the magic of miter saw stands:
- Benefits of a Mobile Stand: Investing in a mobile miter saw stand was a game-changer for me. Not only could I move my saw around with ease, but the adjustable height and stability made my cuts more precise and comfortable.
- DIY vs. Commercial Stands: Pros and Cons: I’ve tried both. Crafting a DIY stand gave me the satisfaction of a personal touch, tailored to my needs. However, commercial stands come with added features and durability. It’s a toss-up, really. If you’re feeling crafty, go DIY. If you want convenience out of the box, commercial stands are the way to go.
Using Clamps for Precision
Ah, clamps! These little devices have saved many a project from going awry:
- Types of Clamps Suitable for Miter Saws: Over time, I’ve experimented with various clamps. C-clamps and bar clamps have become my go-to choices for their stability and ease of use.
- Ensuring Safety and Accuracy with Clamps: A well-clamped workpiece isn’t just about precision; it’s about safety. By ensuring the material doesn’t move mid-cut, I’ve avoided potential mishaps and ensured clean, accurate cuts every time.
The Role of LED and Laser Guides
These modern additions to miter saws can be a boon for accuracy:
- How They Enhance Accuracy: I’ll admit, there’s something satisfying about that glowing line showing exactly where the blade will cut. It’s an immediate visual guide that, when used correctly, can enhance the accuracy of your cuts.
- Calibration and Maintenance: Here’s a tip from my playbook: always check the calibration of your laser guide. Over time, they can shift, leading to discrepancies. A regular check and adjustment ensure they remain a reliable guide.
In the world of woodworking, it’s often the little things that make a big difference. By investing in the right accessories and maintaining them well, you can ensure that every project you undertake is a masterpiece in the making.

Suggested Reading: The 5 Best Handheld Angle Grinders For Concrete In 2023
Miter Saw Tricks: Beyond Woodworking
When most people think of miter saws, they picture wooden planks and timber projects. But over the years, I’ve discovered that this versatile tool has so much more to offer. From cutting different materials to venturing into the world of crafting and art, my miter saw has been with me every step of the way. Let’s explore some of these unconventional uses and tricks I’ve picked up along the way.
Cutting Different Materials
Wood might be the go-to material for most miter saw users, but with the right approach, you can cut through a variety of materials:
- Tips for Cutting Metals and Plastics: Metals, especially softer ones like aluminum, can be cut with a miter saw, provided you have the right blade. I’ve found that a carbide-tipped blade works wonders. For plastics, a fine-toothed blade ensures a clean cut without melting the material. And always remember: slow and steady wins the race. Rushing through these materials can lead to messy cuts or even damage.
- Blade Selection for Various Materials: Over time, I’ve built quite the collection of blades, each tailored for specific materials. For metals, a blade with more teeth ensures a smoother cut, while for plastics, I opt for blades designed to reduce heat buildup. It’s all about having the right tool for the job.
Crafting and Art Projects
Who said miter saws are only for construction and carpentry? They can be a crafter’s best friend too:
- Using a Miter Saw for Non-Traditional Projects: I’ve used my miter saw to create intricate art pieces, craft items, and even toys. With a bit of imagination and the right settings, the possibilities are endless. I’ve made everything from wooden puzzles to decorative frames, all with the precision and finesse of my trusty miter saw.
- Safety Considerations for Unconventional Uses: Venturing into uncharted territory with your miter saw can be exciting, but safety should always be the top priority. Always ensure the material is suitable for cutting with a miter saw, secure the workpiece properly, and never forget your safety gear.
A miter saw is not just a tool; it’s a canvas of possibilities. Whether you’re working on a construction project, crafting a piece of art, or experimenting with different materials, with the right tricks up your sleeve, you can push the boundaries of what’s possible. So, the next time you look at your miter saw, see it not just as a woodworking tool, but as a gateway to a world of creativity.
FAQ Section: Navigating the World of Miter Saws
Navigating the intricate world of miter saws can sometimes feel overwhelming, especially with the myriad of information available. To make things a bit simpler, I’ve compiled a list of frequently asked questions that I often encounter. These are designed to provide quick insights and address common concerns, making your miter saw journey a tad smoother. Let’s dive in!
Can I use my miter saw to cut materials other than wood?
Absolutely! While miter saws are primarily designed for woodworking, with the right blade and settings, they can cut through a variety of materials, including plastics and certain metals like aluminum. However, always ensure you’re using the appropriate blade and taking necessary safety precautions.
How often should I calibrate my miter saw for accurate cuts?
Regular calibration ensures the precision of your cuts. I recommend checking the calibration every few months or after any significant project. However, if you notice any discrepancies in your cuts or if the saw has been subjected to any impact, it’s a good idea to check the calibration immediately.
Is it worth investing in additional accessories for my miter saw?
In my experience, the right accessories can significantly enhance your miter saw’s capabilities. Items like stands, clamps, and laser guides not only make the cutting process smoother but also improve the quality of your projects. Think of them as valuable additions that elevate your woodworking game.
I hope these FAQs provide some clarity and assist you in your miter saw endeavors. Remember, the key is continuous learning and adapting to the ever-evolving world of DIY.

Final Thoughts: The Journey of Mastery with Your Miter Saw
As I sit back and reflect on my journey with my miter saw, it’s evident that it’s been more than just about cutting wood. It’s been a journey of discovery, learning, and growth. From my first hesitant cuts to the intricate projects I undertake today, every moment has been a step towards mastery.
The Importance of Continuous Learning and Practice: One thing I’ve realized is that with tools, especially something as versatile as a miter saw, the learning never stops. Every project presents a new challenge, a new lesson. And just like any skill, practice is key. The more I’ve worked with my miter saw, the more comfortable and proficient I’ve become. It’s a continuous cycle of learning, practicing, and perfecting.
Encouraging Readers to Share Their Own Tricks and Tips: But here’s the beautiful thing: this journey isn’t solitary. Many of you have been on similar paths, discovering your own tricks, facing your own challenges, and celebrating your own victories. I’d love to hear from you. What unique techniques have you developed? What challenges have you overcome? Sharing our experiences enriches the entire community.
A Call to Action for Readers to Engage with the Community and Learn from Each Other: So, I urge you, fellow DIY enthusiasts and miter saw aficionados, to engage. Share your stories, your tips, and your projects. Let’s create a vibrant community where we learn from each other, inspire one another, and push the boundaries of what’s possible with our miter saws.
Remember that every cut, every project, and every challenge is a step forward in your journey of mastery. Embrace the process, share your wisdom, and let’s continue to grow together in this wonderful world of DIY.