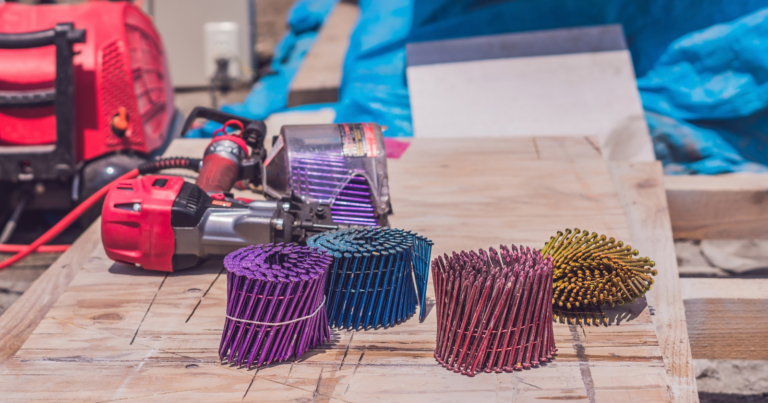
Nail Gun Maintenance Tips
Nail guns are a game-changer for me and many other contractors and DIY enthusiasts out there. But just like any other prized possession in my toolbox, they need some TLC to keep running smoothly and safely. In this guide, I’m going to share some essential nail gun maintenance tips I’ve picked up over the years. Trust me, a little upkeep goes a long way in keeping your nail gun performing at its best.
From the moment I held my first nail gun, it was a game-changer. The efficiency, the power, the sheer satisfaction of nailing down boards in a fraction of the time it used to take with a traditional hammer. But as I quickly learned, with this newfound efficiency came the need for a new kind of care. Nail guns, as robust as they seem, can be quite delicate under the hood. And trust me, there’s nothing worse than being in the middle of a project and having your trusty nail gun sputter out or, even worse, misfire.
Over the years, I’ve had my fair share of nail gun mishaps. Some were minor inconveniences, while others… let’s just say they taught me the importance of safety goggles. That’s why I’ve made it a mission to understand the ins and outs of nail gun maintenance. It’s not just about prolonging the life of the tool; it’s about ensuring every project goes off without a hitch(or a misfired nail.
So, if you’re keen on keeping your nail gun as reliable and efficient as the day you bought it, you’re in the right place. In this guide, I’ll be sharing my tried and true Nail Gun Maintenance Tips. Whether you’re a seasoned contractor or a DIY enthusiast, there’s always something new to learn. Let’s get started!

Suggested Reading: How Do You Know If Wood Is Dry Enough To Split
Why Regular Maintenance is Crucial
When I first got my hands on a nail gun, I was ecstatic about the power and efficiency it brought to my projects. But over time, I’ve come to realize that this power tool, like all others, needs regular care and attention. Here’s why:
Ensuring Safety
I can’t stress this enough: safety first. Using a poorly maintained nail gun is like playing with fire. I’ve heard horror stories and even witnessed a few close calls on job sites. Did you know that according to some studies, thousands of workers end up in the emergency room each year due to nail gun-related injuries? And a significant portion of these could have been prevented with proper maintenance.
Prolonging Nail Gun Lifespan
Let’s talk about money. Investing in a nail gun isn’t cheap, and I’ve learned the hard way that regular maintenance can save a lot in the long run. By simply cleaning and checking my nail gun regularly, I’ve managed to avoid costly repairs and replacements. Plus, there’s the added benefit of preventing premature wear and tear. Think of it as giving your nail gun a longer, healthier life.
Ensuring Optimal Performance
There’s nothing more frustrating than a nail gun that doesn’t perform as it should. I remember this one time when my nail gun started misfiring in the middle of a crucial project. It turned out, a little bit of maintenance could have saved me hours of troubleshooting. A well-maintained nail gun not only ensures consistent performance but also gives you peace of mind. Over the years, I’ve collected a myriad of stories from fellow contractors and DIYers about the difference regular upkeep makes. Trust me; you don’t want to learn the hard way.

Suggested Reading: How To Sharpen A Wood Splitting Drill Bit With A File
Essential Nail Gun Maintenance Tips
Ah, the heart of the matter! Over the years, I’ve picked up a slew of maintenance tips that have kept my nail gun humming like a well-oiled machine. Let me share some of these golden nuggets with you:
Daily Maintenance Routine
- Every day, after wrapping up my projects, I make it a point to clean the exterior of my nail gun. You’d be surprised at how much dust and debris can accumulate in just a day’s work.
- I usually stick to a simple damp cloth for this, but for stubborn grime, a bit of mild detergent does the trick. And oh, a soft-bristled brush is perfect for those hard-to-reach spots.
- I also give my nail gun a quick once-over to check for any loose parts or screws. It’s a small step, but it’s saved me from potential mishaps more times than I can count.
- Lastly, I inspect the power source. Whether you’re using a battery-operated nail gun or one with a cord, ensuring it’s damage-free is crucial. A frayed cord or a leaking battery? Big no-nos.
Weekly Maintenance Checks
- Every week, I set aside some time to lubricate the moving parts of my nail gun. It’s like giving it a mini spa treatment!
- I’ve experimented with a few lubricants, and I’ve found that silicone-based ones work best. But steer clear of petroleum-based lubricants; they can do more harm than good.
- I also checked the nail feed system. There’s nothing more annoying than inconsistent nail feeding.
- A quick tip? Ensure the magazine is clean and the spring tension is just right. It makes a world of difference.
- And don’t forget the safety nose. A quick inspection for wear can prevent misfires and ensure safer operation.
Monthly and Seasonal Maintenance
- Every month, I give my nail gun a deep clean. It’s like spring cleaning, but for your tool.
- I usually disassemble the main parts, clean each one meticulously, and then reassemble. If you’re new to this, always refer to the manufacturer’s guide.
- This is also when I check for any worn-out parts. Over time, some components can wear out, affecting performance.
- Common culprits? O-rings, seals, and the trigger valve. Keep an eye on them.
- If you’re not going to be using your nail gun for a while, especially during off-seasons, store it properly. I always ensure it’s clean, lubricated, and stored in a cool, dry place.
Watch This Video And Learn About Nail Gun Maintenance Tips
Troubleshooting Common Nail Gun Issues
Every tool has its quirks, and nail guns are no exception. Over the years, I’ve had my fair share of “Oh, come on!” moments with them. But with each hiccup, I’ve learned a thing or two. Let’s dive into some of these common issues and how I’ve tackled them:
Jammed Nails
- Ah, jammed nails. The bane of any nail gun user’s existence. I remember this one project where my nail gun jammed every few minutes. Talk about frustrating! Often, the cause is as simple as using the wrong size or type of nails. Sometimes, accumulated dirt and debris in the gun can also be the culprit.
- Over the years, I’ve developed a routine for dealing with jams. First and foremost, I disconnect the power source. No compromises on safety! Then, I carefully open the nose of the gun, gently remove the jammed nail, and give the area a thorough cleaning. If you’re frequently facing this issue, consider giving your nail gun a deep clean or checking if any parts need replacing. And always ensure you’re using the right nails for your gun.
Inconsistent Nail Depth
- There’s nothing more annoying than nails that either sink too deep or don’t go in deep enough. Several factors can mess with the nail depth. The air pressure might be off, the compressor could be acting up, or maybe I’m just holding the gun at a weird angle. Yes, even after all these years, I sometimes get it wrong!
- My first step is always to check the air pressure. If that’s in order, I’ll inspect the compressor. A malfunctioning compressor can wreak havoc on your nail depth. If all else fails, I’ll adjust the depth settings on the nail gun itself. And a pro tip? Always test on a scrap piece of wood before going back to your main project.
Air Leaks
- The unmistakable sound of an air leak can be both annoying and concerning. I’ve had instances where a minor leak turned into a major problem because I ignored it. Pinpointing the source is crucial. It could be a leaky trigger, a loose top cap, or even an issue at the base of the gun.
- Once I’ve identified the source, I check for any visible damage. Often, it’s a worn-out seal or O-ring. Replacing these is usually a quick fix. But if the problem persists, I consult the manufacturer’s guide. Sometimes, it’s a more complex issue that might require professional intervention. Remember, it’s always better to address these issues sooner rather than later.
At the end of the day, understanding your nail gun, its quirks, and how to address them can save you a lot of time and frustration. And always remember: when in doubt, consult the manual or seek professional help. Your projects and your sanity will thank you!

Suggested Reading: How To Set up A Portable Dust Collection System In A Woodshop
Choosing the Right Nail Gun for Your Needs
Ah, the world of nail guns. It’s vast, varied, and can be a tad overwhelming, especially if you’re just dipping your toes into it. Over the years, I’ve had the pleasure (and sometimes, the misadventure) of working with various types of nail guns. And let me tell you, picking the right one can make all the difference. So, let’s dive into the different types available and how to choose the perfect fit for your project.
Types of Nail Guns and Their Pros & Cons
Framing Nailers:
- Pros: These are the heavy-duty beasts of the nail gun world. Perfect for framing, sheathing, and decking. They can handle larger nails, making them ideal for bigger projects.
- Cons: They’re bulky and might be overkill for finer, detailed work.
Finish Nailers:
- Pros: Think of these as the middle ground. They’re great for baseboards, crown molding, and other interior trims. They offer a good balance between power and precision.
- Cons: Not as robust as framing nailers, so they might struggle with thicker materials.
Brad Nailers:
- Pros: These are your go-to for delicate trims and moldings. They use smaller nails, which means smaller nail holes and less filling afterward.
- Cons: They’re not meant for heavy-duty tasks. Using them for larger projects can lead to nails not holding as they should.
Roofing Nailers:
- Pros: Specifically designed for roofing tasks. They’re built to handle the wear and tear of roofing projects and to drive nails that secure roofing materials effectively.
- Cons: They’re specialized. Using them for tasks other than roofing can be problematic.
Pin Nailers:
- Pros: The most delicate of the bunch, perfect for tiny trim, intricate crafts, and detailed woodworking projects. They leave the smallest of holes, often not even needing any filling.
- Cons: They lack the holding power of other nailers and are not suitable for structural tasks.
Tips for Selecting the Right Nail Gun
- Understand Your Project: Before even looking at nail guns, have a clear idea of your project. Are you building a deck or crafting a delicate wooden toy? Your project dictates your tool.
- Weight and Ergonomics Matter: I’ve had days where my nail gun felt like an extension of my arm, and others where it felt like a brick. Test out different models, see how they feel in your hand, and consider the weight, especially if you’ll be using it for extended periods.
- Consider Power Sources: Pneumatic or cordless electric? While I love the consistent power of pneumatic nailers, there’s something liberating about not being tethered to an air compressor with the cordless ones.
- Budget: Nail guns come in various price ranges. While it’s tempting to go for the cheapest option, remember that sometimes you get what you pay for. Consider it an investment.
In the end, the right nail gun is the one that feels right for you and meets your project’s needs. And always remember, no matter which nail gun you choose, maintenance is key. Keep it in top shape, and it’ll serve you well for years to come.
FAQs: Nail Gun Maintenance Tips
We’ve covered a lot about nail gun maintenance, but I know there are always those lingering questions that pop up. To make things easier, I’ve compiled a list of frequently asked questions that many in our community, and even I, had when starting out. Let’s dive into these:
How often should I clean my nail gun?
Ideally, a basic exterior cleaning should be done after each use to remove dust and debris. A more thorough cleaning, where you might disassemble parts of the nail gun, can be done monthly or depending on how frequently you use it. Remember, a clean nail gun is a happy nail gun!
Can I use any lubricant for my nail gun?
Not all lubricants are created equal. For nail guns, I recommend using a silicone-based lubricant. Avoid petroleum-based lubricants as they can degrade certain parts of the nail gun over time. Always check the manufacturer’s recommendations for your specific model.
My nail gun misfires occasionally. Is this a maintenance issue?
Misfires can be caused by several factors. It could be due to a maintenance issue like a dirty nail gun, worn-out parts, or using the wrong size/type of nails. Regular maintenance often resolves misfiring issues. However, if the problem persists, it might be time to consult the manufacturer’s guide or seek professional help.
I hope these FAQs address some of your burning questions. Remember, the key to mastering any tool is understanding it inside and out. Keep those questions coming, and let’s continue our journey of learning together!

Wrapping It Up……..
As I sit back and reflect on my years of working with nail guns, one thing becomes crystal clear: maintenance isn’t just a chore; it’s an investment. An investment in safety, efficiency, and the longevity of the tool that has become an extension of my hand on many projects.
From the countless hours I’ve spent on job sites to the late nights in my workshop, I’ve seen the stark contrast between a nail gun treated with care and one that’s been, well, a bit neglected. The former purrs like a well-tuned engine, while the latter often becomes a source of endless frustration.
But here’s the thing: maintenance isn’t just about the tool. It’s about you. Every time I follow these Nail Gun Maintenance Tips, I’m not just ensuring my tool’s longevity; I’m ensuring my safety and the quality of my work. And there’s an immense pride in knowing that the project I’ve just completed has that extra touch of perfection because my tools were in their best shape.
So, my fellow tool enthusiasts, I urge you to embrace maintenance as a ritual. Let it become second nature. Celebrate the small victories, like when your nail gun works flawlessly on a crucial task because you took the time to care for it.
And as we wrap up this guide, I want to extend an invitation. Our community is a melting pot of experiences, stories, and invaluable tips. Whether you’ve been in the game for decades or are just starting, there’s a wealth of knowledge waiting for you. And hey, maybe you’ll have some wisdom to share too!
Dive into Our Community! Let’s Grow, Learn, and Perfect Our Craft Together!
Remember, every tool has a story. And with proper care, yours can have a long, fulfilling one. Here’s to many more projects, perfectly driven nails, and the satisfaction of a job well done!