How To Sharpen A Wood Splitting Drill Bit With A File
Ah, the sweet symphony of a well sharpened drill bit slicing through wood there’s nothing quite like it, is there? If you’ve landed on this page, you’re probably well-acquainted with the frustration that a dull drill bit can bring. Hi there, fellow tool enthusiast! Today, we’re diving deep into a topic that’s close to my heart and crucial for our beloved projects: how to sharpen a wood splitting drill bit with a file.
Now, maintaining sharp drill bits isn’t just about avoiding annoyance. It’s a ticket to clean, efficient wood splitting, ensuring that our projects not only look top-notch but are also safe and enjoyable to work on. A sharp bit minimizes our effort, reduces the chances of wood splintering, and most importantly, keeps those pesky, unexpected mishaps at bay.
Stick around as we delve into the nitty-gritty of bringing our wood splitting drill bits back to their peak performance, ensuring every spin is as satisfying and effective as possible. Let’s get that bit back in tip-top shape together, shall we?

Suggested Reading: Best Impact Driver Drill Under $100
Understanding Wood Splitting Drill Bits
Anatomy of a Drill Bit
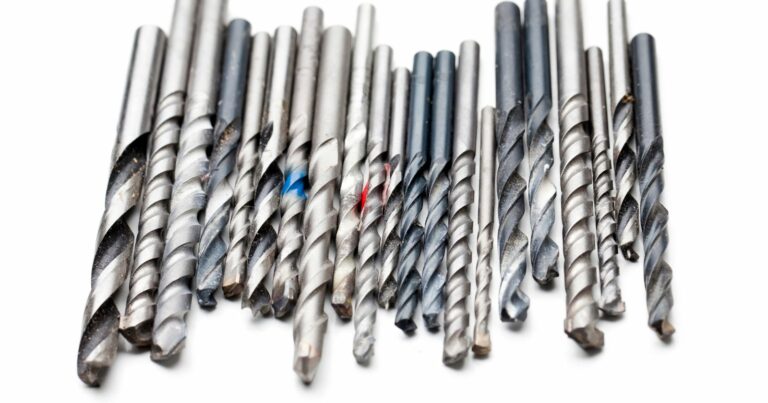
Let’s take a moment to appreciate the unsung hero of our woodworking projects: the humble drill bit. It might look simple at first glance, but there’s more to it than meets the eye. When I look at a drill bit, I see it as having three main parts, each crucial in its own right:
- Point: Ah, the point! This is where all the action happens. It’s the part that first makes contact with the wood, guiding the rest of the bit and ensuring accuracy in our drilling.
- Body: Moving along, we have the body. This is where the spirals live, working tirelessly to remove those wood shavings and keep our hole clean and precise.
- Shank: Lastly, the shank is our connector, ensuring the drill bit stays secure in the drill. A good shank means no wobbling and straight, accurate drilling.
Importance of Sharpness in Drill Bits
Now, let’s chat about why we’re all here: sharpness. I can’t stress enough how pivotal a sharp drill bit is in our woodworking endeavors. It’s not just about making our lives easier (though, that’s a big part!), it’s about so much more:
- Ensuring Clean Cuts: A sharp bit means clean, smooth holes. It’s the difference between a professional-looking finish and something that looks a bit off. We’ve all seen those splintered, rough edges that a dull bit can leave behind, and trust me, it’s worth avoiding!
- Reducing User Fatigue: I’ve been there, pushing and pushing, wondering why the drill isn’t making any progress. A sharp bit does the work so you don’t have to, gliding through the wood and saving you from unnecessary strain.
- Enhancing Safety During Use: This one’s big, folks. A sharp bit is a safe bit. It’s less likely to slip or get stuck, reducing the risk of accidents and keeping our projects (and us) safe and sound.
In the sections to come, we’ll explore how to keep our bits sharp, ensuring they’re always ready to perform at their best. Stick with me, and let’s keep our woodworking smooth, effortless, and above all, safe!

Suggested Reading: Top 10 Carbide Lathe Wood Turning Tools for 2023
Signs Your Wood Splitting Drill Bit Needs Sharpening
Oh, the joys of woodworking! But wait, something feels off. The drill bit isn’t behaving as it usually does. We’ve all been there, haven’t we? Recognizing when our trusty wood splitting drill bit needs a little TLC is crucial, not just for the sake of our projects, but for our ease of work and safety too. Here are a few telltale signs that it might be time to give our bit a good sharpening:
- Difficulty in Drilling: Ever found yourself applying more pressure than usual, trying to force the bit through the wood? It’s like trying to cut a tomato with a dull knife – frustrating and unnecessarily laborious. If drilling starts feeling like a workout, it’s a clear sign that our bit is pleading for a sharpen-up.
- Inefficient Wood Splitting: A sharp bit should glide through wood with ease, creating clean, smooth holes. If you notice that the wood is splintering, or the bit is veering off course, it’s a signal that the sharp edge we rely on is losing its finesse.
- Visible Damages or Dullness on the Bit: Take a close look at your bit. Do you see any nicks, flat spots, or a generally dull appearance on the cutting edges? These visual cues are like the check engine light in your car – a clear signal that maintenance is due.
Recognizing these signs early and taking a little time for bit sharpening can save us from a world of frustration and keep our projects looking sharp and professional. In the next sections, we’ll dive into the how-to of sharpening, ensuring you and your drill bit can get back to smooth sailing (or should I say, drilling?) through your woodworking projects.

Tools Needed for Sharpening a Drill Bit
Sharpening a drill bit isn’t just about the technique; it’s also about having the right tools for the job. And trust me, using the right tools can make the process smoother, more effective, and, importantly, safer. Let’s dive into the essentials, shall we?
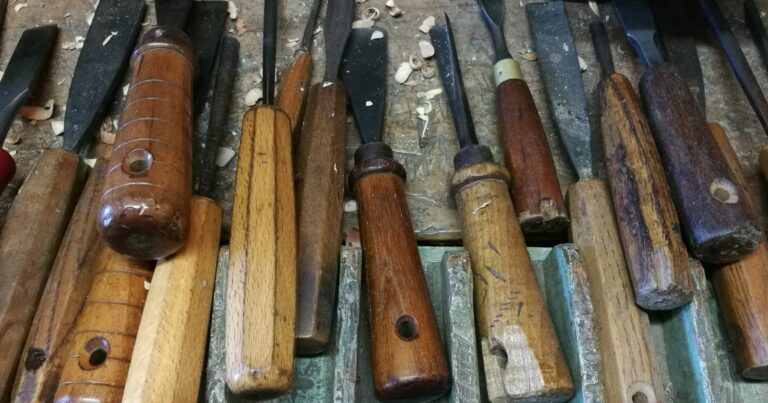
Focusing on Files
Ah, the file! Our main actor in the sharpening process. But not all files are created equal, and choosing the right one can make a world of difference in our sharpening endeavors:
- Single-cut File: Ideal for fine, detailed sharpening, a single-cut file has a single set of parallel teeth and is perfect for giving our drill bit that precise, sharp edge.
- Double-cut File: Need to remove more material? The double-cut file, with its crisscross pattern, is your go-to. It’s aggressive, it’s robust, and it’ll help shape our bit effectively.
- Diamond File: When we’re dealing with harder materials, a diamond file steps into the spotlight. It’s embedded with diamond grit, offering a durable and efficient sharpening experience.
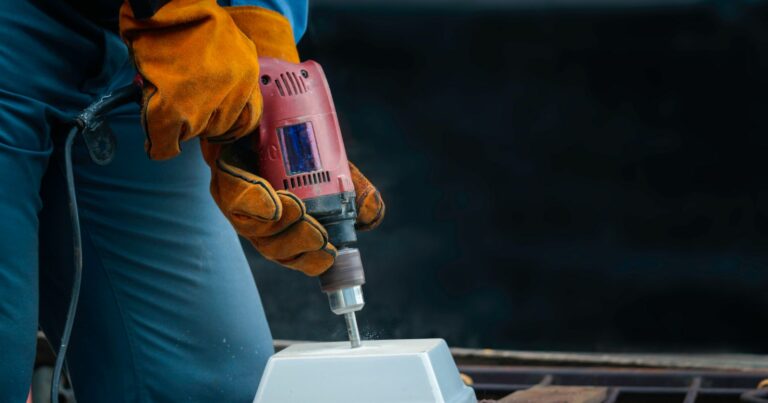
Safety Gear
Safety first, always! When we’re sharpening our drill bits, tiny fragments of material can go flying, and our hands are in close proximity to sharp objects. So, let’s gear up:
- Safety Goggles: Protecting our eyes from flying metal shavings is paramount. A sturdy pair of safety goggles will be our best friend in this process.
- Gloves: A good pair of gloves will not only protect our hands from potential nicks and cuts but also provide a better grip on the file and drill bit.
- Dust Mask: Metal filings are not something we want to inhale. A dust mask ensures we’re not breathing in any particulates while we’re getting our sharpening on.
Equipped with the right files and geared up in our safety attire, we’re ready to tackle the sharpening process head-on. In the upcoming sections, we’ll delve into the step-by-step guide to get that drill bit back in peak condition. Let’s keep those bits sharp and our woodworking projects smoother than ever!
Watch The Video And Learn About How To Sharpen A Wood Splitting Drill Bit With A File
Step-by-Step Guide: How To Sharpen A Wood Splitting Drill Bit With A File
Alright, friends, it’s time to roll up our sleeves and dive into the heart of the matter. Sharpening a drill bit might seem daunting at first, but with the right steps, we’ll have our bit back in action in no time. Let’s walk through this journey together, shall we?
Preparing the Drill Bit
First things first, we can’t work with a dirty, wobbly drill bit. Preparation is key!
- Cleaning the Drill Bit: Let’s give our bit a good wipe down, ensuring there’s no lingering sawdust or debris. A clean bit will give us a clear view of the angles and edges we’ll be working on.
- Securing it in a Vise: Safety and stability are paramount. Securing the bit in a vise ensures it stays put while we work our sharpening magic. Trust me, a stable bit is a game-changer!
Identifying the Angles
Understanding our bit is crucial to sharpening it effectively. Let’s get acquainted with its angles:
- Understanding the Cutting Edge: This is the part that does the heavy lifting, cutting through the wood. We’ll want to keep this edge nice and sharp to ensure clean, efficient drilling.
- Recognizing the Relief Angle: The relief angle gives our cutting edge the space it needs to work effectively. We’ll be ensuring this angle is just right to avoid unnecessary friction and heat during use.
Sharpening Process
Now, onto the main event! Let’s get that bit sharp and ready for action.
Filing the Cutting Edge
- Proper File Positioning: Holding the file at the same angle as the cutting edge, we’ll ensure we maintain its original shape while sharpening.
- Correct Filing Technique: Using smooth, even strokes, we’ll file from the shank towards the point, maintaining consistent pressure throughout.
Working on the Relief Angle
- Adjusting the File Angle: Here, we’ll tilt the file slightly to match the relief angle, ensuring we maintain its shape while sharpening.
- Ensuring Even Material Removal: Consistency is key! We’ll keep our filing even, ensuring the bit remains balanced and effective in use.
Testing the Sharpened Drill Bit
The proof is in the pudding, as they say! Let’s put our sharpened bit to the test.
- Performing a Test Drill: Let’s drill a few test holes, feeling for any resistance and observing the quality of the holes we’re drilling.
- Evaluating and Adjusting Sharpness: If things aren’t quite perfect, no worries! We’ll revisit our filing, making any necessary adjustments to perfect that sharp edge.
And voila! With a bit of patience and careful filing, our wood splitting drill bit is back in action, ready to tackle our next project with ease and precision. In the sections to come, we’ll explore some common mistakes to avoid and tips for maintaining our bits post-sharpening. Stick around, and let’s keep those bits in tip-top shape together!

Suggested Reading: The 5 Best Grinders For Sharpening Lathe Tools In 2023
Common Mistakes to Avoid While Sharpening
Ah, the path to a perfectly sharpened drill bit! It’s not always a straight line, is it? I’ve seen my fair share of sharpening mishaps and, truth be told, I’ve been there myself. Sharpening is as much about the things we should do as it is about avoiding those pesky pitfalls. Let’s talk about a few common mistakes that can throw a wrench in our sharpening endeavors, shall we?
- Over-filing: It’s easy to get carried away, isn’t it? We want that bit sharp, and we want it now! But over-filing can wear our bit down, reducing its lifespan and, ironically, its effectiveness. Remember, patience is our friend here. Gentle, consistent strokes will get us to that sharp edge without sacrificing the longevity of our bit.
- Ignoring the Relief Angle: Oh, the relief angle, our unsung hero! It might be tempting to focus all our attention on the cutting edge, but ignoring the relief angle can lead to inefficient, overheated drilling. It’s all about balance, my friends. Keeping both the cutting edge and the relief angle sharp and well-shaped ensures our bit can do its job smoothly and effectively.
- Inconsistent Filing Strokes: Consistency, consistency, consistency! Inconsistent filing strokes can lead to an uneven edge, throwing our bit off balance and leading to wobbly, inaccurate drilling. Maintaining even pressure and consistent angles with each stroke will ensure our bit is evenly sharpened and ready to drill straight, clean holes every time.
Navigating around these common mistakes might take a bit of focus and patience, but trust me, the results are well worth it. A well-sharpened bit not only makes our projects easier but also ensures they’re of the highest quality. In the upcoming sections, we’ll explore how to maintain our bits post-sharpening, ensuring they stay in peak condition for as long as possible. Stick with me, and let’s keep those bits sharp and our projects flawless!

Maintaining Your Drill Bits Post-Sharpening
Ah, the satisfaction of a freshly sharpened drill bit! But our journey doesn’t end here, my fellow tool enthusiasts. Maintaining our bits post-sharpening is crucial to ensuring they stay in peak condition for as long as possible. Let’s explore how we can keep our bits sharp, effective, and ready for action, shall we?
Regular Checks for Wear and Tear
Just like we keep an eye on our car or our household appliances, regular checks on our drill bits can save us from unexpected hiccups mid-project. I like to give my bits a quick once-over before each use, checking for any visible damages, dullness, or irregularities. A bit that’s in good shape is a bit that’ll serve us well, ensuring clean, smooth drilling every time.
Proper Storage Solutions
Now, where do we keep our trusty bits when they’re not in use? Proper storage is key to maintaining their sharpness and ensuring they’re always ready when we need them.
- Drill Bit Holders: Investing in a good drill bit holder not only keeps our bits organized but also protects them from damage, ensuring they don’t knock against each other and lose their sharpness.
- Protective Coatings: A bit of protective coating can go a long way in preventing rust and keeping our bits in top condition. A quick wipe down post-use and a light coating can keep them sharp and ready for action.
Routine Sharpening
And of course, let’s not forget about routine sharpening. Keeping our bits consistently sharp is key to ensuring they’re always ready to perform at their best.
- Establishing a Sharpening Schedule: Depending on how often we use our bits, establishing a regular sharpening schedule ensures they’re always in peak condition when we need them.
- Keeping Track of Usage: I like to keep a little log of my bit usage. Noting down when and how often they’re used helps me determine when it’s time for a little TLC, ensuring they’re always sharp and ready for action.
And there we have it! With a bit of regular checking, proper storage, and routine sharpening, our drill bits will stay in peak condition, ready to tackle our projects with ease and precision. In the next sections, we’ll explore additional tips and tricks to keep our woodworking smooth and enjoyable. Stick around, and let’s keep those projects flawless together!
Suggested Reading: The 7 Best Miter Saws for Furniture Making
Additional Tips and Tricks
We’ve sharpened, we’ve maintained, and now, my friends, it’s time to elevate our drill bit care to the next level with a few extra tips and tricks up our sleeves. Over the years, I’ve picked up a few additional practices that have made my sharpening journey smoother and more effective. Let’s dive into a few of these, shall we?
- Utilizing a Gauge for Consistent Angles: Consistency is key when it comes to sharpening, and using a gauge has been a game-changer for me. It ensures that I’m maintaining consistent angles with each sharpening session, keeping my bits balanced, straight, and effective in use. A small investment in a gauge can lead to significantly more consistent and effective sharpening, trust me!
- Investing in Quality Files for Better Results: Not all files are created equal, and investing in quality files has made a world of difference in my sharpening endeavors. A good file not only makes the sharpening process smoother and more effective but also lasts longer, giving us better results over time. It’s a small investment that pays off in spades in the long run!
- Exploring Alternative Sharpening Tools: While files are fantastic, exploring alternative sharpening tools has opened up a world of possibilities for me. Diamond sharpeners, whetstones, and even specialized drill bit sharpeners have each brought something unique to the table, offering different benefits and efficiencies. Don’t be afraid to explore and find what works best for you!
And there we have it! A few extra tips to keep our sharpening game strong and our drill bits in peak condition. Remember, finding what works best for you is key, and a little experimentation can go a long way in finding your perfect sharpening routine. In the upcoming sections, we’ll tackle some frequently asked questions to quench our thirst for knowledge even further. Stick around, and let’s continue this journey to sharper, more effective drilling together!

FAQs: Sharpening Your Wood Splitting Drill Bit
Navigating through the world of tool maintenance, especially sharpening our beloved drill bits, can spark a few questions. It’s a journey of continuous learning, and we’re here to explore it together! Below, we’ve compiled a few frequently asked questions to quench your curiosity and ensure your sharpening journey is smooth and effective. Let’s dive into some of the queries that fellow tool enthusiasts, like you, often ponder.
How often should I sharpen my wood splitting drill bit?
The frequency of sharpening your drill bit largely depends on usage. If you notice a decrease in performance, visible dullness, or find yourself applying extra pressure during use, it’s likely time for a sharpen. Regular checks and maintaining a log of usage can help you establish a sharpening routine that ensures your bit is always in peak condition.
Can I use a machine to sharpen my drill bits?
Absolutely! While this guide focuses on using a file, there are various drill bit sharpening machines available that can provide a quick and precise sharpening experience. The choice between manual and machine sharpening boils down to personal preference, available tools, and the specific requirements of your drill bits.
Is there a risk of damaging my drill bit if I sharpen it incorrectly?
Yes, incorrect sharpening techniques can potentially damage the drill bit. Over-filing, altering the original angles, or uneven sharpening can impact the bit’s performance and lifespan. That’s why it’s crucial to understand the bit’s anatomy, use consistent filing strokes, and maintain the correct angles during the sharpening process.
Conclusion
And there we have it, my fellow tool enthusiasts – a comprehensive journey from recognizing the dullness in our wood splitting drill bits to bringing them back to their sharp, efficient selves. Together, we’ve delved into the anatomy of our bits, understood the signs of wear and tear, and navigated through the sharpening process with care and precision.
Let’s not forget those key steps on how to sharpen a wood splitting drill bit with a file:
- Preparing and cleaning our bit,
- Identifying and respecting those crucial angles,
- Navigating through the sharpening process with a steady hand, and
- Testing to ensure our bit is ready to get back to work.
Remember, my friends, regular maintenance is our ticket to smooth, efficient, and enjoyable woodworking. Keeping our bits sharp not only ensures the quality of our work but also keeps our projects running smoothly and safely. A little care goes a long way in maintaining the longevity and effectiveness of our tools.
As we wrap up our time together, I encourage you to embrace the process, find joy in maintaining your tools, and take pride in your woodworking projects, knowing that they’re backed by well-cared-for equipment. May your bits stay sharp, your holes be smooth, and your woodworking adventures be ever enjoyable!
Feel free to revisit this guide whenever your bits need a little TLC, and don’t hesitate to explore further, finding additional resources and techniques that work best for you. Happy drilling, and until next time, keep those bits sharp!

Join The Community
Hey there, fellow tool lover! If you’ve found your way through this guide, it’s clear you have a passion for keeping your tools in tip-top shape and your projects running smoothly. But why journey alone when there’s a whole community of like-minded individuals ready to welcome you with open arms?
🛠 Join our community at ImpactDriverDrill.com! 🛠
Here, we dive even deeper into the world of tools, sharing tips, tricks, and insights that go beyond the bit. Whether you’re a seasoned pro or just starting out, there’s a spot for you in our vibrant, supportive community.
- Share Your Stories: We want to hear about your projects, your successes, and even those pesky mishaps. Your experiences bring invaluable insights to our community, and who knows, your story might just be the solution someone else has been searching for!
- Learn and Grow: Our community is a treasure trove of knowledge, with members sharing their own tips, tricks, and advice on everything from tool maintenance to project ideas.
- Celebrate Together: Whether it’s a project gone right or finally mastering the art of sharpening, we’re here to celebrate those victories with you, big or small.
So, what do you say? Ready to take your tool journey to the next level and meet others who share your passion? Join our community, and let’s keep the conversation, learning, and celebrations going!