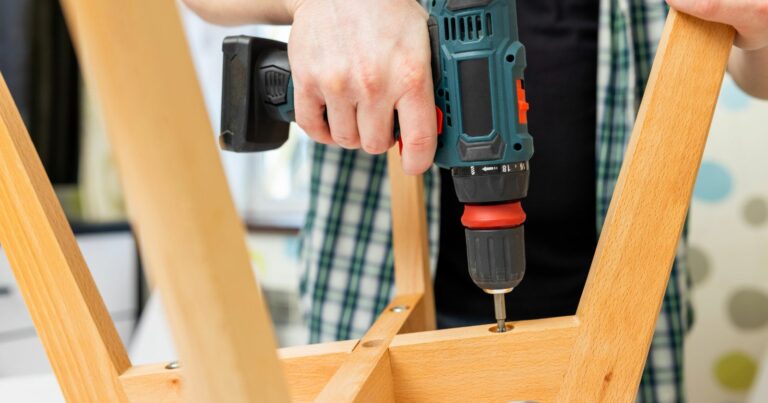
Installing A Kitchen Cabinet Using An Impact Driver
When it comes to DIY projects, especially those as significant as renovating your kitchen, the difference between a frustrating experience and a triumphant makeover often boils down to having the right tools at your disposal. It’s not just about the skill in your hands or the vision in your mind; it’s equally about the efficiency, precision, and reliability of the tools you use. This is where the magic of an impact driver comes into play, particularly when you’re tackling tasks like installing a kitchen cabinet.
The target keyword for today’s deep dive is Installing A Kitchen Cabinet Using An Impact Driver, a phrase that might seem specific but opens the door to a world of DIY empowerment and efficiency. Whether you’re a seasoned DIY enthusiast or a beginner eager to transform your space, understanding how to leverage an impact driver for installing kitchen cabinets can elevate your home improvement projects from daunting to doable, all while ensuring a professional finish.

Why Use an Impact Driver for Kitchen Cabinet Installation?
Installing kitchen cabinets is a task that demands precision, power, and efficiency. While several tools can get the job done, an impact driver stands out for its unique advantages. Let’s dive into why an impact driver is your best ally for this project.
The Power Difference
Comparison of torque and speed between impact drivers and traditional drills: An impact driver offers significantly higher torque and speed compared to traditional drills. This difference is crucial when working with kitchen cabinets, where you often encounter hard materials and the need for fast, powerful driving. The impact driver’s mechanism allows it to deliver force directly to the screw, minimizing effort and reducing the time spent on each screw. This power difference not only makes the installation process smoother but also helps prevent the common issue of under-driving screws, ensuring your cabinets are securely attached.
Precision and Control
How an impact driver provides better control over screw driving, reducing the risk of damage: One of the fears when installing kitchen cabinets is damaging the cabinet material or the wall. An impact driver addresses this concern head-on. Its design allows for more precise control over the amount of torque applied, significantly reducing the risk of stripping screws or damaging surfaces. This precision comes from the impact driver’s ability to apply bursts of high torque, giving you the control to drive screws to the perfect depth without overdoing it.
Efficiency and Time-Saving
Examples of time saved during installation projects: Time is of the essence in any DIY project, and using an impact driver for installing kitchen cabinets can be a real game-changer. For instance, consider the process of mounting a series of upper and lower cabinets. With a traditional drill, you might find yourself constantly fighting against resistance, leading to fatigue and extended project time.
An impact driver, however, makes quick work of screws and fasteners, significantly cutting down installation time. This efficiency is not just about speed; it’s also about the reduced physical strain, allowing you to maintain focus and energy throughout the project. Whether you’re working on a single cabinet or an entire kitchen, the time savings add up, making the impact driver an invaluable tool in your DIY arsenal.

Preparing for Installation
Before diving into the actual installation of your kitchen cabinets, it’s crucial to gather all necessary tools and materials and ensure you’re prepared for a safe and efficient process. Here’s what you need to get started:
Tools and Materials Needed
- Impact driver: The star of the show, providing the power and precision needed for the job.
- Screws: Ensure you have the right type and size for your cabinets and walls.
- Drill bits: For pre-drilling holes in your cabinets or walls, if necessary.
- Level: Essential for making sure your cabinets are perfectly horizontal.
- Measuring tape: For accurate placement and spacing of your cabinets.
- Stud finder: To securely anchor your cabinets to the wall.
- Pencil: For marking drill points and alignment lines on the wall.
Gathering these tools and materials beforehand will streamline your installation process, making it smoother and more efficient.
Safety Gear
Safety should never be an afterthought when undertaking any DIY project, especially one involving power tools and heavy lifting.
- Safety glasses:, Protect your eyes from dust and debris.
- Gloves: To improve grip and protect your hands.
- Ear protection: Especially important when using power tools for extended periods.
Equipping yourself with the right safety gear minimizes the risk of injury, ensuring a safer working environment.
Pre-Installation Checklist
Before you start drilling and mounting, a few preparatory steps are necessary to ensure a successful installation:
Measuring and marking: Carefully measure the space where your cabinets will go, using a pencil to mark where each cabinet will be installed. This step is crucial for alignment and spacing.
Checking wall alignment: Use a level to check if the walls are straight and even. Uneven walls may require adjustments during installation to ensure your cabinets are level.
Identifying stud locations: Use a stud finder to locate the studs in your wall. Securing the cabinets into studs is essential for stability and support, especially for heavy upper cabinets.
Taking the time to properly prepare for your kitchen cabinet installation not only makes the process smoother but also helps avoid common pitfalls that could delay or complicate your project. With your tools, materials, and safety gear ready, and a thorough pre-installation checklist completed, you’re set to move forward with confidence.
Watch This Video And Learn About Installing A Kitchen Cabinet Using An Impact Driver
Step-by-Step Guide: Installing A Kitchen Cabinet Using An Impact Driver
Embarking on the journey of installing kitchen cabinets can be a rewarding DIY project. With an impact driver in hand, you’re well-equipped to tackle the task with efficiency and precision. Follow this step-by-step guide to ensure your kitchen cabinets are installed perfectly.
Step 1: Layout and Planning
Determining cabinet placement: Before anything else, decide where each cabinet will go. Consider the layout of your kitchen, appliance locations, and how you plan to use the space.
Using a level and pencil for marking: With your layout decided, use a level to draw straight, horizontal lines where the bottom of the upper cabinets will align. Similarly, mark the top of where the base cabinets will sit. These lines are your guides to ensure cabinets are level and evenly spaced.
Step 2: Preparing the Cabinets
Removing doors and hardware: To make the cabinets lighter and easier to handle, remove any doors and hardware. This step prevents damage and makes it easier to adjust and align the cabinets during installation.
Checking for any adjustments: Inspect each cabinet for any necessary adjustments. Ensure all components fit correctly and make any modifications before mounting them to the wall.
Step 3: Mounting the Upper Cabinets
Techniques for securing cabinets to the wall: Start with the upper cabinets. Locate the studs using a stud finder and mark their positions. Hold the cabinet against the wall, aligning it with your marks. Use your impact driver to secure the cabinet to the wall studs with screws. Ensure each cabinet is level before and after securing it.
Ensuring they are level and aligned: Use clamps to hold adjacent cabinets together, checking alignment and levelness before joining them with screws. This step is crucial for a uniform appearance and functionality.
Step 4: Installing the Base Cabinets
Adjusting for floor unevenness: Floors are rarely perfectly level, especially in older homes. Use shims under the base cabinets to adjust for any unevenness, ensuring the top of each cabinet is level.
Attaching cabinets together: Similar to the upper cabinets, clamp adjacent base cabinets together, checking for alignment and levelness. Once satisfied, secure them together and to the wall, ensuring they’re anchored into studs for maximum stability.
Step 5: Finishing Touches
Reattaching doors and installing hardware: With the cabinets securely in place, reattach the doors and install any hardware like handles or knobs. Adjust the hinges as needed to ensure the doors open and close smoothly.
Final adjustments: Take a step back and inspect your work. Check for any misalignments or uneven gaps between doors and cabinets. Make any necessary adjustments to ensure everything looks perfect.
Following these steps with care and attention to detail will lead to a beautifully installed set of kitchen cabinets. The power and precision of an impact driver make it an indispensable tool for this project, ensuring that each screw is driven perfectly, contributing to the overall stability and aesthetic of your new kitchen.

Troubleshooting Common Installation Issues
Even with careful planning and execution, you might encounter a few hiccups along the way when installing kitchen cabinets. Here’s how to troubleshoot some of the most common issues, ensuring your project stays on track and your cabinets look and function as they should.
Problem: Misaligned Cabinets
Solution: How to realign using shims and adjusting screws. If you notice your cabinets are not perfectly aligned, don’t panic. This is a common issue that can be easily fixed with shims and adjusting screws. First, determine where the misalignment occurs. If a cabinet is too high or low, loosen the screws slightly, insert shims behind the cabinet at the mounting points to adjust the height or depth, and then retighten the screws. For side-to-side alignment, you may need to loosen the screws that connect adjacent cabinets and adjust as necessary before retightening.
Problem: Stripped Screws
Solution: Techniques for removal and replacement using an impact driver. Stripped screws can be a nuisance, especially when they compromise the stability of your cabinets. To remove a stripped screw, you can try placing a rubber band over the screw head and then gently using your impact driver to remove it. The rubber band provides extra grip. Once removed, replace the stripped screw with a new one of the same size. If the hole has become too large, you might need to use a slightly larger screw or fill the hole with wood filler and re-drill a new pilot hole once it’s dry.
Problem: Damaged Wall Surface
Solution: Repair tips and how to avoid during installation. Accidentally damaging the wall surface during installation can be frustrating. To repair minor damage, such as small holes or scratches, use lightweight spackle or joint compound, apply it smoothly over the area, and sand it down once dry. For larger damages, you might need to use a patching kit or even cut out and replace sections of drywall. To avoid damaging walls, always drill slowly and carefully, use the correct drill bit size, and ensure you’re drilling into studs, not just the drywall. Additionally, placing a piece of painter’s tape over the area where you’ll drill can help prevent the surface from cracking or chipping.
By addressing these common issues promptly and effectively, you can keep your kitchen cabinet installation project moving forward smoothly. Remember, patience and attention to detail are key to overcoming these challenges and achieving a professional-looking finish.

Wrapping Up Installing A Kitchen Cabinet Using An Impact Driver
Throughout this post, I’ve explored the ins and outs of installing kitchen cabinets using an impact driver, highlighting the tool’s advantages in power, precision, and efficiency. I’ve walked through the preparation phase, detailing the necessary tools, materials, and safety gear. My step-by-step guide provided a roadmap for the installation process, from layout and planning to the finishing touches that bring your project to completion. I have also tackled common installation issues, offering solutions to keep your project on track. I discussed the importance of maintaining and caring for your impact driver to ensure it remains a reliable companion for your DIY endeavors.
I would love to hear from you! Share your experiences, challenges, or tips on using impact drivers for home projects in the comments below. Your stories not only inspire but also build a community of DIYers who learn from each other’s successes and setbacks. So, grab your impact driver, and let’s make those DIY dreams a reality!