Using An Impact Driver For Framing And Construction
When it comes to framing, whether you’re a seasoned contractor or a DIY enthusiast, the significance of having the right tools at your disposal cannot be overstated. Framing is the backbone of any construction project, setting the stage for the integrity and durability of the final structure. It’s a task that demands precision, efficiency, and, most importantly, the right equipment. That’s where the Impact Driver for Framing comes into play, a tool that has revolutionized the way we approach framing projects.
In this post, I will dive deep into why an impact driver is a must-have for framing, how to select the right one for your needs, and some tips and tricks to get the most out of this powerful tool. Whether you’re building a new home, adding an extension, or simply putting up a garden shed, understanding the role of an impact driver in framing can make all the difference in the quality and efficiency of your work. So, let’s get started on this journey to framing excellence with the help of the right impact driver.
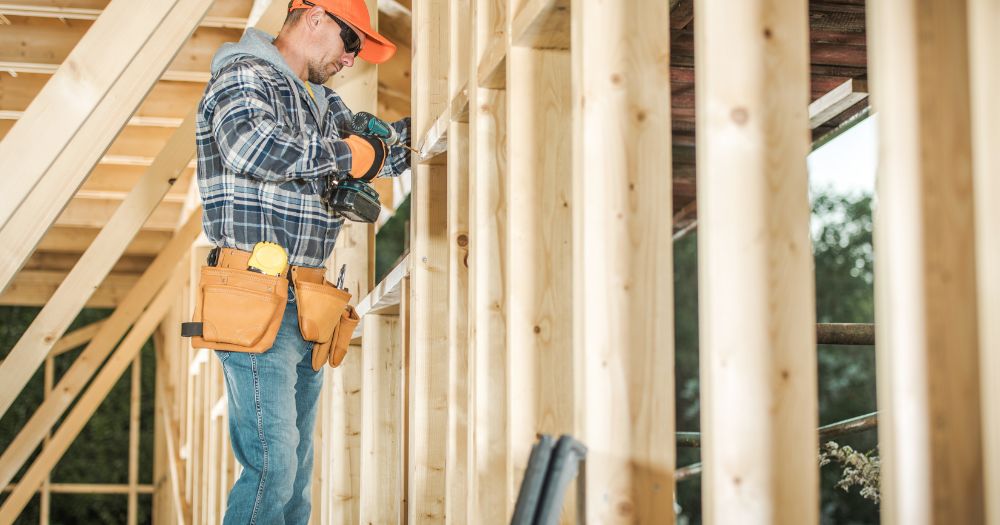
Step By Step Guide Using An Impact Driver For Framing And Construction
Step 1: Safety First
- Wear Protective Gear: Always wear safety glasses and gloves to protect yourself from flying debris and sharp objects.
- Secure the Area: Ensure your working area is clean, well-lit, and free of any obstacles that might cause you to trip or fall.
Step 2: Prepare Your Materials
- Gather Materials: Have all your framing materials, such as wood studs, plates, and sheathing, ready and within reach.
- Select the Right Bit: Choose the appropriate bit for the screws you’ll be using. For framing, you’ll often use longer, thicker screws, so a bit that matches the screw head is crucial.
Step 3: Set Up Your Impact Driver
- Insert the Bit: Place the bit into the chuck of the impact driver, ensuring it’s securely fastened.
- Adjust Settings: If your impact driver has speed or torque settings, adjust them according to the thickness of the materials you’re working with. A higher torque setting is useful for driving screws into harder materials.
Step 4: Practice
- Test on Scrap Material: Before starting your actual project, practice driving screws into a piece of scrap wood. This will help you get a feel for the tool’s power and how much pressure to apply.
Step 5: Start Framing
- Align Your Materials: Carefully align the wood pieces that you’ll be joining together.
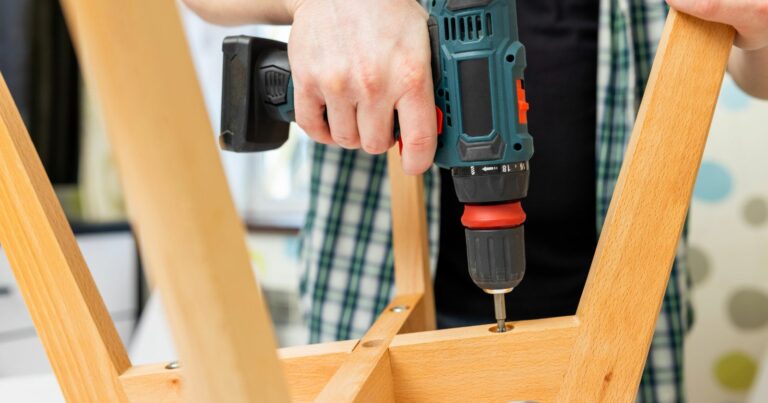
- Drive the Screws: Place the tip of the bit into the screw head, then gently press the trigger. Increase pressure gradually until the screw is driven into the wood at the desired depth.
- Repeat: Continue this process, driving screws at each point where the wood pieces intersect or where your framing plan indicates.
Step 6: Inspect and Adjust
- Check for Alignment: After securing a few pieces together, pause to ensure everything is aligned correctly and adjust as necessary.
- Tightness: Make sure all screws are driven to a consistent depth and are tight enough to hold the frame securely.
Step 7: Continue Framing
- Work Methodically: Continue working through your framing project, following your plans and ensuring each piece is securely fastened.
Step 8: Final Inspection
- Examine Your Work: Once all pieces are assembled, do a thorough inspection of the frame to ensure it’s sturdy and meets your project’s requirements.
- Make Adjustments: If you find any loose screws or misaligned pieces, adjust them as needed.
Tips:
- Battery Life: Keep an extra battery charged and on hand if you’re working on a large project to avoid downtime.
- Spare Bits: Have spare bits available in case one wears out or breaks.
Using an impact driver for framing can significantly increase the efficiency and quality of your work. With practice, you’ll find it an indispensable tool in your construction or DIY toolkit.

Understanding Impact Drivers for Framing
When starting on any framing project, the choice of tools can make a significant difference in both the outcome and the experience of the work. Among these tools, the impact driver stands out for its specific advantages, especially when it comes to framing. Let’s break down what an impact driver is and why it’s particularly suited for framing tasks.
Why Use an Impact Driver for Framing?
Framing requires the assembly of structural components, which means working with dense materials and needing to drive fasteners securely and quickly. Here’s where the impact driver shines:
- Efficiency: The impact driver’s high torque output means fasteners are driven in more quickly than with a standard drill, speeding up the framing process significantly.
- Precision: Despite their power, impact drivers are surprisingly precise. They allow for greater control over the driving process, reducing the risk of stripping screws or damaging materials.
- Reduced Fatigue: The concussive action of the impact driver takes much of the strain away from the user’s hand and wrist, reducing fatigue during long framing projects.
- Versatility: While their primary function is driving screws, impact drivers can also handle a variety of other tasks with the right attachments, making them a versatile addition to any tool collection.
In framing applications, the ability to quickly and securely fasten materials together without stripping screws or causing user fatigue is invaluable. Whether you’re working on a residential home, a commercial building, or a simple DIY project, an impact driver can significantly enhance the efficiency and quality of your work.
By understanding the unique benefits and operation of impact drivers, it’s clear why they are considered essential tools for framing. Their combination of power, precision, and efficiency makes them unmatched in the realm of fastening tools, especially in the demanding context of framing projects.

Key Features to Look for in an Impact Driver for Framing
Selecting the right impact driver for framing is not just about picking the most powerful or the most expensive model. It’s about understanding the specific features that make an impact driver suitable for the demands of framing projects. Here are the key features to consider when choosing an impact driver for your framing needs.
Power and Torque
The heart of an impact driver’s effectiveness lies in its power and torque. For framing, where you’re driving screws into dense materials and need to do so efficiently, the torque output is critical.
- Why Power and Torque Matter: High torque ensures that screws are driven deeply and securely, which is essential for the structural integrity of framing projects. Power, measured in watts, influences the driver’s ability to perform under load without overheating or bogging down.
- Assessing Power Needs: Consider the scale and nature of your framing projects. Heavy-duty projects require an impact driver with a high torque rating, typically measured in Newton-meters (Nm) or inch-pounds (in-lbs). A higher number indicates more driving power, which is crucial for framing.
Battery Life and Type
For cordless impact drivers, the battery is a key factor that affects performance and convenience on the job site.
- Importance of Battery Life: Long battery life ensures that you can work through your project without constant interruptions for recharging. This is especially important for large framing projects or when working in areas where charging options are limited.
- Comparison of Battery Types: Lithium-ion batteries are the most common in modern impact drivers, offering a good balance of weight, capacity, and longevity. When choosing, look for higher ampere-hour (Ah) ratings, which indicate a longer battery life. Also, consider models with fast charging capabilities to minimize downtime.
Size and Weight
An impact driver’s size and weight directly influence its usability, especially during long framing sessions.
- Balance Between Power and Ergonomics: A lightweight and compact design makes an impact driver easier to maneuver and use in tight spaces, which are common in framing projects. However, this should not come at the expense of power and durability.
- Impact on User Fatigue and Project Efficiency: A heavier tool can lead to quicker onset of fatigue, reducing efficiency and potentially compromising safety. Look for a model that offers a good balance, providing enough heft to feel sturdy but not so much that it becomes cumbersome over time.
Speed Settings and Control
The ability to adjust speed settings allows for greater control over the driving process, which can be crucial when working with different materials and fastener sizes.
- How Variable Speed Settings Enhance Control: Variable speed settings allow you to adjust the driving speed based on the task at hand. For delicate framing materials or when precision is paramount, being able to lower the speed can prevent damage and ensure more accurate fastener placement.
- Importance for Different Framing Materials and Tasks: Different framing tasks, from installing delicate trim pieces to securing structural beams, require different speeds and torque settings. An impact driver with multiple speed settings and an easy-to-use control system offers the versatility needed to tackle these varied tasks effectively.
When choosing an impact driver for framing, considering these key features will help you select a tool that not only meets the demands of your projects but also enhances your efficiency and effectiveness on the job. The right impact driver becomes an extension of your hand, allowing you to work smarter, not harder.
Watch This Video And Learn About Using An Impact Driver For Framing And Construction
Top Impact Drivers for Framing: A Comparative Review
In the world of construction and DIY projects, having the right impact driver for framing can make a significant difference in the quality and efficiency of your work. With so many options on the market, it can be challenging to choose the one that best fits your needs. To help you make an informed decision, I’ve reviewed three top impact drivers, highlighting their key features, pros and cons, and specific benefits for framing projects.
DeWalt Review: The Power Dynamo

Key Features:
- Exceptional torque for demanding framing jobs.
- State-of-the-art battery technology extends operation time.
- Designed ergonomically to reduce fatigue during use.
Pros:
- Unmatched efficiency and power.
- Extended battery life for continuous work without the need for frequent recharging.
- Comfortable for long-duration use.
Cons:
- Its weight may hinder maneuverability.
- Priced higher than other options.
Framing Specific Benefits:
The DeWalt model shines in heavy-duty framing tasks, offering a blend of power and endurance. Its ergonomic design and prolonged battery life make it a worthy investment for professionals.
Makita Review: The Agile Performer

Key Features:
- A compact and light build, maintaining high power.
- Adjustable speed settings for superior control.
- Rapid charge battery reduces downtime.
Pros:
- User-friendly, minimizing fatigue.
- Adaptable speed settings for various framing materials and tasks.
- Quick charging keeps the tool ready at all times.
Cons:
- Torque slightly lower than the most robust models.
- Battery longevity may decrease with constant heavy use.
Framing Specific Benefits:
Makita’s model excels in balancing power with ergonomic design, ideal for DIYers and professionals seeking precision and ease of use in their framing projects.
Milwaukee Review: The Versatile Workhorse

Key Features:
- Balanced power, weight, and battery lifespan.
- Built for durability.
- Intuitive controls for effortless operation.
Pros:
- Versatile performance for diverse framing jobs.
- Durable construction ensures lasting value.
- Simple to use, suitable for both novices and seasoned users.
Cons:
- May not outperform in specific areas compared to more specialized models.
- Some may prefer more niche features.
Framing Specific Benefits:
Milwaukee’s offering is the all-rounder, providing reliable performance for a wide range of framing tasks. It’s an excellent choice for those requiring a versatile impact driver that is easy to handle.
Tips for Choosing the Right Model
When selecting an impact driver for your framing projects, consider the following:
- Matching Features to Project Needs: Assess the scope and requirements of your projects. If you’re dealing with heavy-duty framing, prioritize power and battery life. For more detailed work, look for a model with variable speed settings and good ergonomics.
- Considering the Long-term Value vs. Upfront Cost: While some models may be more expensive, their durability, battery technology, and efficiency can offer better value over time. Weigh the initial investment against the benefits you’ll receive during the tool’s lifespan.
Choosing the right impact driver for framing involves balancing power, ergonomics, and specific project requirements. By considering these factors, you can select a model that not only meets your current needs but also serves you well in future projects.

Troubleshooting Common Issues with Impact Drivers in Framing
Even with the best tools and accessories, encountering issues during framing projects is not uncommon. Impact drivers, while incredibly efficient, can present challenges such as stripped screws and battery performance issues. Let’s explore some effective troubleshooting techniques and tips to overcome these common problems, ensuring your framing projects proceed smoothly.
Overcoming Stripped Screws and Fasteners
Stripped screws can halt your progress and potentially damage your materials. Here are some techniques and tips to avoid or deal with this frustrating issue:
- Prevention is Key: Use high-quality, impact-rated bits that fit the screw head snugly. Applying the correct pressure and speed can also prevent stripping.
- Correct Technique: Ensure the bit is fully inserted into the screw head before starting. Apply steady pressure and start slowly to ensure the bit does not slip.
- Use a Screw Extractor: If a screw does become stripped, a screw extractor kit can be a lifesaver. These kits are designed to grip into the stripped head and allow you to reverse the screw out.
- Replacement: Sometimes, the best solution is to replace the stripped screw with a new one. This can prevent further damage to the material and ensure a secure fit.
Managing Battery Life and Performance
Maximizing the performance and lifespan of your impact driver’s battery is crucial for efficient framing work. Here are some tips to help you get the most out of your batteries:
- Use Proper Charging Practices: Avoid leaving batteries on the charger for extended periods after they are fully charged. Overcharging can reduce battery life over time.
- Keep Batteries Clean and Cool: Dust and debris can affect battery connections, reducing efficiency. Store batteries in a cool, dry place to prevent overheating and potential damage.
- Rotate Batteries: If you have multiple batteries, rotate their usage to ensure even wear and prolong their lifespan.
- Understand Your Tool’s Requirements: Using your impact driver on its optimal settings for the task at hand can conserve battery life. Adjusting the speed and torque settings according to the material and screw size can make a significant difference.
By adopting these troubleshooting tips, you can enhance the efficiency and longevity of your impact driver, making it a reliable partner in all your framing projects. Whether you’re dealing with stubborn screws or managing battery life, these strategies will help you maintain your pace and quality of work, ensuring successful project outcomes.
Wrapping Up Using An Impact Driver For Framing And Construction
Choosing the right impact driver for your framing projects is more than a matter of convenience; it’s a decision that directly impacts the quality, efficiency, and enjoyment of your work. Throughout this guide, I’ve explored the critical features that distinguish the best impact drivers for framing, from power and torque to battery life and ergonomic design. I’ve also reviewed top models, offering insights into their specific benefits for framing tasks, and provided tips for selecting the model that best meets your needs.
I would love to hear from you! If you have experiences to share, questions about selecting the right impact driver, or tips for fellow framing enthusiasts, please leave a comment below. Your insights can help build a community of knowledgeable, skilled individuals who take pride in their work and the tools they use to accomplish it.

