Building A Workbench With An Impact Driver
Welcome to the world of DIY and professional craftsmanship, where the heart of every project begins at a single, crucial point: the workbench. A sturdy workbench isn’t just a luxury; it’s a necessity for anyone serious about their craft, from the weekend warrior to the seasoned pro. It’s the foundation upon which all your projects come to life, a steadfast partner in the dance of creation. But here’s a twist. What if I told you that building this central piece of your workshop could be simplified, streamlined, and even made enjoyable with the right tool? Enter the impact driver, a game-changer in the world of power tools.
Today, I will be diving into the process of Building A Workbench With An Impact Driver, showcasing how this dynamic tool can transform the way you approach this essential project. So, buckle up and let’s get ready to build not just a workbench, but a cornerstone for your future creations.

Why Use an Impact Driver for Your Workbench Project?
When Starting on the journey of creating a workbench, the choice of tools can make all the difference. While the traditional drill has long been a staple in the toolboxes of DIY enthusiasts and professionals alike, the impact driver emerges as a superior contender for tasks demanding high precision and power. Let’s delve into why an impact driver should be your go-to tool for this project.
Impact-Site-Verification: 2037c29e-f75e-495d-9283-df2da1cb82e6
The Power Behind the Tool
At first glance, impact drivers and traditional drills might seem interchangeable. However, the distinction lies in their operation and output. Impact drivers are designed to deliver a powerful combination of rotational force and concussive blows. This unique mechanism translates to an unmatched torque, far surpassing what a standard drill can offer.
Benefits in terms of torque and efficiency:
- Higher Torque: Impact drivers generate significantly more torque than traditional drills, making them ideal for driving large screws and bolts with ease.
- Efficiency: With an impact driver, you’ll find that tasks are completed faster and with less effort on your part. This efficiency is a game-changer when building a workbench, where numerous fastenings are required.
Versatility and Precision
One might wonder if such a powerful tool sacrifices precision for strength. The answer is a resounding no. In fact, the impact driver’s design not only accommodates a wide range of tasks but also enhances precision.
Types of tasks an impact driver excels at:
- Driving Screws: Whether it’s securing the legs of your workbench or attaching a vise, the impact driver sinks screws effortlessly and securely.
- Boring Holes: With the right bit, an impact driver can also bore holes, making it a versatile tool for prepping your workbench’s surface or assembling joinery.
Contribution to precision in building a workbench:
- The impact driver’s compact size and lightweight design allow for greater control and maneuverability, ensuring that each fastening is placed with precision.
- Its high torque output reduces the likelihood of stripping screws, a common issue when precision is paramount.
The impact driver is not just a tool but a pivotal ally in the construction of your workbench. Its blend of power, efficiency, versatility, and precision makes it an indispensable part of the building process, ensuring that your workbench is not only sturdy but also a testament to the quality of your craftsmanship.

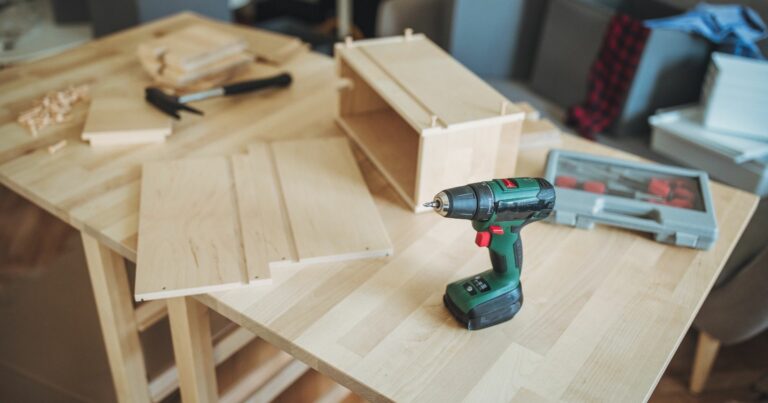
Step-by-Step Guide to Building a Workbench with an Impact Driver
Building a workbench might seem like a daunting task, but with an impact driver and a bit of know-how, it becomes an achievable and rewarding project. Follow this step-by-step guide to create a sturdy and functional workbench for your workspace.
Cutting the Wood to Size
Safety Tips:
- Always wear safety glasses and gloves to protect yourself from splinters and sawdust.
- Ensure your work area is well-lit and free of any obstructions.
- Keep your fingers away from the path of the saw blade.
Step-by-Step Cutting Instructions:
- Measure twice, cut once: Double-check your measurements before making any cuts to avoid mistakes.
- Mark your lumber with a pencil and a straight edge for precise cuts.
- Use clamps to secure the wood to your work surface, ensuring it doesn’t move while cutting.
- Follow your marked lines with a circular saw, keeping the saw steady and at a consistent speed for clean cuts.
Assembling the Frame
Detailed Assembly Steps:
- Lay out the cut pieces for the frame on your work surface, arranging them in their final positions.
- Apply wood glue at the joints for extra strength.
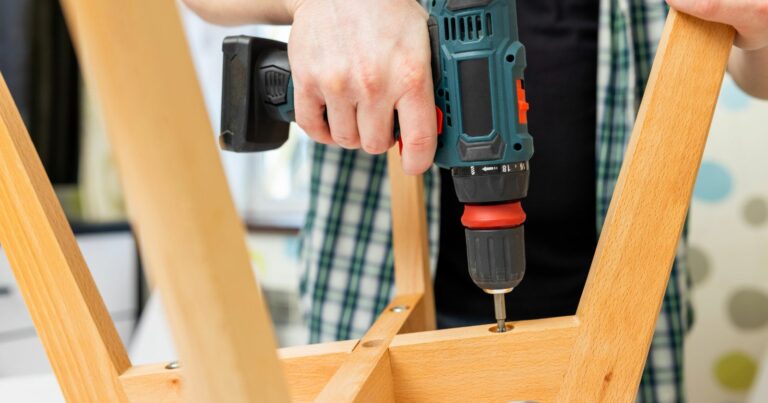
- Use your impact driver and wood screws to join the pieces together. Start with the corners, ensuring they are square.
- For the best results with your impact driver, pre-drill holes to avoid splitting the wood, especially near the ends.
How and Where to Use the Impact Driver for Best Results:
- When driving screws, apply steady pressure and let the impact driver do the work. The high torque will drive screws quickly and efficiently without stripping them.
- Use the impact driver for attaching the legs to the frame, ensuring a tight and secure fit.
Attaching the Workbench Top
Preparing the Top:
- Once the frame is assembled, lay the workbench top upside down on a flat surface.
- Place the frame on top, centering it on the underside of the workbench top.
Securing it to the Frame with Precision:
- Pre-drill holes through the frame and into the underside of the top to prevent wood splitting.
- Use your impact driver to secure the top to the frame with screws, ensuring an even distribution for a firm attachment.
Finishing Touches
Sanding and Treating the Wood:
- Sand the entire workbench, starting with a coarse grit sandpaper and working your way up to a fine grit for a smooth finish.
- Apply a wood treatment or sealant to protect the wood from moisture and wear. This will also give your workbench a professional, finished look.
Optional Additions like Drawers or Shelves:
- Consider adding drawers or shelves for additional storage. Measure and cut the wood to fit, then assemble using your impact driver.
- Attach the drawers or shelves to the frame, ensuring they are secure and level.
By following these detailed steps and utilizing your impact driver, you’ll build a sturdy, functional workbench that will serve as a cornerstone for countless projects. Enjoy the process and the satisfaction of creating something truly valuable for your workspace.
Watch This Video And Learn About Building A Workbench With An Impact Driver
Troubleshooting Common Issues
Even with careful planning and execution, you might encounter a few hiccups along the way when building your workbench. Here are some common issues related to using an impact driver and how to troubleshoot them, ensuring your project stays on track.
Problems with Screws
Stripping Heads:
- Stripping screw heads can be frustrating and is often caused by not applying enough pressure or using a bit that doesn’t fit the screw head properly. To avoid this, make sure you’re using the correct bit size for your screws and apply firm pressure when driving the screws in. If you encounter a stripped screw, use a screw extractor to remove it.
Breaking Screws:
- Screws may break due to excessive force or using screws that are too thin for the task. To prevent breaking screws, ensure you’re using the appropriate size and length for the material thickness. Pre-drilling holes can also reduce the stress on screws, minimizing the chances of them breaking.
Fixing Misalignments
Adjusting for Square and Level:
- Misalignments can throw off the entire project, making your workbench wobbly or uneven. If you notice any misalignment:
- Check the squareness of your frame by measuring diagonally from corner to corner. The measurements should be equal. If they’re not, adjust the frame until they match.
- Use a level to check the top of your workbench. If it’s not level, you may need to adjust the legs or add shims under the legs to balance it out.
- Ensure all connections are tight and secure. Sometimes, loosening the screws and realigning the pieces before tightening them again can fix misalignments.
By addressing these common issues promptly, you can ensure your workbench is sturdy, level, and ready for any project you undertake. Remember, building a workbench is not just about following steps but also about adapting and solving problems as they arise. With your impact driver in hand and a bit of patience, you’ll be well-equipped to tackle these challenges and achieve a great result.

Wrapping up Building A Workbench With An Impact Driver
As I wrap up our journey on Building A Workbench With An Impact Driver, it’s clear to see the unmatched benefits this powerful tool brings to the table. From simplifying the assembly process with its high torque and efficiency to ensuring precision and versatility in every task, the impact driver proves to be an indispensable ally in the world of DIY and professional craftsmanship.
Remember, the journey of Building A Workbench With An Impact Driver doesn’t end here. It’s a continuous process of learning, experimenting, and improving. So, grab your tools, let your creativity flow, and build a space that inspires you to create, innovate, and achieve.
Thank you for following along, and happy building!