How to Set Up a Bench Grinder: A Beginner’s Guide in 5 Simple Steps
Hey there, fellow tool lovers! Just like you, I’ve got a soft spot for the good old bench grinder. This beast of a tool is a must-have in any self-respecting workshop, offering unmatched versatility for grinding, shaping, and sharpening tasks. But here’s the thing – to truly harness the power of your bench grinder, you need to set it up just right.
Now, you might be thinking, “I’ve got this. It can’t be that hard, right?” Well, it’s not exactly brain surgery, but How to Set Up a Bench Grinder is a topic that does need a bit of expertise. It’s not just about optimizing performance – safety is a big deal too.
That’s where I come in. Whether you’re a seasoned veteran or a fresh-faced beginner just dipping your toes into the vast ocean of DIY, I’m here to guide you. Step by step, I’ll walk you through the process of setting up a bench grinder. By the time we’re done, you’ll be ready to take on any grinding task with confidence and finesse. So, are you ready to get your hands dirty? Let’s dive in!

Suggested Reading: How To Sharpen A Wood Lathe: A Beginner’s Guide in 9 Steps
Understanding Your Bench Grinder
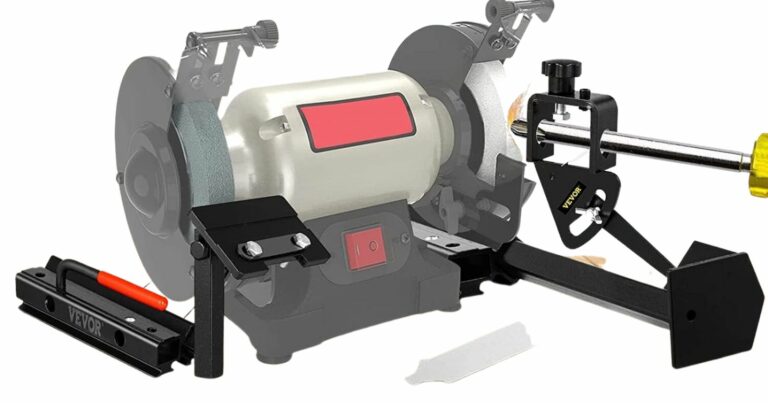
Hey there, my fellow tool aficionados! Before we roll up our sleeves and get down to the business of setting up your bench grinder, it’s crucial that we take a moment to really get to know this incredible piece of machinery. Sure, at first glance, a bench grinder might seem like a complex creature, but once we break it down, you’ll see it’s made up of a few key components. Let’s take a closer look, shall we?
Components of a Bench Grinder
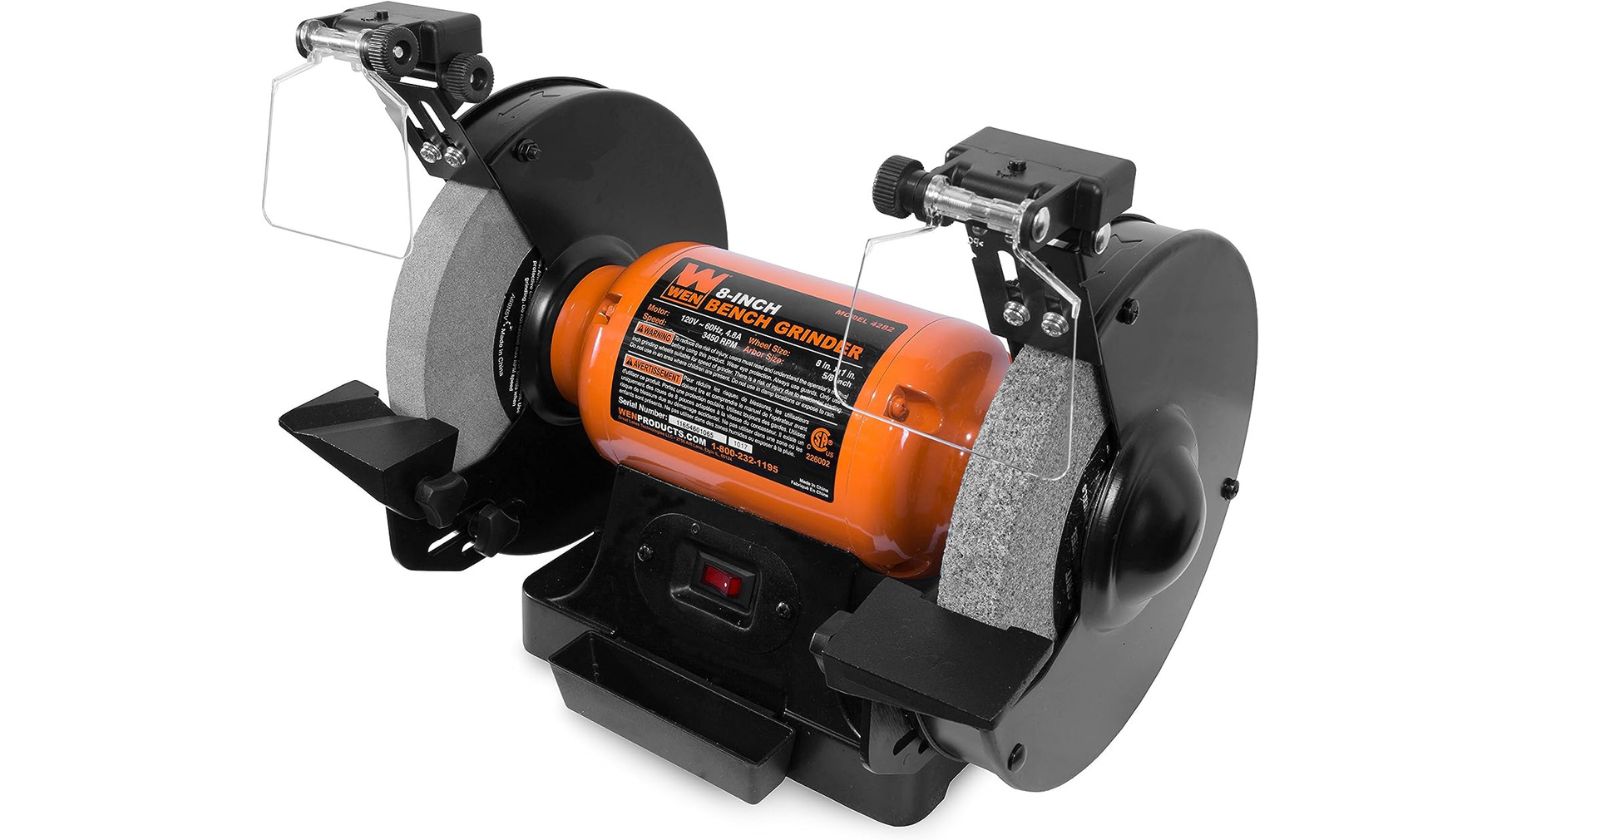
- Motor: This is the beating heart of your bench grinder. It’s the driving force that breathes life into the grinding wheels, setting them into a whirl of action. The motor is the muscle of your bench grinder, providing the necessary power to tackle all your grinding and sharpening tasks.
- Grinding Wheels: These are the real stars of the show. Grinding wheels come in a variety of grits, each designed for different types of grinding and sharpening tasks. Whether you’re looking to grind down a stubborn piece of metal or sharpen your trusty set of chisels, the right grinding wheel can make all the difference.
- Tool Rests: These are the unsung heroes of the grinding process. They provide a stable surface to hold your workpiece while it’s being ground. They’re like an extra pair of hands, offering support and stability during your grinding tasks.
- Eye Shields: Last, but by no means least, we have the eye shields. These safety devices are there to protect your eyes from sparks and debris. When you’re grinding, sparks can fly, and trust me, the last thing you want is a spark in your eye!
Safety Gear Needed
Now, before we dive headfirst into the setup process, it’s vital that we gear up for safety. Working with a bench grinder isn’t exactly a high-risk job, but as I always say, it’s better to be safe than sorry. Here’s the safety gear you’ll need:
- Safety Glasses: These are your first line of defense against sparks and debris. They’ll protect your eyes and ensure you can keep your eye on the job (pun very much intended!).
- Ear Protection: Bench grinders can be quite the noise-makers, especially if you’re working in a small or enclosed space. A good pair of earplugs or earmuffs can protect your hearing and make your grinding tasks a whole lot more comfortable.
- Work Gloves: These will protect your hands from sharp edges on the workpiece or the grinding wheels. Plus, they’ll give you a better grip on your workpiece, improving control and precision.
Now that we’ve got a solid understanding of our bench grinder and the safety gear we’ll need, we’re ready to dive into the setup process. So, let’s get our grind on!
Pre-Setup Preparations
Alright, my fellow tool enthusiasts! Now that we’re well-acquainted with our bench grinder and have our safety gear on standby, it’s time to gear up for the setup process. Proper preparation is the secret sauce to a smooth and successful setup. So, let’s dive in!
Choosing the Right Location
The spot you choose for your bench grinder in your workshop is more critical than you might initially think. Here’s what I keep in mind when I’m picking the perfect spot:
- Stability: My bench grinder needs a stable, flat surface to sit on. This isn’t just about performance – a wobbly grinder is a safety hazard waiting to happen. So, I always make sure I choose a spot where my grinder can sit firmly without any wobble or tilt.
- Lighting: Good lighting is a must when you’re working with tools. You need to see clearly what you’re doing, especially when you’re grinding or sharpening. So, I always pick a well-lit area for my bench grinder.
- Space: Grinding can be a messy affair with sparks and debris flying around. You need plenty of space around your grinder to move freely and safely. Plus, you don’t want to be bumping into other tools or workbenches while you’re grinding.
- Safety: I always steer clear of areas with flammable materials. Sparks from grinding can ignite these materials, leading to a fire hazard. Safety first, always!
Assembling Necessary Tools
Setting up a bench grinder isn’t a Herculean task, but you’ll need a few tools to do it right. Here’s what I always have on hand:
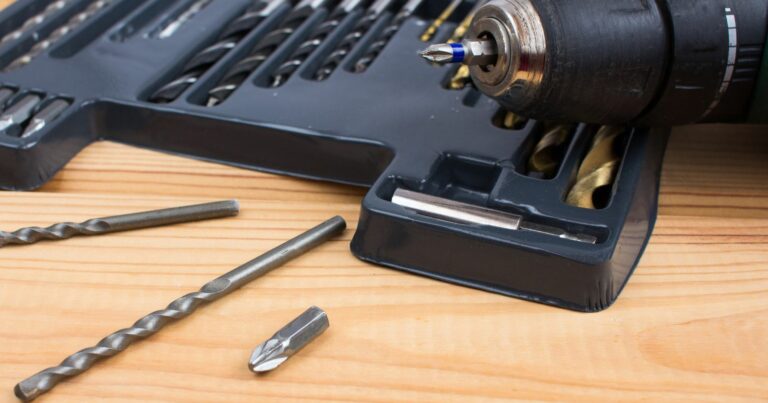
- Screwdrivers: I use these handy tools to attach the tool rests and eye shields. I make sure I have the right size to fit the screws on my grinder.
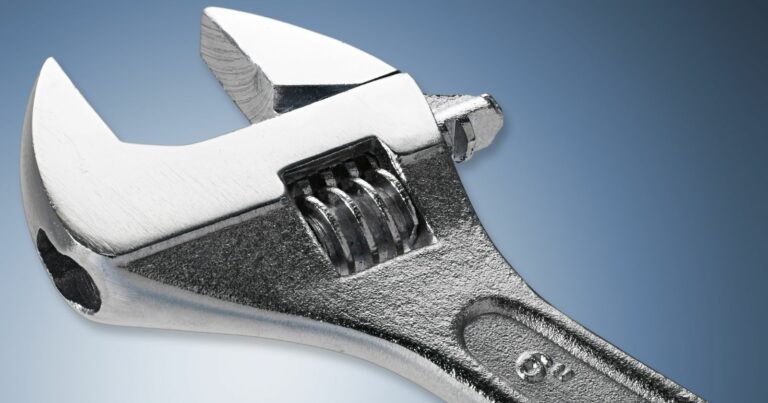
- Wrench: This comes in handy for tightening the nuts and bolts during the setup process. A good adjustable wrench always does the trick.
- Level: This tool ensures my grinder is sitting perfectly flat on my workbench. An uneven grinder can lead to uneven grinding and potential safety issues.
With the right location picked out and the necessary tools at hand, I’m now ready to start setting up my bench grinder. In the next section, we’ll dive into the actual setup process. So, stick around!
Suggested Reading: Things To Make With Lathe Wood Tools
Step-by-Step Guide to Setting Up Your Bench Grinder
Alright, my fellow tool enthusiasts! Now that we’ve got our location nailed down and our tools at the ready, it’s time to dive into the actual setup of your bench grinder. Don’t worry, I’ll be with you every step of the way. Let’s get started!
1. Unboxing and Inspection
First things first, let’s get that bench grinder out of its box. But remember, don’t just toss the packaging aside – we’ll need to keep the user manual handy for reference throughout the setup process.
Once you’ve got your bench grinder out in the open, give it a good once-over. I always check for any signs of damage that might have occurred during shipping. Also, make sure all the components are there – you should have the grinder itself, the grinding wheels, tool rests, and eye shields.
2. Mounting the Bench Grinder
Next up, we’ll need to secure the bench grinder to your workbench. This is crucial for stability during operation.
Your bench grinder should have mounting holes in its base. Align these with the holes in your workbench, insert the bolts, and tighten them securely with your wrench. I always use a level to ensure the grinder is sitting flat. If it’s not, you may need to adjust the bolts or shim the grinder’s base until it’s level.
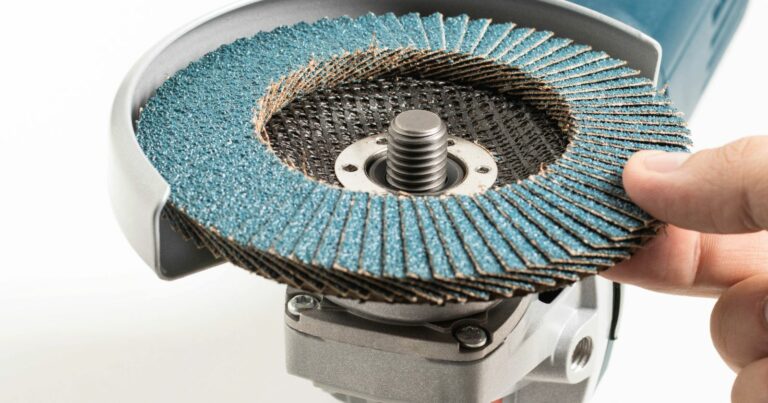
3. Installing the Grinding Wheels
Now it’s time to install the grinding wheels. Your bench grinder should come with two wheels – one coarse and one fine.
The coarse wheel is typically used for heavy-duty grinding tasks, while the fine wheel is better suited for more delicate tasks like sharpening blades.
To install the wheels, remove the safety guard, slide the wheel onto the motor shaft, replace the guard, and then secure the wheel with the provided nut. Make sure the wheel rotates freely and doesn’t wobble.
4. Adjusting the Tool Rests
The tool rests are where you’ll place the item you’re grinding. They should be adjusted so they’re close to the wheels but not touching.
To adjust the tool rests, loosen the locking handle, move the rest to the desired position, and then tighten the handle. The gap between the rest and the wheel should be no more than 1/8 inch to prevent the workpiece from getting jammed.
5. Setting Up the Eye Shields
Last but not least, we need to set up the eye shields. These are crucial for protecting your eyes from sparks and debris.
To install the eye shields, simply attach them to the provided mounts using the included screws. The shields should be positioned so they shield your eyes but don’t obstruct your view of the workpiece.
And there you have it! Your bench grinder is now set up and ready to go. But before we start grinding, there are a few safety checks we need to perform. So, stay tuned for the next section
Watch This Video And Learn About How to Set Up a Bench Grinder
Suggested Reading: How to Use Carbide Wood Turning Tools: A Comprehensive Guide
Common Mistakes to Avoid
When Using a Bench Grinder Alright, my fellow DIYers, before we move on to testing your bench grinder, let’s take a moment to talk about some common mistakes that I’ve made when setting up and using my bench grinder. I’ve learned from these blunders, and I want to help you avoid them. So, let’s dive in!
- Ignoring Safety Precautions: One of the most common mistakes I’ve made is ignoring safety precautions. Safety should always be your top priority when working with any tool, and bench grinders are no exception. I always wear my safety gear, including safety glasses, ear protection, and work gloves. These protect me from sparks, noise, and potential contact with the grinding wheel. And remember, I never operate my bench grinder without the eye shields and tool rests in place. These components are there for my safety and to ensure the grinder operates correctly
- Using Damaged Grinding Wheels: Damaged grinding wheels can be dangerous and can affect the quality of your grinding. I always inspect my grinding wheels for any cracks, chips, or excessive wear before I start grinding. If I notice any damage, I replace the wheels immediately. Using damaged wheels can lead to uneven grinding, and in worst-case scenarios, the wheel can shatter, causing potential injury.
- Ignoring the Manufacturer’s Instructions: Every bench grinder is a little different, and the manufacturer’s instructions are there to help you set up and use your grinder safely and effectively. Ignoring these instructions can lead to improper setup, poor performance, and even safety hazards. I always read and follow the manufacturer’s instructions for my specific model.
- Not Checking the Grinder’s Stability: A wobbly bench grinder can lead to uneven grinding and can be a safety hazard. I always ensure my bench grinder is securely mounted to a stable, flat surface. If my grinder is wobbling or vibrating excessively during use, I stop immediately and check the stability of the grinder and the condition of the grinding wheels.
- Not Maintaining My Bench Grinder: Regular maintenance is key to the performance and longevity of my bench grinder. This includes cleaning the grinder after each use, regularly inspecting the grinding wheels and tool rests, lubricating the motor, and regularly testing my grinder. A well-maintained grinder will perform better, last longer, and be safer to use.
- Overloading the Grinder: Bench grinders are powerful tools, but they’re not invincible. Trying to grind too much material at once or forcing the workpiece into the wheel can overload the motor and damage the grinder. I always feed the workpiece into the wheel gently and let the grinder do the work. If the grinder starts to bog down or the motor starts to strain, I back off and let the grinder catch up.
Remember, the key to successful DIY projects is not just having the right tools, but also knowing how to use and maintain them properly. Avoiding these common mistakes can help ensure that your bench grinder serves you well for many years to come. So, stay safe, and happy grinding! And as always, if you’re ever unsure about something, don’t hesitate to seek professional advice.
Testing Your Bench Grinder
Alright, my fellow DIYers! We’re on the final stretch now. With our bench grinder all set up, it’s time to give it a test run. But before we let the sparks fly, we need to perform a few safety checks. Let’s get to it!
Safety Checks
Before I flip the switch on the bench grinder, I always make sure everything is safe and secure. Here’s what I check:
- Secure Components: I double-check to ensure all components, including the grinding wheels, tool rests, and eye shields, are securely attached. A loose component can not only cause damage to the grinder but also pose a safety risk.
- Clear Area: I take a moment to check the area around the grinder for any loose objects that could be caught in the grinder. This includes tools, scraps of metal, or even loose clothing. Remember, a clear workspace is a safe workspace!
- Safety Gear: And of course, I don’t forget to put on my safety gear. This includes safety glasses to protect my eyes from sparks and debris, ear protection to guard against the noise, and work gloves to keep my hands safe. Remember, safety first!
Initial Test Run
Now that we’ve performed our safety checks, it’s time for the initial test run. This will help us identify any potential issues before we start grinding.
- Power Up: I turn on the grinder and let it run for a minute. This allows the motor to warm up and the grinding wheels to reach their full speed.
- Listen and Watch: I listen for any unusual noises, like grinding or squealing sounds from the motor. Also, I watch for any unusual vibrations or wobbling. These could indicate a problem with the grinder or an improperly installed component.
If everything sounds and looks good during the test run, then congratulations! You’ve successfully set up your bench grinder, and it’s ready for action. But we’re not done yet. In the next section, we’ll cover some basic grinding techniques and safety tips to ensure you get the most out of your bench grinder. So, stay tuned!
Suggested Reading: Best Impact Driver Clamps
Tips for Maintaining Your Bench Grinder
Alright, my fellow tool enthusiasts! We’ve set up our bench grinder, performed our safety checks, and even done a test run. But our journey doesn’t end here. To ensure your bench grinder serves you well for years to come, regular maintenance is key. Here are some tips from my personal experience:
- Keep It Clean: Just like any other tool in my workshop, I make sure my bench grinder is kept clean. Dust and debris can clog up the motor and cause performance issues. After each use, I clean the grinder, paying special attention to the motor and grinding wheels. I use a soft brush to gently remove any dust or debris from the motor and wheels. For stubborn grime, a damp cloth does the trick. Remember, a clean grinder is a happy grinder!
- Inspect the Grinding Wheels: The grinding wheels do all the heavy lifting, so they’re prone to wear and tear. I regularly inspect them for any cracks, chips, or excessive wear. If I notice any damage, I replace the wheels immediately. Using damaged wheels can be dangerous and can also affect the quality of your grinding. I recommend keeping a spare set of grinding wheels on hand, so you’re never caught off guard.
- Lubricate the Motor: The motor is the heart of the bench grinder, so it needs some TLC. I lubricate the motor as per the manufacturer’s instructions. Regular lubrication can prevent overheating and prolong the life of the motor. I typically use a high-quality machine oil for lubrication. Just a few drops every few months can keep your motor running smoothly.
- Check the Tool Rests: Don’t forget about the tool rests. These should be checked regularly for stability. If they’re loose or wobbly, I tighten them up. Also, I check for any signs of damage or wear. A damaged tool rest can affect the accuracy of your grinding.
- Regularly Test Your Grinder: In addition to these maintenance tasks, I also recommend regularly testing your grinder. I turn it on and listen for any unusual noises. I check for any excessive vibration. Regular testing can help you catch potential issues before they become major problems.
Remember, a well-maintained bench grinder is a happy bench grinder. And a happy bench grinder means a happy DIYer. So, take care of your grinder, and it’ll take care of you. Happy grinding
FAQs: How to Set Up a Bench Grinder
Alright, my fellow DIYers, before we wrap things up, I thought it would be helpful to address some frequently asked questions about setting up and maintaining a bench grinder. These are questions that I’ve often encountered in my own journey, and I hope the answers will provide you with some additional insights. So, let’s dive in!
How often should I lubricate the motor of my bench grinder?
The frequency of lubrication can depend on the model of your bench grinder and how often you use it. However, from my experience, I recommend lubricating the motor every few months. But remember, always refer to the manufacturer’s instructions for specific guidance.
What should I do if my bench grinder vibrates excessively during operation?
Excessive vibration can be a sign of an unbalanced grinding wheel or an uneven surface where the grinder is placed. First, I always check to ensure my grinder is on a flat, stable surface. If the surface is not the issue, I inspect the grinding wheels. They might need to be replaced or reinstalled.
Can I use a bench grinder for polishing?
Absolutely! Bench grinders are versatile tools. By swapping out the grinding wheels for buffing wheels, you can use your bench grinder for polishing metal objects. Just remember to follow the same safety precautions as you would when grinding.
Remember, the key to successful DIY projects is not just having the right tools, but also knowing how to use and maintain them properly. I hope these FAQs have been helpful. Happy grinding, and until next time, stay safe and keep DIYing!
Conclusion
Well, my fellow DIYers and tool enthusiasts, we’ve reached the end of our journey. Setting up a bench grinder might have seemed like a daunting task at first, but I hope this comprehensive guide has shown you that it’s something we can tackle with confidence.
Remember, the key to a successful setup is preparation and safety. I always make sure I have all the necessary tools at hand, choose a suitable location for my grinder, and never forget to gear up with the right safety equipment.
And remember, it’s okay to ask for help if you’re unsure about any step in the process. We’re all here to learn and grow, and there’s no shame in seeking advice. In fact, I believe it’s the mark of a true professional to know when to ask for help.
With your bench grinder now set up and ready to go, you’re well on your way to becoming a grinding pro. Whether you’re sharpening tools, grinding down metal, or just maintaining your equipment, your bench grinder will be there to help you get the job done. It’s a versatile and valuable tool that I’m sure will serve you well for many years to come.
But remember, the care of your bench grinder doesn’t stop at setup. Regular maintenance, including cleaning, inspecting the grinding wheels, lubricating the motor, and checking the tool rests, will ensure your bench grinder stays in top shape and continues to serve you well.
So, here’s to many happy hours of grinding. Remember to take care of your bench grinder, and it’ll take care of you. Happy grinding, and until next time, stay safe and keep DIYing!
And remember, this is just the beginning. There’s a whole world of tools and techniques out there waiting for you to explore. So, keep learning, keep experimenting, and most importantly, keep having fun. After all, that’s what DIY is all about.
So, until next time, keep those tools sharp and your spirits high. Happy grinding!
More Bench Grinder Resources:
Here Are Some Additional Bench Grinder Guides I Wrote For You To Check Out