Building A Deck With An Impact Driver: Tips And Tricks
When it comes to home improvement projects, building a deck is a significant undertaking that not only enhances the aesthetic appeal of your home but also increases its value. However, the success of such a project heavily relies on the tools and materials you choose. One tool that stands out for its efficiency and reliability is the impact driver. In this guide, I will dive into the process of Building A Deck With An Impact Driver, showcasing why this powerful tool is a game-changer for both seasoned DIYers and professional contractors alike.
The choice of tools can make or break your decking project. Traditional drills might have been your go-to for previous projects, but when it comes to driving screws through dense materials or ensuring your deck’s durability, the impact driver proves to be superior. Its ability to deliver high torque with minimal effort from the user makes it an indispensable tool in your arsenal. So, whether you’re constructing a cozy backyard retreat or a spacious outdoor living area, understanding how to leverage the power of an impact driver will not only streamline the process but also ensure a sturdy and long-lasting deck.

Why Choose an Impact Driver for Your Deck Project?
When embarking on a deck-building project, the choice of tools can significantly impact the efficiency, ease, and outcome of your work. Among the myriad of tools at your disposal, the impact driver stands out as a particularly advantageous choice. Let’s dive into the reasons why an impact driver should be your go-to tool for decking projects.
The Power Behind the Tool
At the heart of the impact driver’s appeal is its impressive torque and speed. Unlike traditional drills, impact drivers are designed to deliver a powerful rotational force coupled with quick bursts of downward thrust. This combination allows the tool to drive screws into tough materials with remarkable ease and precision. The torque output of an impact driver can be significantly higher than that of a standard drill, making it ideal for tasks that involve driving large or long screws, a common requirement in deck construction.
Comparing an impact driver to a traditional drill highlights the former’s superiority in handling demanding tasks. While a drill operates on continuous rotational force, it may struggle with resistance, leading to wear on the user’s hand or even stripping the screw head. The impact driver, on the other hand, applies its force in sudden, powerful bursts, reducing the likelihood of these issues and making it a more efficient tool for the job.
Efficiency and Productivity
The efficiency of an impact driver is not just about its power; it also significantly improves screw driving speed. This speed is achieved through the tool’s design, which allows it to drive screws twice as fast as a drill in some cases. For deck builders, this means being able to complete the framing and decking more quickly, saving valuable time and effort.
Moreover, the design of the impact driver reduces strain on the user’s hand. The bursts of force applied by the tool are directed into the screw, not the wrist or arm of the person using it. This means you can work longer without fatigue, which is especially beneficial in large projects like deck building where repetitive motions are common. The ergonomic benefits of using an impact driver ensure that you can maintain productivity throughout the project without compromising on precision or safety.
Choosing an impact driver for your deck project offers significant advantages in terms of power, efficiency, and user comfort. Its ability to handle tough materials with ease, combined with its speed and ergonomic design, makes it an indispensable tool for anyone looking to build a durable and beautiful deck.

Preparing to Build Your Deck
Before you dive into the construction phase of your deck project, thorough preparation is key. This stage is all about planning, gathering the necessary materials and tools, and ensuring you’re equipped with the right safety gear. Let’s break down these crucial steps to set the foundation for a successful build.
Designing Your Deck
The design phase is where your dream deck starts to take shape. Here are a few considerations to keep in mind:
- Size: Think about how you plan to use your deck. Will it be for intimate family dinners, or do you need space for large gatherings? The size of your deck should accommodate its intended use.
- Materials: From classic wood to composite materials, your choice will affect the deck’s appearance, maintenance, and longevity. Each material has its pros and cons, so weigh them carefully.
- Location: Consider the orientation of the sun throughout the day and the views you want to enjoy. Also, be mindful of wind patterns and privacy concerns.
Gathering Your Materials and Tools
With your design in hand, it’s time to compile a list of materials and tools needed for the project. Here’s a basic checklist:
- Wood or Composite Decking: Choose based on your design considerations and budget.
- Screws and Fasteners: Opt for weather-resistant options suitable for your decking material.
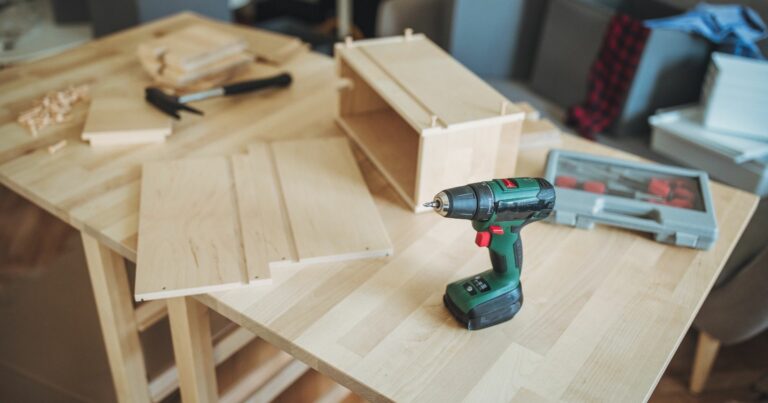
- Impact Driver: A crucial tool for efficiently driving screws with precision and less effort.
- Additional Tools: Measuring tape, saw, level, and drill (for pilot holes).
Choosing the right impact driver is crucial. Look for a model that balances power, weight, and battery life to ensure it can handle the demands of deck building.
Watch This Video And Learn About Building A Deck With An Impact Driver
Step-by-Step Guide to Building a Deck with an Impact Driver
Building a deck is a rewarding project that enhances your outdoor living space and adds value to your home. With an impact driver in hand, you’re equipped to tackle this project with greater efficiency and ease. Let’s walk through the key steps from foundation to finishing touches, ensuring your deck is both beautiful and durable.
Setting Up the Foundation
A solid deck starts with a solid foundation. Here’s how to ensure your foundation is up to the task:
- Mark the Area: Use stakes and string to outline your deck’s footprint.
- Dig Footings: Based on your design, dig footings to the required depth below the frost line in your area.
- Pour Concrete: Place concrete footings or piers, ensuring they are level and set to the correct height for your deck frame.
Framing Your Deck
Framing is the skeleton of your deck, providing structure and support for the decking boards:
- Install Ledger Board: Securely attach the ledger board to your house with lag screws, using your impact driver for a tight fit.
- Set Posts and Beams: Install posts at the corners and along the perimeter, then attach beams on top of the posts to support the joists.
- Lay Joists: Space joists evenly across the beams, using joist hangers for added stability. Your impact driver will make quick work of securing these in place.
Installing the Deck Boards
With the frame in place, it’s time to lay the decking boards:
- Choose Your Boards: Select high-quality decking boards that fit your aesthetic and budget.
- Lay the First Board: Start at the edge closest to your house, ensuring the board is straight and aligned.
- Secure the Boards: Use your impact driver to drive screws through the decking boards into the joists. For the best results, pre-drill holes to prevent splitting.
- Maintain Even Spacing: Use spacers to keep a consistent gap between boards for drainage and expansion.
Finishing Touches
The final steps will ensure your deck looks great and lasts for years:
- Apply Finishes: Choose a sealant or stain to protect your deck from the elements. Apply according to the manufacturer’s instructions for the best protection.
- Install Railings and Stairs: If your deck is elevated, you’ll need railings for safety. Stairs may also be necessary for access. Use your impact driver to secure these elements firmly in place.
By following these steps and utilizing the power and efficiency of an impact driver, you’ll build a deck that’s not only structurally sound but also a beautiful addition to your home. Whether you’re enjoying quiet mornings or hosting lively gatherings, your new deck will be a testament to your hard work and the versatile capabilities of your chosen tool.

Maintenance and Care for Your Deck
After the hard work of building your deck with an impact driver, regular maintenance is key to preserving its beauty and extending its life. Equally important is taking care of the tools that made the project possible, ensuring they remain in top condition for future projects. Here’s how to keep both your deck and impact driver in their best shape.
Regular Maintenance Tips
A well-maintained deck not only looks better but is also safer and can last for many years. Here are some routine maintenance tasks to keep your deck in prime condition:
- Annual Inspection: Start each season with a thorough inspection of your deck. Look for signs of wear, loose boards or railings, and check for any structural damage.
- Cleaning: Clean your deck at least once a year. Use a deck cleaner suitable for your deck material to remove dirt, mildew, and algae. Avoid power washing if it can damage the wood.
- Sealing: After cleaning, apply a water-repellent sealant to protect the wood from moisture, which can lead to warping and rot.
- Repair and Replace: Promptly repair or replace damaged boards and hardware to prevent further damage and maintain safety.
- Snow and Ice Removal: If you live in a snowy area, gently remove snow and ice to prevent moisture penetration and reduce the risk of slips.
Impact Driver Care
Your impact driver is an invaluable tool for not only deck building but many other projects. Here are some tips to ensure its longevity:
- Clean After Use: Wipe down your impact driver after each use to remove dust and debris. A blast of compressed air can help clear out the vents.
- Check and Replace Bits Regularly: Inspect your bits for wear and replace them as needed. Using worn bits can damage the tool and the workpiece.
- Lubricate Moving Parts: Occasionally, apply a drop of machine oil to the chuck to keep it moving smoothly.
- Battery Care: For cordless models, follow the manufacturer’s instructions for battery care. Store batteries in a cool, dry place and avoid leaving them on the charger for extended periods.
- Storage: Store your impact driver in a clean, dry place. If it came with a case, use it to protect the tool from dust and moisture.
By following these maintenance tips for your deck and impact driver, you can enjoy a beautiful outdoor space for gatherings, relaxation, and more, while also ensuring your tools are ready for your next project. Regular care not only extends the life of your deck and tools but also enhances safety and functionality.

Wrapping Up Building A Deck With An Impact Driver
Building a deck is a rewarding project that can transform your outdoor living space, adding both aesthetic appeal and value to your home. Throughout this guide, I’ve explored the pivotal role an impact driver plays in making the deck-building process smoother, more efficient, and ultimately more successful. The unmatched torque, speed, and ease of use offered by an impact driver not only expedite the construction but also ensure that every screw is driven with precision, reducing the risk of damage and ensuring a sturdy, long-lasting structure.
I’d love to hear from you! Whether you’re sharing your success stories, the challenges you’ve overcome, or if you have any questions about the process, feel free to leave a comment below. Your experiences not only enrich our community but also inspire and help others in their deck-building ventures.
Happy building, and may your new deck be a source of joy and pride for years to come!