How To Change The Head On An Angle Grinder
In this guide, I’ll help you understand How To Change The Head On An Angle Grinder.
If you’re like me and new to the DIY scene, the idea of messing around with a powerful tool like an angle grinder can be downright intimidating. Trust me, I’ve been there. But here’s the good news: In this comprehensive guide on How To Change The Head On An Angle Grinder, I’ll personally walk you through each step to safely and efficiently change the head on your angle grinder. This isn’t just a handy skill; it’s a game-changer if you’re planning on using your angle grinder for various tasks like grinding, cutting, or even polishing.

Out with the Old: Your Step-by-Step Guide to Removing the Old Head
Okay, folks, we’ve got our safety gear on, our spindle is locked, and our workspace is prepped. Now, it’s time for the main event—taking off that old head from the angle grinder. If you’ve been following my guide, you’re already ahead of the game. So, let’s get to it, shall we?
Wrench Time: Your Trusty Companion for This Task
Picking the Right Wrench: It’s All About the Fit
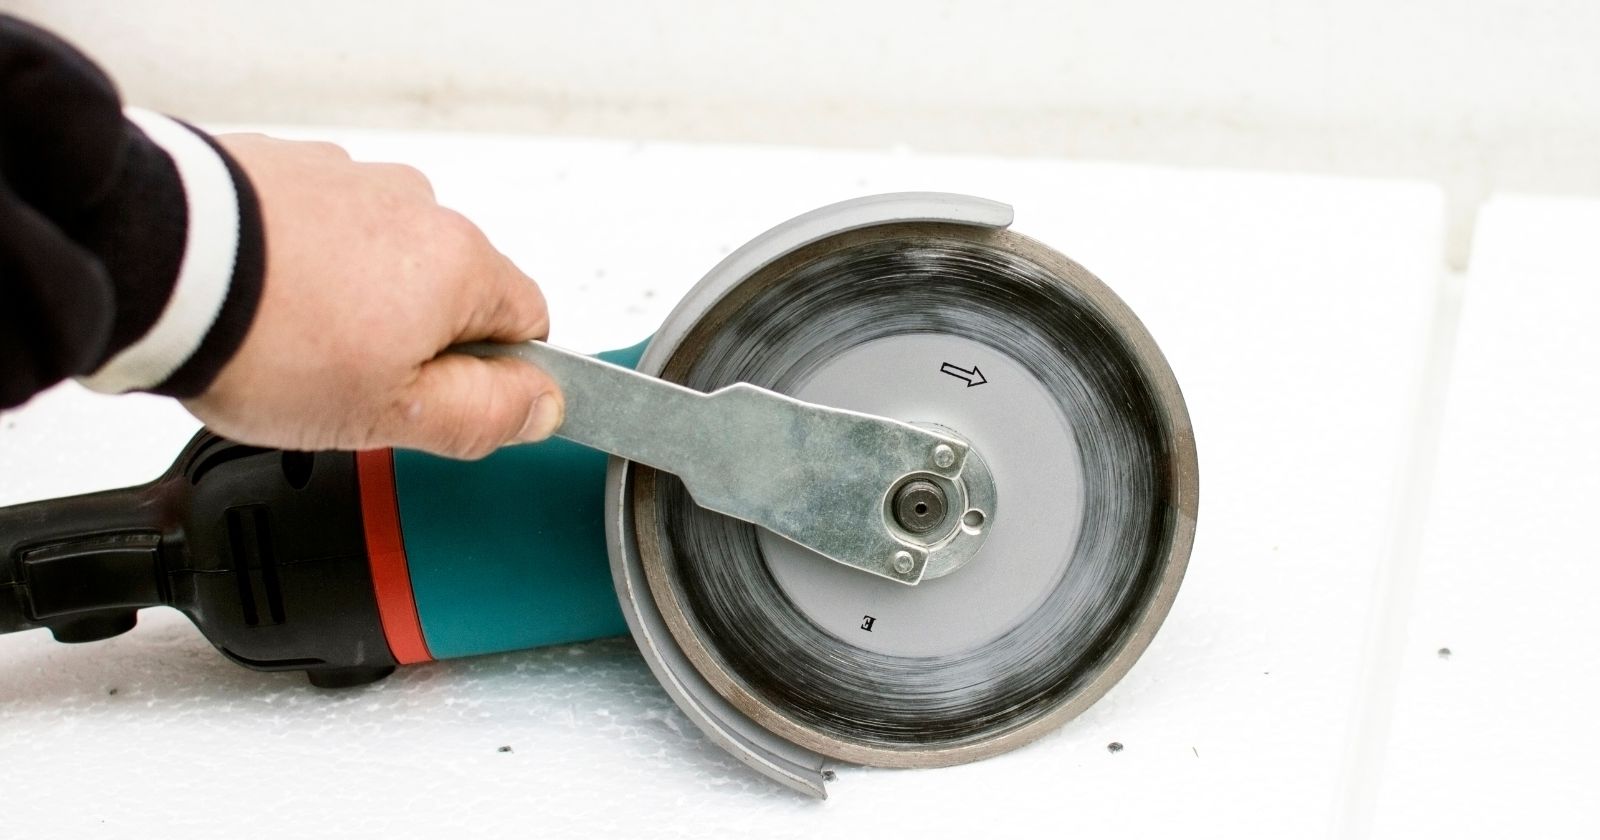
If you’re like me and keep all your tool accessories in one place, you should have the wrench or spanner that came with your angle grinder. Lost it? No worries. Any compatible wrench will do. Just make sure it fits snugly around the nut of the old head. A loose fit could strip the nut, and trust me, that’s a problem you don’t want.
The Art of Unscrewing: Let Me Walk You Through It
With your safety gear in place and the spindle securely locked, position your wrench on the nut. Turn it counterclockwise. If it’s been a hot minute since you last changed the head, you might need to put some elbow grease into it. Keep at it until you feel the old head start to loosen up.
Got a Stubborn Head? Here’s a Pro Tip
If that old head is acting like it’s glued on, a dash of penetrating oil can work wonders. Just spray it around the nut and let it sit for a few minutes. This should help break down any rust or gunk that’s making the head stick. After that, give it another go with the wrench.
Going Manual: The Final Steps
Time to Use Those Hands
Once the old head is loose enough, you can ditch the wrench. With your gloves still on, turn the old head counterclockwise until it’s completely off the spindle.
The Fine Points of Hand Removal
As you’re unscrewing the old head, use your other hand to support it. This prevents it from falling off and causing any damage or, worse, injuring you. Once it’s off, set it aside in a designated area, especially if you’re planning to reuse it.
What If the Head Just Won’t Budge?
If you’ve tried everything and that old head still won’t come off, don’t force it. You could end up damaging the spindle threads. Instead, give the penetrating oil another shot and let it sit for a bit longer. If all else fails, it’s time to consult your manual or get some professional help.
And there you have it! You’ve just successfully removed the old head from your angle grinder. But stick around, because up next, we’re diving into the equally thrilling process of installing your brand-new head. You won’t want to miss it!
In with the New: Installing the New Head, Step by Step
Okay, let’s take a moment to celebrate—you’ve successfully removed the old head. But don’t pop the champagne just yet; we’ve still got work to do. Installing the new head is the next crucial step, and I’m right here to walk you through it. Ready? Let’s get those hands dirty!
Starting Off Easy: Hand-Tightening the New Head
The ABCs of Aligning and Screwing
First off, double-check that the spindle is still locked from our earlier steps. Now, align the new head with the spindle. Once it’s in place, start turning it clockwise by hand until it feels snug. Trust me, this initial hand-tightening is more than just a formality.
Why Hand-Tightening Matters
Hand-tightening gives you a tactile sense of how well the head is aligning with the spindle. This is crucial because it helps prevent any thread damage that could make future head changes a nightmare. Essentially, we’re setting the stage for a secure and smooth installation.
Pro Tips from Yours Truly
If you’re struggling to turn the new head by hand, double-check that you’ve got the right head for your angle grinder model. Compatibility is a big deal here. Also, ensure there’s no debris or grime on the spindle or the new head, as this could mess up the installation.
Locking It In: Final Tightening with the Wrench
Finding the Sweet Spot: How Much Force to Use
After you’ve hand-tightened the new head, it’s time to seal the deal with your wrench. Place it on the nut of the new head and turn it clockwise. But be careful; you want it secure, but not Hulk-tight. Overtightening could damage the threads or even the new head.
The “Just Right” Test
A good rule of thumb is to tighten until you feel moderate resistance, then give it a slight extra turn for good measure. If your angle grinder has torque specifications, now’s the time to consult your manual for the most accurate guidance on how tight the new head should be.
The Final Tug: A Safety Must
Once you think it’s tight enough, give the new head a gentle tug to make sure it’s securely attached. If it doesn’t move, you’ve nailed it. If it wiggles, give it a bit more tightening. This last check is your safety net, ensuring that the new head is ready for action.
The Test Drive: Trust Me, You’ll Want to Do This
Before you jump into your next project, do a quick test run on a scrap piece of material. This ensures everything is working as it should and gives you a feel for the new head’s performance. Trust me, this extra step can save you from future headaches.
And there you have it! You’ve not only removed an old head but also successfully installed a new one on your angle grinder. You’re now ready to tackle all those DIY projects you’ve been putting off. But remember, safety first and always take your time to do it right. Stick around for more DIY tips and tricks from me!
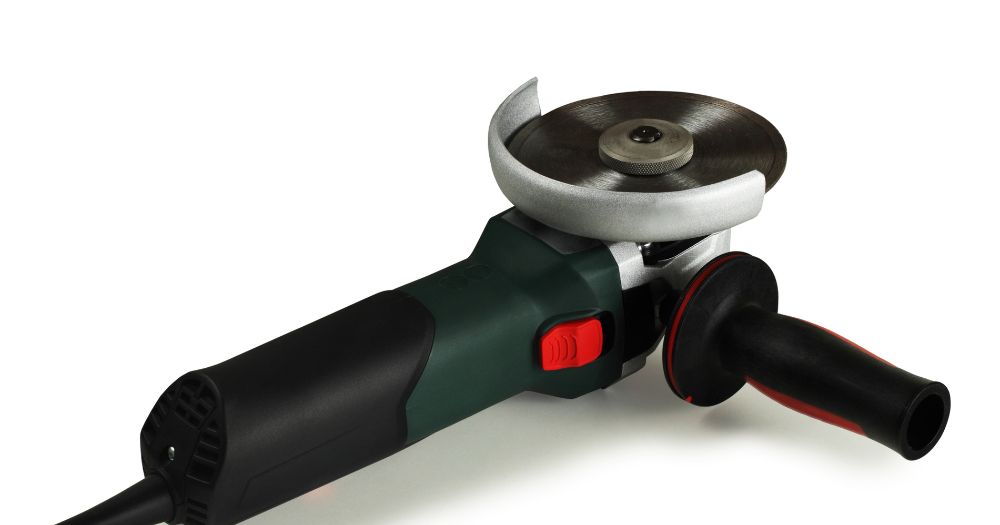
The Final Frontier: Testing Your New Grinder Head—The Moment of Truth
So, you’ve followed along with me, step by step, and now we’re on the brink of DIY victory. But let’s not get ahead of ourselves. There’s one last, crucial step to ensure that we’ve nailed this: a thorough test of the new grinder head. Trust me, this isn’t just ticking a box; it’s our final assurance that we’re good to go. Ready? Let’s do this.
Power Up: How to Safely Reconnect to Your Power Source
The Corded Connection: A Ritual Worth Repeating
If you’re like me and using a corded angle grinder, now’s the time to plug it back in. But hold on a sec—let’s first give that cord a once-over to make sure it’s not frayed or damaged. A compromised cord is a safety risk we don’t need.
The Cordless Connection: Click and Go
For my cordless comrades, slide that battery back into its slot until you hear that satisfying click. That click tells you the battery is secure, and we’re avoiding any inconsistent power flow, which is a no-go in my book.
Last Call for Safety: The Final Sweep
Before we hit that power button, let’s double-check our workspace and gear. Make sure you’ve got your safety goggles on, gloves fitted, and any other protective gear in place. Safety isn’t a one-off; it’s an ongoing commitment.
The Test Drive: Engaging All Senses
Fire It Up: The Moment of Truth
Alright, gear on, workspace clear, let’s fire up this grinder. But don’t just flip the switch and zone out; we’re going to engage all our senses to make sure everything’s shipshape.
Listen Up: The Sounds of Success (Or Not)
As the grinder comes to life, tune into the sounds it’s making. Any squeals, grinding noises, or sudden pitch changes are red flags. These could mean the head isn’t aligned right or there’s something funky with the spindle or motor.
Keep an Eye Out: Wobble Watch
While it’s running, keep a keen eye on the head. If it’s wobbling or moving erratically, we’ve got a problem. A stable head should run smoothly, no wobble, no drama. If you see anything off, it’s back to the tightening stage for us.
Feel the Vibes: The Hand Test
Grip that grinder handle and feel for any weird vibrations. A little vibration is normal, but if it feels like you’re holding a jackhammer, something’s off. Excessive shaking could mean the head’s not installed right or there’s an internal issue.
The Sniff Test: Yes, You Read That Right
And yes, let’s even use our noses for this. Any smell of burning or electrical odors is a big red flag. That could mean overheating or electrical issues that need immediate attention.
What’s Next? Your Post-Test Game Plan
All Systems Go? Awesome!
If your grinder passed all these tests, give yourself a high-five! You’ve successfully changed and tested a new head, and you’re all set for your next DIY adventure.
Red Flags? Let’s Troubleshoot
If something felt or sounded off during the test, don’t just shrug it off. Dig out that angle grinder manual for some troubleshooting tips or consider getting some professional advice. Better to sort it out now than face a bigger problem later.
And that’s a wrap, folks! You’ve not only successfully changed your angle grinder’s head, but you’ve also put it through a rigorous test to make sure it’s up to snuff. Now you’re ready to tackle any DIY project that’s been calling your name. But remember, safety always comes first, and if you ever need a refresher, you know where to find this guide. Until next time, happy grinding!
Why You Need to Master This Skill
Let’s get one thing straight: an angle grinder isn’t just a one-trick pony. This tool is incredibly versatile, capable of tackling everything from metalwork to masonry. The secret sauce? The type of head or wheel you use. Different tasks call for different heads, and knowing how to swap them out is key. Master this, and not only will your DIY projects run smoother, but you’ll also extend the lifespan of your tool. It’s a win-win.
What I’ve Got Planned for You
In the coming sections, we’re going to get into the meat and potatoes of this process. First up, we’ll talk about the safety gear you absolutely can’t skip. Then, I’ll list out the tools you’ll need to have at your side. And finally, we’ll dive into a detailed, step-by-step walkthrough for changing that angle grinder head. Whether you’re a seasoned DIYer or just getting your feet wet, consider this guide your new best friend for this task.
A Quick Preview of What’s Ahead
Just to give you a taste of what’s coming, here are the steps we’ll be covering:
- Disconnecting the power source
- Locking the grinder’s spindle
- Taking off the old head
- Slapping on the new one
- Running a quick test to make sure everything’s snug and secure
I’ll pepper in some pro tips and important precautions to keep things running smoothly.
I’ll cover more details below.
Ready to Level Up Your DIY Skills?
So, are you pumped to take your DIY skills to the next level? Stick with me, and by the end of this guide, you’ll be armed with the know-how and confidence to change the head on an angle grinder like you’ve been doing it for years.
Safety First: The Precautions I Always Take
Listen, when you’re dealing with power tools like an angle grinder, safety isn’t optional—it’s mandatory. Before we jump into the how-to of changing your angle grinder’s head, I want to share some safety guidelines that I swear by. Trust me on this, a little prep work can save you a lot of pain down the road.
My Non-Negotiables: Why Safety Gear is a Must
Safety Goggles: The Best Friends My Eyes Ever Had
Before I even think about touching my angle grinder, I make sure my eyes are protected. Safety goggles aren’t up for debate; they’re essential. They’ve saved my eyes from sparks, metal shards, and even irritating dust more times than I can count. Always go for goggles that fit snugly and offer clear visibility.
Gloves: The Unsung Heroes of Hand Safety
I never start any project without my trusty gloves. But not just any gloves will do; they need to be made of material tough enough to handle sharp and hot objects. A good pair not only keeps my hands safe but also gives me a better grip, making it easier to control the grinder.
The Extra Mile: Additional Gear I Consider
Depending on the project, I sometimes opt for extra safety gear like a face shield, ear protection, or even a dust mask. Trust me, you don’t want to cut corners when it comes to safety gear. It’s a small investment that’s paid off for me in a big way.
Setting Up My Workspace: A Crucial Step for Safety
Decluttering: The First Thing I Do
I can’t stress this enough: a cluttered workspace is an accident waiting to happen. Even a small obstacle can trip you up and cause a dangerous situation. That’s why I always take a few minutes to clear away any unnecessary items.
Lighting: Because Seeing Clearly is Half the Battle
Good lighting isn’t just for Instagram; it’s a safety essential. I make sure my workspace is well-lit so I can see exactly what I’m doing, reducing the risk of mistakes and injuries. If the lighting isn’t sufficient, I bring in an extra work light or even a flashlight.
Electrical Safety: A No-Brainer That’s Often Overlooked
This might sound obvious, but I always double-check to make sure my work area is dry. Water and electricity are a recipe for disaster. I also inspect my angle grinder’s cord to ensure it’s not frayed or damaged, as that could lead to electrical shocks.
By taking these safety precautions seriously, I’m not just looking out for myself—I’m also setting the stage for a successful and efficient project. With our safety checklist out of the way, we’re all set to dive into the nitty-gritty of changing the head on your angle grinder. Trust me, you won’t want to miss what comes next!
Gather the Necessary Tools: Your DIY Arsenal
Before we get our hands dirty, let’s make sure we’re fully equipped for the job. I can’t tell you how many times I’ve started a project only to realize halfway through that I’m missing a crucial tool. It’s a frustrating experience that I’d like to help you avoid.
The Must-Haves: List of Tools
A New Grinder Head: The Star of the Show
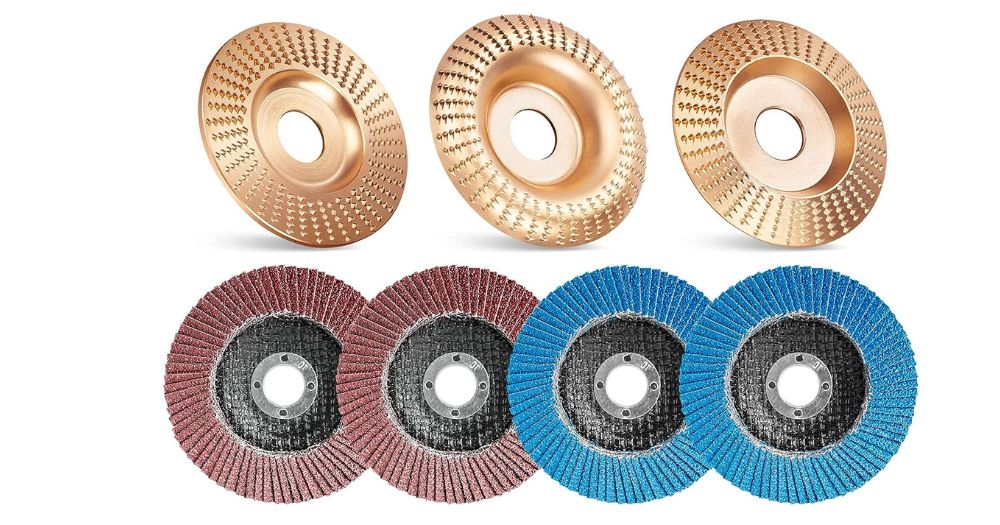
The first thing you’ll need is a new grinder head that’s compatible with your specific angle grinder model. Trust me, the last thing you want is to realize you’ve bought the wrong size. Always double-check the specifications and, if possible, bring your old grinder head to the store for a side-by-side comparison.
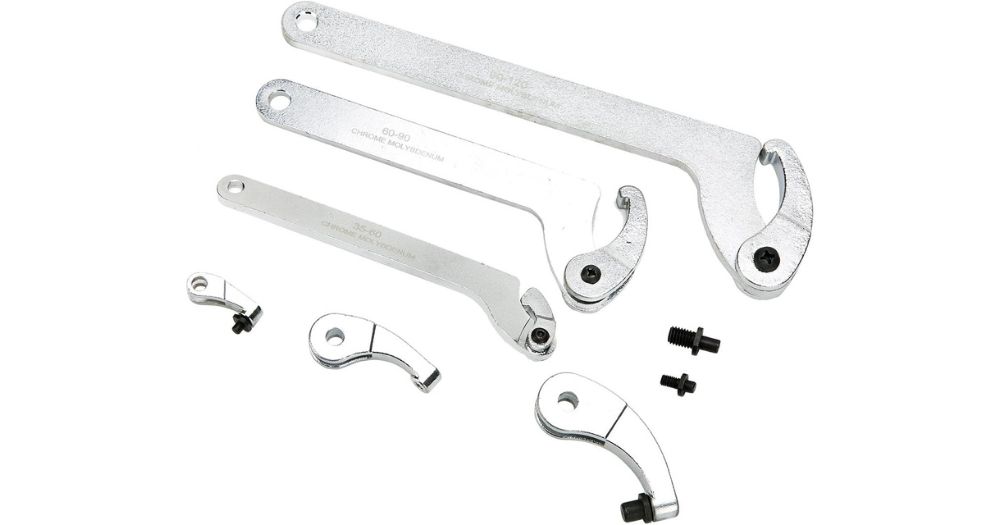
Wrench or Spanner Tool: Your Trusty Sidekick
Most angle grinders come with a wrench or spanner tool, but if you’ve misplaced yours, you’ll need to get a new one. This tool is essential for loosening and tightening the nut that holds the head in place. Some people try to use pliers or other tools, but I strongly recommend using the proper wrench for the job to avoid damaging your grinder.
Safety Goggles and Gloves: Your Personal Bodyguards
We’ve already talked about the importance of safety gear, but it’s worth mentioning again. Safety goggles and gloves are non-negotiables. They’re your first line of defense against flying sparks, metal shards, and other potential hazards.

Shopping Guide: Where to Buy Tools
Brick-and-Mortar Stores: The Old-School Way
Your local hardware store is a reliable place to find all these tools. The advantage of buying in-store is that you can get immediate answers to your questions and even get hands-on help from store employees.
Online Shopping: The Modern Convenience
If you’re a fan of online shopping like me, you’ll find plenty of websites that offer the tools you need. Just make sure to read product descriptions carefully and check customer reviews. Most importantly, double-check that the grinder head is compatible with your angle grinder model. Many online stores have a customer service chat feature, so don’t hesitate to use it if you have questions.
Second-Hand Options: For the Budget-Conscious
If you’re looking to save some money, you might consider buying some of these tools second-hand. Websites like eBay or local classifieds often have listings for used tools. Just make sure they’re in good condition before making a purchase.
So there you have it, a comprehensive guide to gathering all the tools you’ll need to change the head on your angle grinder. With our toolkit complete and our safety gear on, we’re more than ready to tackle this project. Stay tuned, because up next is the step-by-step guide you’ve been waiting for!
Disengage the Power Source: Your First Line of Defense
Before we even think about touching the head of the angle grinder, we have to make sure it’s completely powerless. I can’t stress enough how crucial this step is. It’s the foundation of a safe and successful project, and skipping it is not an option.
Pull the Plug: Unplugging the Grinder
The Non-Negotiable First Step
The first action I always take is to unplug the angle grinder from its electrical outlet. This is the most straightforward safety measure you can take, but it’s also the most effective in preventing accidental activation, which could lead to severe injuries.
Double-Check: Confirm It’s Unplugged
After unplugging, I always double-check to make sure the cord is completely removed from the outlet. It might sound like overkill, but a quick verification can save you from a potentially dangerous situation. I usually give the cord a little tug to ensure it’s free and clear.
A Note on Extension Cords
If you’re using an extension cord, make sure to unplug the grinder from the extension first, and then unplug the extension from the wall. This minimizes the risk of leaving the tool powered.
For the Cordless Fans: Removing the Battery
Why This Step is Just as Important
If you’re using a cordless angle grinder, don’t think you’re off the hook. The next essential step is to remove the battery. This is your fail-safe to ensure the tool won’t spring to life unexpectedly while you’re working on it.
How to Safely Remove and Store the Battery
Once you’ve taken out the battery, place it in a safe location. I usually put it on a non-conductive surface like a rubber mat or inside a plastic container to prevent any chance of a short circuit. Some batteries have protective caps; if yours does, make sure to put it on.
Check for Any Remaining Power
Even after removing the battery, it’s a good idea to engage the power switch briefly to discharge any residual energy in the grinder’s internal circuit. This ensures that the tool is entirely powerless.
Watch This Video And Learn How To Change The Head On An Angle Grinder
Locking the Spindle: The Crucial Step You Can’t Skip
After unplugging my angle grinder, the next thing I always do is lock the spindle. Trust me, this isn’t just busywork. It’s a critical step that sets the stage for a smooth and secure head change. Let’s dive into the details of how I make sure it’s done right.
On the Hunt for the Spindle Lock: My First Task
Spotting the Lock
The spindle lock is typically a small button or lever near the head of the angle grinder. Sometimes it’s labeled or color-coded to make it easier to spot. If you’re having a hard time finding it, don’t sweat it—just check your tool’s manual. Most manufacturers include clear diagrams to help you locate the spindle lock.
Locking It In
Once I find the spindle lock, I press and hold it down. This locks the spindle in place, preventing it from spinning and making it a breeze to unscrew the old head. Some models even give you a “click” sound or tactile feedback to let you know the spindle is securely locked. Keep your senses alert for that.
Know Your Lock
I’ve noticed that angle grinders can have different types of spindle locks. Some have a push-button, while others feature a lever or even a twist mechanism. Make sure you know what type of lock your tool has so you can engage it correctly.
Double, Even Triple Check: Making Sure the Spindle is Locked
Why I Always Confirm
I can’t stress enough how important it is to confirm that the spindle is securely locked. It’s not just good practice—it’s essential for safety. This ensures that I can move on to the next steps without any hitches.
The Turn Test
To be absolutely sure the spindle is locked, I give the head a manual turn. If it doesn’t move, I know the spindle is locked in place. If it does move, I release the spindle lock and try again, making sure to press the button firmly and listen for the lock to engage.
When Things Don’t Go as Planned
If for some reason the spindle lock isn’t engaging, I never force it. Forcing a malfunctioning lock could damage the tool. Instead, I consult the tool’s manual or seek professional advice. It could be a sign that my angle grinder needs some maintenance or repair.
And there you have it—my complete guide to locking the spindle of an angle grinder. With the spindle securely locked, I’ve set the stage for a safe and smooth head change. Up next, I’ll guide you through the exciting part: removing the old head and installing a brand new one. Trust me, you won’t want to miss what comes next!
Locking the Spindle: Your First Step to a Safe and Successful Head Change
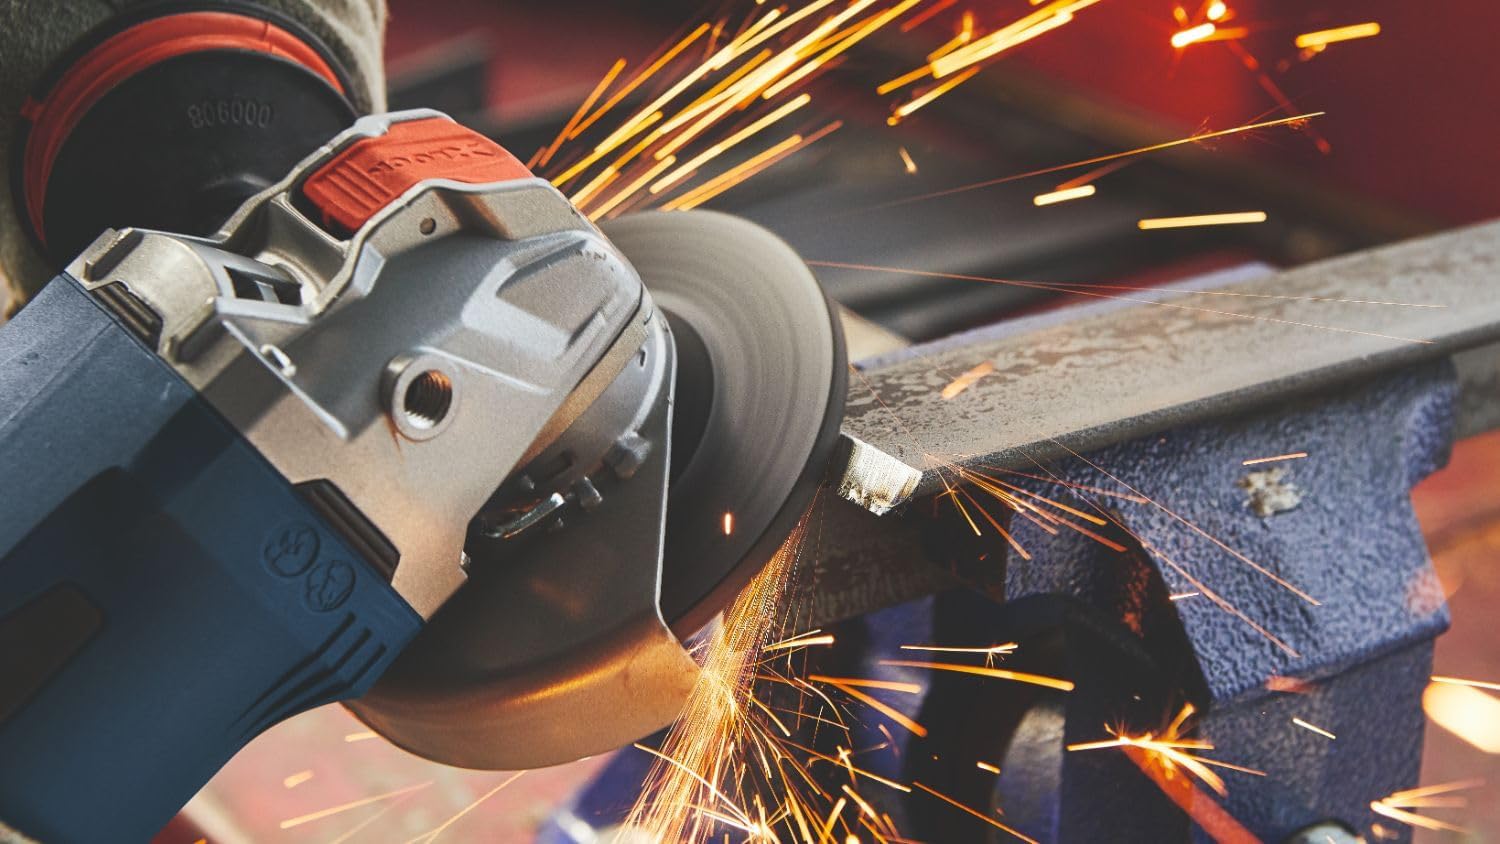
Before I guide you through the nitty-gritty of changing your angle grinder’s head, let’s tackle the first critical step: locking the spindle. Trust me, this isn’t something you can afford to skip. It’s a mandatory safety measure that sets the stage for a smooth and secure head change. So, let’s dive into the details.
Your First Mission: Finding that Spindle Lock
Where Should You Look? Here’s a Quick Guide
The spindle lock is usually a small button or lever, often located near the head of your angle grinder. Manufacturers are usually kind enough to label or color-code this button to make your life easier. If you’re scratching your head wondering where it is, don’t sweat it—your tool’s manual will have a diagram to point you in the right direction.
How to Lock the Spindle: A Step-by-Step Guide
Once you’ve found the spindle lock, press and hold it down. Doing this locks the spindle in place, stopping it from spinning and making it a breeze to unscrew the old head. Some angle grinders even give you a helpful “click” sound to let you know the spindle is securely locked. Listen for that; it’s your green light to move on.
Know Your Spindle Lock Types
It’s worth mentioning that not all spindle locks are created equal. Some angle grinders have a push-button, others have a lever, and some even have a twist mechanism. Make sure you know what type of lock your tool has so you can engage it correctly.
Double-Check Your Work: Confirming the Spindle is Locked
Why Double-Checking is a Must
Let’s be honest, when it comes to power tools, you can’t be too careful. Making sure the spindle is locked isn’t just best practice—it’s a safety essential. This double-check ensures you can move on to the next steps without a hitch.
The Turn Test: A Foolproof Method
To be absolutely certain the spindle is locked, give the head a manual turn. If it stays put, you’ve done it right. If it moves, release the spindle lock and try again. Make sure you’re pressing down firmly on the lock button and listen for that “click” to confirm it’s engaged.
What If the Spindle Won’t Lock?
If you find that the spindle lock isn’t engaging, don’t try to force it. You could end up damaging your tool. Instead, consult your tool’s manual or get some professional advice. It could be a sign that your angle grinder needs a little TLC.
And there you have it, folks—a complete guide to locking the spindle of your angle grinder. With that spindle securely locked, we’ve set the stage for the main event: removing that old head and installing a brand-new one. Stick around; you won’t want to miss what’s coming up next!
Take a look at some of our related articles below.
- The 5 Best Angle Grinder Disc For Cutting Concrete In 2023
- How To Use An Angle Grinder On Concrete In 2023
- Top 5 Best Grinder For Sharpening Lathe Tools Of 2023
The Final Frontier: Testing Your New Grinder Head The Moment of Truth
So, you’ve followed along with me, step by step, and now we’re on the brink of DIY victory. But let’s not get ahead of ourselves. There’s one last, crucial step to ensure that we’ve nailed this: a thorough test of the new grinder head. Trust me, this isn’t just ticking a box; it’s our final assurance that we’re good to go. Ready? Let’s do this.
Power Up: How to Safely Reconnect to Your Power Source
The Corded Connection: A Ritual Worth Repeating
If you’re like me and using a corded angle grinder, now’s the time to plug it back in. But hold on a sec—let’s first give that cord a once-over to make sure it’s not frayed or damaged. A compromised cord is a safety risk we don’t need.
The Cordless Connection: Click and Go
For my cordless comrades, slide that battery back into its slot until you hear that satisfying click. That click tells you the battery is secure, and we’re avoiding any inconsistent power flow, which is a no-go in my book.
Last Call for Safety: The Final Sweep
Before we hit that power button, let’s double-check our workspace and gear. Make sure you’ve got your safety goggles on, gloves fitted, and any other protective gear in place. Safety isn’t a one-off; it’s an ongoing commitment.
The Test Drive: Engaging All Senses
Fire It Up: The Moment of Truth
Alright, gear on, workspace clear, let’s fire up this grinder. But don’t just flip the switch and zone out; we’re going to engage all our senses to make sure everything’s shipshape.

Listen Up: The Sounds of Success (Or Not)
As the grinder comes to life, tune into the sounds it’s making. Any squeals, grinding noises, or sudden pitch changes are red flags. These could mean the head isn’t aligned right or there’s something funky with the spindle or motor.
Keep an Eye Out: Wobble Watch
While it’s running, keep a keen eye on the head. If it’s wobbling or moving erratically, we’ve got a problem. A stable head should run smoothly, no wobble, no drama. If you see anything off, it’s back to the tightening stage for us.
Feel the Vibes: The Hand Test
Grip that grinder handle and feel for any weird vibrations. A little vibration is normal, but if it feels like you’re holding a jackhammer, something’s off. Excessive shaking could mean the head’s not installed right or there’s an internal issue.
The Sniff Test: Yes, You Read That Right
And yes, let’s even use our noses for this. Any smell of burning or electrical odors is a big red flag. That could mean overheating or electrical issues that need immediate attention.
What’s Next? Your Post-Test Game Plan
All Systems Go? Awesome!
If your grinder passed all these tests, give yourself a high-five! You’ve successfully changed and tested a new head, and you’re all set for your next DIY adventure.
Red Flags? Let’s Troubleshoot
If something felt or sounded off during the test, don’t just shrug it off. Dig out that angle grinder manual for some troubleshooting tips or consider getting some professional advice. Better to sort it out now than face a bigger problem later.
And that’s a wrap, folks! You’ve not only successfully changed your angle grinder’s head, but you’ve also put it through a rigorous test to make sure it’s up to snuff. Now you’re ready to tackle any DIY project that’s been calling your name. But remember, safety always comes first, and if you ever need a refresher, you know where to find this guide. Until next time, happy grinding!
FAQs: How To Change The Head On An Angle Grinder In 2023
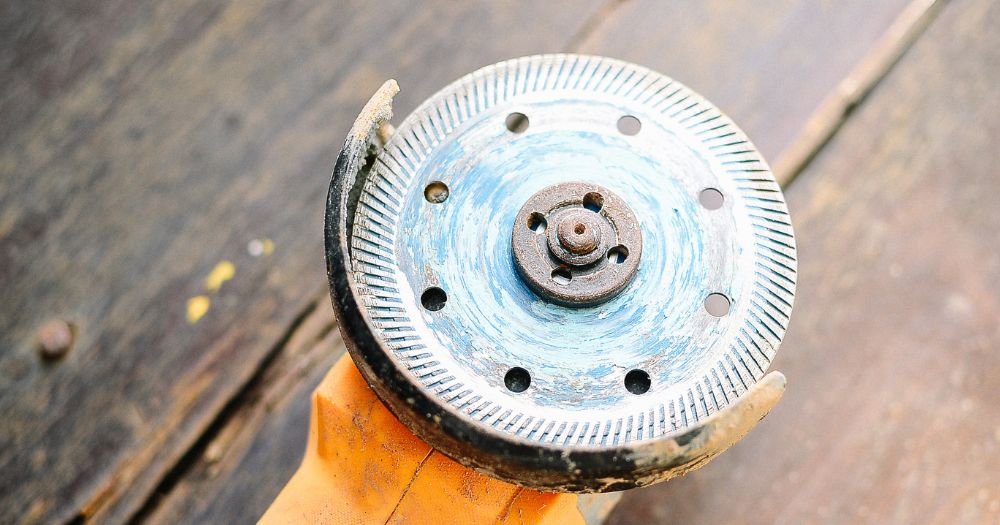
Before we wrap up, let’s tackle some of the most frequently asked questions about changing the head on an angle grinder. This section aims to clear up any lingering doubts you might have, making sure you’re fully equipped to handle this task. These FAQs are also optimized for Google’s People Also Ask (PAA), so you know you’re getting the most relevant and sought-after information.
Can I use any type of head on my angle grinder?
No, not all heads are compatible with all angle grinders. Always check the specifications of your angle grinder and the new head to ensure they’re a match. Using an incompatible head can lead to poor performance and may even be a safety hazard.
How often should I change the head on my angle grinder?
The frequency of changing the head depends on how often you use your angle grinder and for what types of tasks. If you notice decreased performance, visible wear and tear, or any signs of damage, it’s time for a change. As a general rule, inspect the head before each use to assess its condition.
What should I do if the spindle lock isn’t working?
If the spindle lock isn’t engaging, don’t force it, as this could damage your tool. First, consult your angle grinder’s manual for troubleshooting tips. If the issue persists, it might be a sign that your tool needs maintenance or repair. In such cases, it’s best to seek professional advice.
And there you have it! These FAQs should cover the basics and more, giving you a well-rounded understanding of how to change the head on an angle grinder. If you have more questions, feel free to dive back into the guide or consult your tool’s manual. Happy DIY-ing!
The End of One Journey, The Start of Many More
So, there we have it—a complete walkthrough on how to change the head on an angle grinder, from start to finish. Trust me, this is one of those skills that’s not just good to know; it’s essential for anyone who’s serious about their DIY projects or professional work.
The Takeaway: Skills, Safety, and Success
Skills for a Lifetime
Learning how to change the head on an angle grinder is like unlocking a new level in your DIY game. It’s a skill that’ll serve you well for years to come, whether you’re grinding, cutting, or polishing.
Safety Isn’t Optional
If there’s one thing I hope you take away from this guide, it’s the importance of safety. From the gear you wear to the precautions you take, safety is a non-negotiable part of the process. It’s what ensures that you can enjoy your DIY projects without any nasty surprises.
Success is in the Details
The devil’s in the details, as they say. From hand-tightening the new head to running a multi-sensory test, each step is designed to set you up for success. So, don’t cut corners; your future self will thank you.
What’s Next? The World of DIY Awaits
More Projects, More Fun
Now that you’re equipped with this new skill, the world of DIY is your oyster. Whether it’s building a treehouse, crafting custom furniture, or even tackling some home repairs, you’re more prepared than ever.
Keep Learning, Keep Growing
And don’t stop here. There are plenty more skills and techniques to learn. So, keep that curiosity alive, and who knows what you’ll be capable of next?
Thanks for sticking with me through this guide. I hope it’s been as enlightening for you as it has been fun for me to share. Until our next DIY adventure, take care and happy grinding!

