

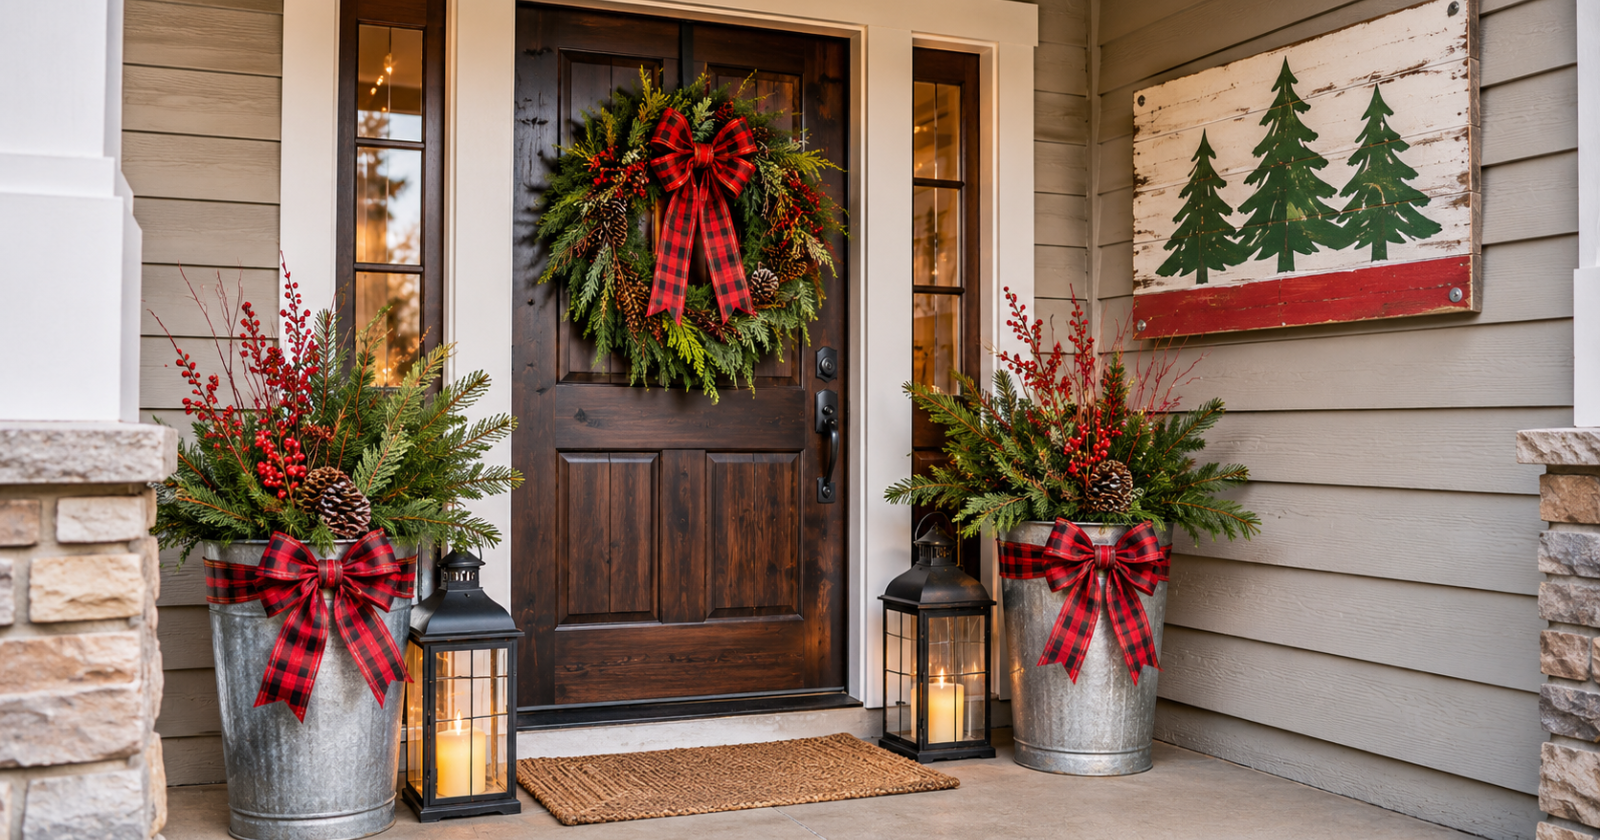
12 DIY Outdoor Christmas Decorations Using Wood, Greenery, And Lights
You don’t need expensive decorations to make your porch or yard look festive for Christmas. An old planter, a few evergreen branches, leftover wood, or some ribbon can make a nice holiday display without spending much money.

For beginners, I recommend starting with evergreen planters, door swags, ribbon wreaths, or painted wooden signs. Planters work well beside the front door, wreaths and swags are good choices for covered porches, and properly finished wooden signs can decorate a fence or yard when securely mounted.
The key is choosing materials that fit the location. Decorations on a covered porch need protection from windblown rain, while anything sitting in an open yard must be built and secured for greater weather exposure.

My Recommendation:
Smart Lighting Pick For This Project
3 Pack Warm White Battery Operated Fairy Lights With Remote
These battery operated fairy lights offer a simple option. The flexible wire wraps around a small hoop, while the warm white LEDs add a soft Christmas glow.
A porch gives you several decorating spots without needing to build anything permanent. Start with the front door, an empty corner, or an existing railing.
1. Make Christmas Evergreen Planters
Evergreen planters look great beside a front door, especially when you use two matching containers.

Materials and tools: A heavy, frost suitable outdoor planter with drainage, evergreen branches, decorative twigs, pinecones, potting mix, garden pruners, and floral wire.
How to make it
- Choose a sturdy planter designed to handle winter temperatures.
- Check that the drainage holes are open.
- Add enough potting mix to support the branches.
- Place taller evergreen branches toward the center or back.
- Add shorter branches around the edges.
- Arrange decorative twigs between the greenery.
- Attach pinecones with floral wire so they won’t fall out.
Keep the arrangement fairly low and full. Tall branches can make a lightweight container top heavy.
Secure and place: Use a wide, stable planter on a level surface beside the door. If it’s exposed to wind, use an anchoring method suited to the planter and surface. Don’t count on added weight alone.
Weather and storage: Choose a container specifically suitable for freezing conditions. Water trapped in the soil or container can freeze and cause cracking in some materials. The potting mix may also freeze, making it difficult to move or rearrange the branches later.
Avoid containers with blocked drainage. After Christmas, compost the greenery and clean the planter. Empty and store the container if its manufacturer recommends doing so for winter.
Save money: Reuse a suitable summer planter and ask a Christmas tree seller about leftover evergreen trimmings.
Smart product opportunity: A sturdy, frost suitable outdoor planter with drainage is a practical recommendation for readers who don’t already own one.
2. Create Outdoor Christmas Lantern Displays
Two outdoor lanterns with flameless candles can make an entrance feel welcoming without adding much clutter.

Materials and tools: Outdoor suitable lanterns, outdoor rated battery operated LED candles, greenery, weather resistant ribbon, and scissors.
How to make it
- Clean the lanterns and check for loose or damaged parts.
- Check the manufacturer’s outdoor use instructions for both the lantern and the LED candle.
- Place a suitable flameless LED candle inside each lantern.
- Tie a small greenery bundle around the handle.
- Add ribbon, keeping it clear of electrical components and ventilation openings.
- Arrange the lanterns on a level surface.
Use two different sizes if you have them. There’s no need to buy a matching set.
Secure and place: Set the lanterns in a protected porch corner, away from foot traffic. Follow any manufacturerprovided mounting instructions, and bring unsecured lanterns indoors before strong winds.
Weather and storage: A lantern labeled for outdoor use doesn’t automatically mean every candle placed inside it is suitable for outdoor conditions. Check both products separately.
Some battery operated candles are intended only for dry, sheltered locations. Keep them away from rain or moisture unless the manufacturer specifically permits that exposure.
Use flameless candles rather than open flames. Remove batteries and dry the lanterns before storage.
Save money: Decorate outdoor lanterns you already use throughout the year.
3. Make A Simple Christmas Door Swag
A door swag gives you the look of a Christmas wreath without buying a frame.

Materials and tools: Evergreen branches, floral wire, ribbon, pruning shears, and a suitable door hanger.
How to make it
- Cut several branches to different lengths.
- Arrange the longest branches at the back.
- Add shorter greenery across the front.
- Wrap floral wire tightly around the stems.
- Cover the wired section with a ribbon bow.
- Attach a hanging loop.
Secure and place: Hang the swag from a properly rated hook or door hanger. Check that the door still opens, closes, and locks easily.
Weather and storage: Fresh greenery eventually dries out. This project works best on a sheltered door. Compost natural branches after the holidays, or dry and store reusable artificial greenery.
Save money: Use evergreen trimmings and ribbon left over from other decorations.
4. Make An Outdoor Christmas Ribbon Wreath
A ribbon wreath is a no power tool project you can remake in different colors each year.

Materials and tools: Wire wreath frame, outdoor suitable ribbon, floral wire, scissors, and a secure wreath hanger.
How to make it
- Cut several equal lengths of ribbon.
- Fold each piece into a decorative loop.
- Attach the loops to the wire frame.
- Continue until the frame looks full.
- Finish with a larger bow or a few shatter resistant ornaments.
Plaid ribbon works well if you want something simple that matches natural greenery.
Secure and place: Use a hanger rated for the finished wreath’s weight. Avoid indoor adhesive hooks on exposed exterior surfaces.
Weather and storage: Choose ribbon suitable for outdoor conditions. A covered door helps reduce fading and moisture exposure. Store the wreath in a box large enough to protect its shape.
Save money: Keep the same wire frame and change the ribbon each season.
5. Decorate Porch Railings With Greenery And Bows
You can make a railing look festive with garland and a few bows. There’s no need to cover every section.

Materials and tools: Outdoor suitable garland, ribbon, reusable ties, measuring tape, and scissors.
How to make it
- Measure the railing section.
- Cut or select garland to fit.
- Position the garland along a suitable decorative section.
- Fasten it at several points.
- Add bows and tuck away loose ribbon ends.
Secure and place: Use ties compatible with the railing material. Keep necessary handholds clear, and don’t let garland hang loosely over an elevated edge.
Weather and storage: Check ties after windy weather. Remove the garland, let it dry, and coil it loosely for storage.
Save money: Decorate the railing nearest the entrance instead of the entire porch.
6. Make A Christmas Display With A Wooden Crate
An old wooden crate can hold a small Christmas arrangement without requiring much work.

Materials and tools: Sturdy wooden crate, sandpaper, compatible exterior finish, paintbrush, galvanized bucket, evergreen branches, and weather resistant ornaments.
How to make it
- Inspect the crate for loose boards and protruding nails.
- Sand rough areas and apply a suitable exterior finish if needed.
- Let the finish cure according to its instructions.
- Place a bucket of greenery inside the crate.
- Add a few secured decorations.
Secure and place: Keep the crate low, on a level porch surface, and out of the walking path. If it can’t be secured adequately, bring it inside when strong winds are expected.
Weather and storage: This is better suited to a covered porch than an exposed yard. Keep the wood out of standing water and dry it before storing.
Save money: Use an old crate and a bucket you already own.
Homemade Christmas Decorations for the Yard
Yard decorations need more protection because they’re exposed to wind, snow, and rain.
Keep lightweight displays low, use suitable supports, and avoid placing decorations where they could fall into the street or sidewalk.
7. Make Oversized Christmas Gift Box Decorations
Large decorative presents can fill an empty spot near the porch. For outdoor use, skip cardboard and use sturdy plastic containers.

Materials and tools: Outdoor suitable rigid plastic boxes with secure lids, weather resistant ribbon, suitable straps, appropriate anchoring hardware where needed, and scissors.
How to make it
- Choose two or three sturdy boxes in different sizes.
- Check that the containers are suitable for the expected outdoor temperatures.
- Wrap ribbon around each box like a present.
- Fasten the ribbon so it can’t slide off.
- Secure each lid.
- Arrange the boxes low to the ground without stacking them.
- Secure the containers using a suitable anchoring system when required.
Secure and place: Plastic storage containers aren’t automatically wind resistant. Their broad sides can catch strong gusts, even when the boxes seem heavy enough.
For a fully exposed yard, use a purpose made anchoring system appropriate for the containers, ground conditions, and expected loads. Follow the manufacturer’s installation instructions.
Before driving ground stakes or anchors into the soil, contact 811 to request underground utility markings and follow local digging requirements.
If you can’t anchor the boxes safely, place them in a sheltered location and bring them indoors when windy weather is expected.
Weather and storage: Plastic boxes may become brittle in freezing temperatures, depending on the material. Ribbon and lids can also be damaged by storms.
Don’t assume a container can withstand winter weather simply because it’s made from plastic.
After Christmas, remove the ribbon and stack the dry boxes for storage.
Save money: Use sturdy outdoor storage containers you already own instead of buying decorative gift boxes.
8. Make A Pinecone Christmas Arrangement
Pinecones, evergreen branches, and a few decorative twigs make an inexpensive arrangement for a sheltered spot.

Materials and tools: Heavy outdoor suitable bucket, pinecones, evergreen branches, floral wire, garden pruners, and suitable arrangement material.
How to make it
- Clean the pinecones and check for insects.
- Fill the container with material that supports the greenery.
- Insert evergreen branches.
- Wire larger pinecones into the arrangement.
- Add a few red twigs for color.
Secure and place: Use a low, wide container and fasten the loose materials. Position it near a protected porch wall or garden border, not in an open windy area.
Weather and storage: Natural pinecones absorb moisture and can deteriorate. Compost worn natural materials, then dry and store the container.
Save money: Collect fallen pinecones where permitted and use leftover branches from another project.
Simple Wooden Outdoor Christmas Projects
Wood works well for reusable holiday decorations, but the type of wood matters.
For outdoor signs and stars, choose wood or exterior rated wood products suitable for the expected exposure. Paint alone won’t make every type of wood weather resistant.
Precut boards and wooden shapes are easier for beginners than making angled cuts with a saw.
9. Make A Painted Wooden Christmas Sign
A wooden Christmas sign only needs a board, paint, and simple lettering.

Materials and tools: Precut exterior suitable wooden board, sandpaper, compatible exterior primer, exterior paint, stencils, paintbrush, and appropriate outdoor mounting hardware.
How to make it
- Choose wood suitable for exterior use.
- Sand the board and remove the dust.
- Apply exterior primer following the manufacturer’s instructions.
- Paint the front, back, edges, and cut ends.
- Let the finish dry and cure completely.
- Add lettering with stencils or a small brush.
- Mount the sign to a suitable fixed support.
“Merry Christmas” or “Joy” is enough. Complicated artwork isn’t necessary.
Secure and place: Use mounting hardware appropriate for the sign’s weight and the surface. Don’t leave a tall sign leaning unsecured against the house.
Weather and storage: Exterior primer and paint help protect wood against moisture and sunlight, but they don’t prevent every type of deterioration.
Inspect the sign each season, particularly around cut ends, edges, and mounting holes. Repair chipped or peeling finishes before using it again.
Store the sign in a dry area when Christmas is over.
Save money: Use leftover exterior suitable wood and compatible paint from another home project.
10. Make Wooden Christmas Stars
Wooden stars make a simple fence or porch wall display. Precut shapes keep the project beginner friendly.

Materials and tools: Precut exterior suitable wooden stars, sandpaper, compatible exterior primer, exterior paint, paintbrush, and mounting hardware.
How to make it
- Choose wooden stars made from material suitable for outdoor use.
- Sand each star and remove the dust.
- Apply primer to all exposed surfaces.
- Paint the front, back, edges, and cut ends.
- Allow the finish to cure completely.
- Arrange the stars in a group of different sizes.
- Attach each one securely to a suitable support.
Secure and place: Use outdoor fasteners rated for the mounting surface and each star’s weight. Don’t rely on indoor adhesive strips or place the stars where they could fall onto a walkway.
Weather and storage: Exterior paint provides protection but doesn’t make wood maintenance free.
Check the stars each season for cracks, moisture damage, peeling paint, and loose mounting hardware. Touch up the finish when needed.
Wrap the stars separately when storing them to protect the painted surfaces.
Save money: Use leftover exterior paint and choose simple precut shapes.
If you’d like to build a larger decoration, see my guide to DIY wooden Christmas trees for more woodworking ideas.
How To Make Outdoor Decorations Weather Resistant
A decoration doesn’t have to survive every kind of weather, but it should be made for the conditions it will normally face.

Protect Wooden Decorations
Choose exterior suitable wood and a compatible finish.
Sand the surface, apply primer, and finish all exposed areas, including the back and cut ends. Follow the manufacturer’s drying and curing instructions before placing the decoration outdoors.
Paint and exterior finishes help reduce weather damage, but they don’t make every wood product suitable for outside use.
Inspect painted decorations regularly and repair damaged finishes as needed.
Secure Decorations Against Wind
The way you mount a decoration matters as much as its weight.
Wreaths need suitable hangers. Wooden signs need properly rated fasteners. Freestanding displays may require purpose made anchors matched to the surface and decoration.
Check supports regularly and remove portable decorations before severe weather.
Choose Materials That Handle Moisture
For exposed locations, look for exterior suitable wood, outdoor nrated artificial greenery, weather resistant ribbon, and containers suitable for freezing temperatures.
Keep indoor only materials, untreated indoor wood, and moisture sensitive decorations under appropriate shelter or indoors.
Outdoor Christmas Lighting and Electrical Safety
Outdoor Christmas lights should be designed for the location where you use them.
Before buying lights, look for an appropriate certification mark from a recognized independent testing organization, such as UL, ETL (Intertek), or CSA.
That mark indicates the electrical product has been evaluated against applicable safety requirements. It doesn’t automatically mean the lights are suitable for outdoor use, so check the manufacturer’s indoor or outdoor rating separately.
Outdoor Lighting Safety Checklist
- Choose lights and electrical decorations marked for outdoor use.
- Look for appropriate independent safety certification, such as UL, ETL, or CSA.
- Use a properly GFCI protected electrical supply.
- Inspect cords, plugs, and light strands for damage before installation.
- Follow the manufacturer’s limits for connecting strands.
- Keep cords away from door hinges, walking paths, and standing water.
- Use suitable outdoor mounting clips instead of nails or staples that could damage insulation.
- Protect electrical connections as directed by the manufacturer.
- Turn lights off before leaving home or going to sleep.
An outdoor rated timer can help manage the lighting schedule. Make sure it’s suitable for the connected load and weather conditions.
Never use indoor only electrical equipment outside or attempt improvised wiring. Have a qualified electrician address damaged or unsuitable outdoor outlets.
For more information, see the Electrical Safety Foundation International’s outdoor decorating safety guidance.
DIY Outdoor Christmas Decorations For Small Spaces
For a narrow porch, apartment entrance, or balcony, keep decorations compact. One planter or hanging decoration may be enough.
11. Make A Small Christmas Greenery Basket
A small greenery basket fits beside a door where a large planter would get in the way.

Materials and tools: Low, sturdy outdoor suitable basket or container, evergreen branches, floral wire, ribbon, pruners, and scissors.
How to make it
- Add suitable support material inside the basket.
- Arrange short evergreen branches.
- Secure the stems with floral wire.
- Add a small ribbon bow.
- Keep the arrangement low enough to remain stable.
Secure and place: Set the basket on a level surface outside the door’s swing. Use a suitable anchoring method if needed, or move it indoors during strong winds.
Weather and storage: Metal or other outdoor suitable containers handle damp locations better than many indoor woven baskets. Compost natural greenery and dry the container before storage.
Save money: Reuse a small outdoor container rather than buying a holiday themed basket.
12. Make A Small Outdoor Lighted Christmas Decoration
A small lighted hoop can add Christmas lighting without running strands across the roof or yard.

Materials and tools: Sturdy metal hoop or wreath frame, certified outdoor rated LED Christmas lights, outdoor suitable plastic ties, scissors or flush cutters, and a suitable mounting system.
How to make it
- Lay the frame on a table.
- Position the lights around the hoop.
- Attach the strand with ties without pinching the insulation.
- Trim the tie ends carefully.
- Inspect the strand and connections.
- Mount the hoop securely.
- Connect the lights according to their instructions.
Secure and place: Use a fixed hanger rated for the finished decoration’s weight and location. Keep the hoop from swinging into the door, and never use the electrical cord to support its weight.
Weather and storage: Look for a suitable UL, ETL, or CSA certification mark and confirm the lights are specifically rated for outdoor use.
Use connections and a power supply appropriate for the expected conditions. Unplug and dry the decoration before storage.
Save money: Reuse a sturdy wreath frame and suitable outdoor lights you already own, provided they’re in good condition.
For cleanup tips, see how to wrap Christmas lights for storage.
Decorating a Small Porch Without Drilling
For renters, start with decorations that don’t require permanent changes.
A compact planter, a suitable over the door wreath hanger, or a freestanding basket can work without drilling holes.
Check rental rules before attaching decorations to railings, walls, or balcony structures. Some adhesive hooks aren’t suitable for cold or wet conditions, so always check the product instructions.
For more ideas, read my guide to balcony Christmas decor ideas.
You can also coordinate your outdoor display with these Christmas entryway ideas for inside the home.
FAQs About My DIY Outdoor Christmas Decorations
What Are the Easiest DIY Outdoor Christmas Decorations?
Evergreen planters, door swags, ribbon wreaths, and greenery baskets are among the simplest projects. Most need only scissors, pruners, floral wire, and basic supplies.
How Can I Make Inexpensive Outdoor Christmas Decorations?
Reuse existing planters, baskets, leftover exterior suitable wood, and suitable ornaments. Natural greenery and pinecones can reduce costs, while precut wood saves beginners from buying cutting tools.
How Can I Decorate a Small Porch Without Drilling?
Use compact planters, a lightweight wreath on a suitable door hanger, or a low greenery arrangement. Check rental restrictions and keep the entrance and walking areas clear.
How To Store Outdoor Christmas Decorations
A little organization after Christmas can save you from repairing or replacing decorations next year.

- Remove natural greenery. Compost branches and pinecones that can’t be reused.
- Clean and dry reusable decorations. Don’t pack away damp wood, wreaths, or containers.
- Inspect hardware and finishes. Check for rust, chipped paint, and loose parts.
- Wrap lights loosely. Use a storage reel or suitable organizer without sharply bending the cords.
- Remove batteries. Store battery operated decorations according to the manufacturer’s instructions.
- Label your containers. Keep porch, yard, and lighting supplies organized.
- Choose a dry storage location. Protect decorations from moisture and heavy items that could crush them.
Store small supplies such as reusable ties, hooks, and spare mounting hardware in a labeled container. That makes next year’s setup easier.
Final Thoughts
Start with one part of your porch or yard rather than decorating everything at once.
An evergreen planter, a handmade wreath, or a painted wooden sign may be all you need. Choose materials that suit the weather, secure the finished project properly, and store it carefully so you can use it again next Christmas.

Willie Drew
I’m Willie Drew, and I’m here to help you turn your home into a space you’re proud to show off using simple projects, smart tools, and realistic budgets.