


How To Build A Bird House That Looks Good Any Yard
I love projects that are simple, useful, and actually get used, and learning how to build a bird house checks all three boxes.
This is one of those DIY builds that feels approachable even if you do not have a full workshop.
With basic tools, untreated wood, and a few smart design choices, it is easy to create a safe and comfortable space for local birds.
This guide walks through how to build a bird house step by step so you can build with confidence and enjoy watching birds settle in.
Choosing The Right Birdhouse
Choosing the right birdhouse design starts with understanding which birds you want to attract and what they actually need.
The size, shape, and entrance hole all matter more than decorative details. When a birdhouse matches a bird’s nesting habits, it’s far more likely to be used.
Simple Birdhouse Box Designs
Simple designs work best. A basic wooden nesting box is easy to build and provides everything most birds need.
One-board birdhouses are especially beginner-friendly and quick to assemble.
Natural-style options like log birdhouses offer good insulation and durability, while gourd birdhouses add visual interest but require extra prep time.
No matter the style, always use untreated wood such as cedar or pine. Avoid paint, pressure-treated lumber, or sealants inside the box, as these can harm birds.
Focus on function first: solid construction, a sloped roof for rain runoff, ventilation holes near the top, and drainage holes in the floor.
Choosing Birdhouse Entrance Holes
The size of the entrance hole is one of the most important parts of your birdhouse dThe entrance hole controls which birds can safely use the birdhouse. If the hole is too large, predators or aggressive birds may get inside.
- Bluebirds prefer a 1.5-inch hole
- Chickadees do best with a 1.125-inch hole
- Wrens also use a 1.5-inch hole
The hole should be smooth and placed about 6 to 10 inches above the floor inside the box. This keeps eggs and chicks protected from predators and weather.
Getting the entrance size right is one of the most important steps in birdhouse design.
Match Birdhouses To Birds
Different birds need different box sizes and placement heights. Bluebirds prefer open areas and boxes mounted about 5 feet off the ground.
Chickadees prefer smaller boxes attached to trees. Larger birds like purple martins require multi-compartment houses mounted much higher.
Before building, take a moment to notice which birds visit your yard.
Designing the birdhouse around local species turns it from a decoration into a home birds will actually use.
Gathering Tools And Materials
Building a birdhouse doesn’t require a full workshop. Most designs can be made with basic tools and a few simple materials.
The goal is a sturdy house that stays dry, stays ventilated, and is safe for birds.
Essential Building Tools
- Measuring tape and pencil for accurate marks
- Miter Saw for straight cuts
- Drill and drill bits for pilot holes, ventilation, drainage, and the entrance hole
- Sandpaper to smooth sharp edges and rough spots
- Clamps (optional) to hold pieces steady while assembling
If you only have a drill and a handsaw, you can still build a solid birdhouse.
Choosing Wood And Hardware
Untreated wood like cedar or pine (easy to cut and safe for birds)
- Exterior grade screws or galvanized nails to prevent rust
- Wood glue (optional) for extra strength, used sparingly
- Hinges or a simple latch (optional) if you want an easy-clean side or roof
Avoid pressure-treated wood or chemical-treated lumber. If you paint the outside, keep the inside unfinished and use a bird-safe exterior paint.
Smart Birdhouse Add Ons
These aren’t required, but they improve how well the birdhouse holds up:
- Roof overhang to reduce rain getting inside
- Ventilation holes near the top to prevent overheating
- Drainage holes in the floor to keep the nest dry
Having the right tools and safe materials makes the build easier, but the real win is building a box that protects birds from weather and predators.
Safe Workspace Setup Tips
A simple setup keeps the project safe and frustration-free. You don’t need anything fancy, just a stable space and basic protection.
Wear safety glasses when cutting or drilling to protect your eyes from wood chips. A dust mask is helpful when sanding, especially in enclosed spaces.
Gloves can help with splinters, but remove them when using power tools.
Set up your workspace on a flat, well-lit surface like a workbench or sturdy table. Keep tools within reach and clear away clutter so pieces don’t slide or tip while you work.
Take a moment to organize screws, drill bits, and wood pieces before starting. A clean workspace helps you work more accurately and reduces mistakes.
A safe, steady setup makes the entire build smoother and more enjoyable.
Build A Birdhouse Step By Step
Building a birdhouse involves careful measuring, cutting, and assembling to make sure the birds feel safe and cozy.
You’ll also want to add just the right entrance hole and finish it with protection from the weather. Let’s break down each step so your DIY birdhouse turns out just right.
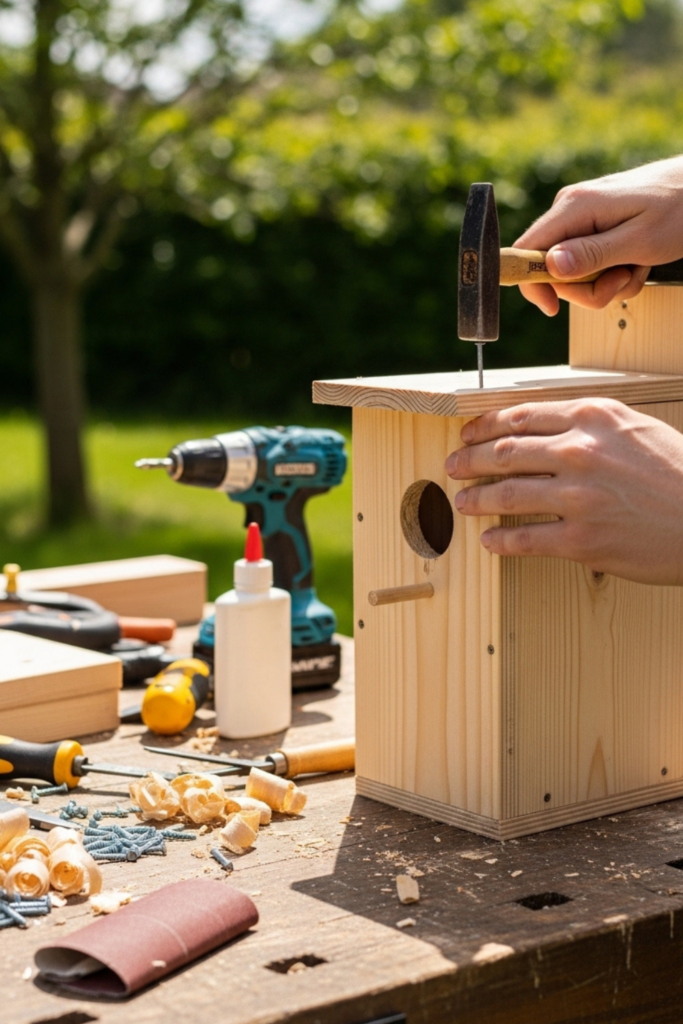
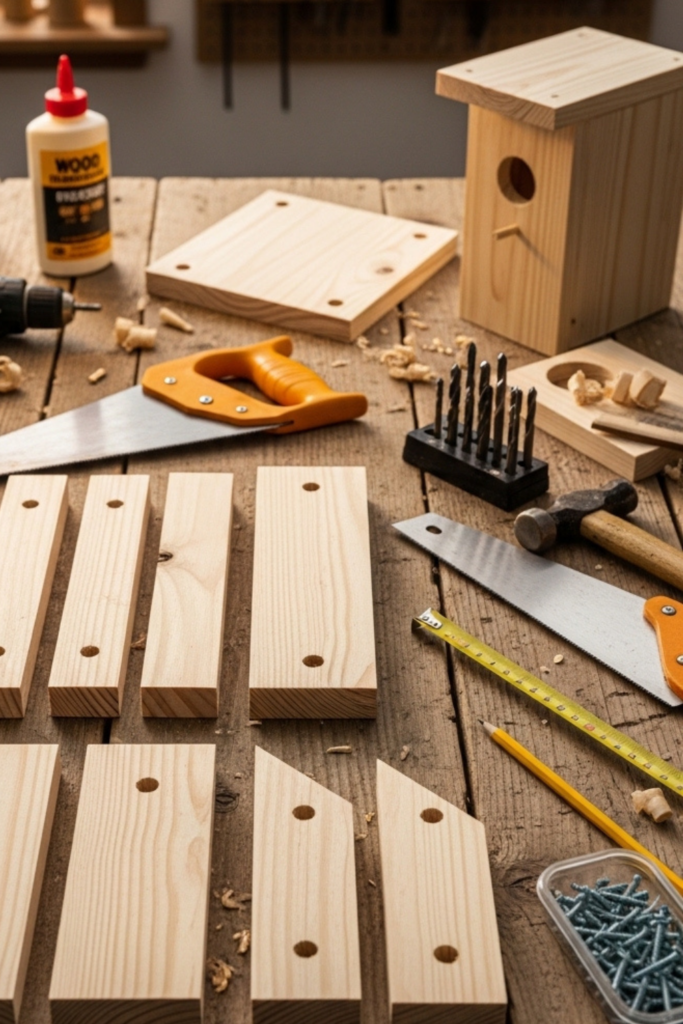
Measuring And Cutting Pieces
Accurate cuts make the entire birdhouse easier to assemble and more durable. Take your time with measuring and marking before cutting.
Small mistakes here can cause gaps later.
Start with untreated wood like cedar or pine. Measure and mark each piece using a pencil and measuring tape.
A simple birdhouse typically includes two side panels, a front, a back, a floor, and two roof pieces.
Cut the pieces carefully using a hand saw or power saw, keeping edges straight and clean.
If you don’t have a saw, many home improvement stores will cut wood for you if you bring measurements.
Here’s a common size example for a basic birdhouse:
- Side panels: 4 x 3.5 inches
- Floor: 5 x 3.25 inches
- Front and back panels: 5 x 8 inches
- Roof panels: 4.75 x 7 inches and 5.5 x 7 inches
After cutting, lightly sand all edges and corners. This removes splinters and helps pieces fit together smoothly.
Clean, accurate cuts make assembly faster and help create a birdhouse that stays strong through changing weather.lp everything fit snugly.
Remember, accuracy here saves you frustration later when assembling.
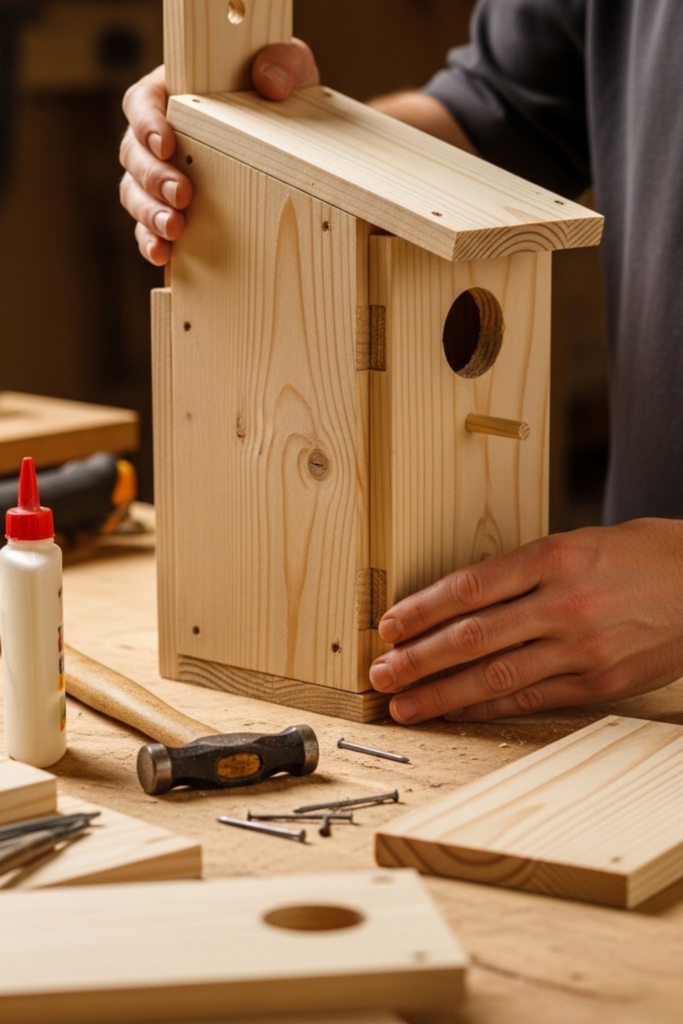
Birdhouse Panel Assembly
Once all pieces are cut and sanded, assembly comes together quickly. Work on a flat surface and check alignment as you go to keep the birdhouse square and sturdy.
Start by attaching one side panel to the front panel. Apply a small amount of wood glue along the edge if desired, then secure it with galvanized screws.
Pre-drill pilot holes to prevent splitting. Repeat with the second side panel.
Next, slide the floor piece into position. Secure it with screws from the sides and back, but avoid gluing it in place.
Leaving the floor removable or accessible makes future cleaning easier.
Attach the back panel last, fastening it firmly to the sides and floor. This panel adds strength and often supports mounting, so make sure it sits straight and tight.
Once the main structure is assembled, check all joints for gaps or loose fasteners. A solid, square frame helps the birdhouse last longer and keeps birds safe from weather and predators.
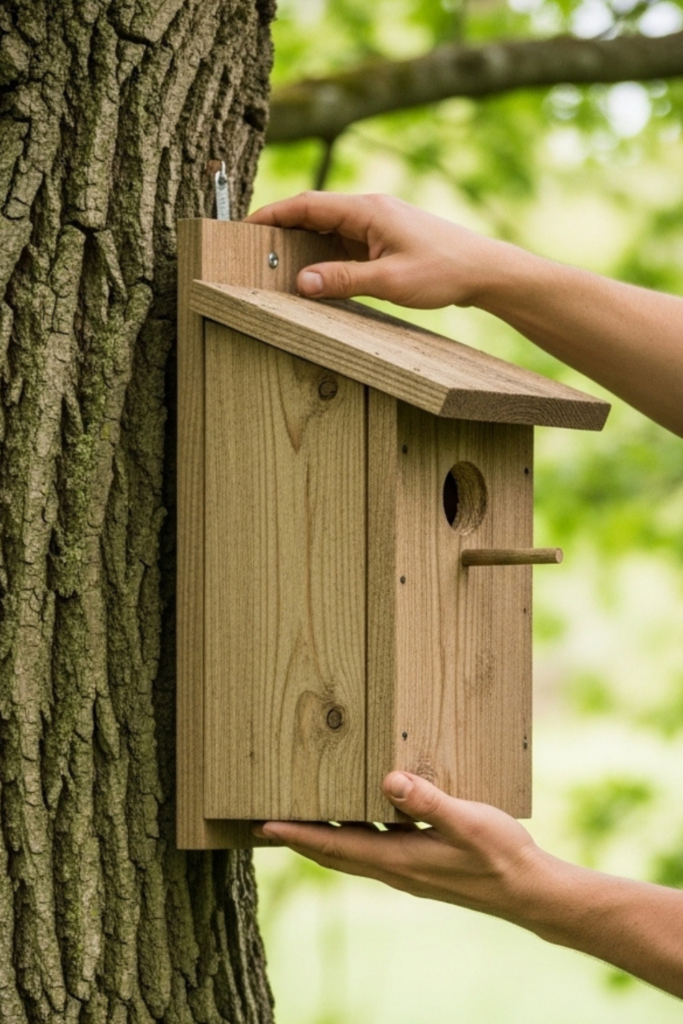
Drilling Entrance Hole Details
The entrance hole is one of the most important parts of a birdhouse. Its size and placement determine which birds can safely use the box.
Mark the entrance hole on the front panel before assembling or after the main structure is built.
Drill the hole cleanly using the correct size for your target bird species. Place the hole in the upper half of the front panel, about 6 to 10 inches above the floor inside the box.
After drilling, sand the edges of the hole until smooth. Sharp edges can injure adult birds or chicks.
Avoid adding a perch below the entrance, as it can make it easier for predators to reach inside.
To improve comfort, drill small ventilation holes near the top of the side panels. Add a few drainage holes in the floor so moisture can escape.
These simple details help regulate temperature and keep the nesting area dry.
Once finished, double-check that all holes are clean, smooth, and properly placed. Small details here make a big difference in whether birds choose the house.
Finishing Touches And Weatherproofing
Before placing the birdhouse outside, take a few steps to protect it from the elements. A weather-resistant finish helps the wood last longer and keeps the interior dry.
If you choose to paint or stain, use natural or neutral colors and apply only to the outside surfaces.
Never paint the inside of the birdhouse. Avoid bright colors or strong-smelling finishes, as these can discourage birds.
Seal roof joints and exterior seams lightly to reduce water entry, but don’t block ventilation or drainage holes.
Make sure the roof overhangs the front slightly to help shed rain away from the entrance.
Once finished, allow the birdhouse to dry completely before mounting.
A properly sealed birdhouse holds up better through rain, wind, and seasonal changes while staying safe for nesting birds.
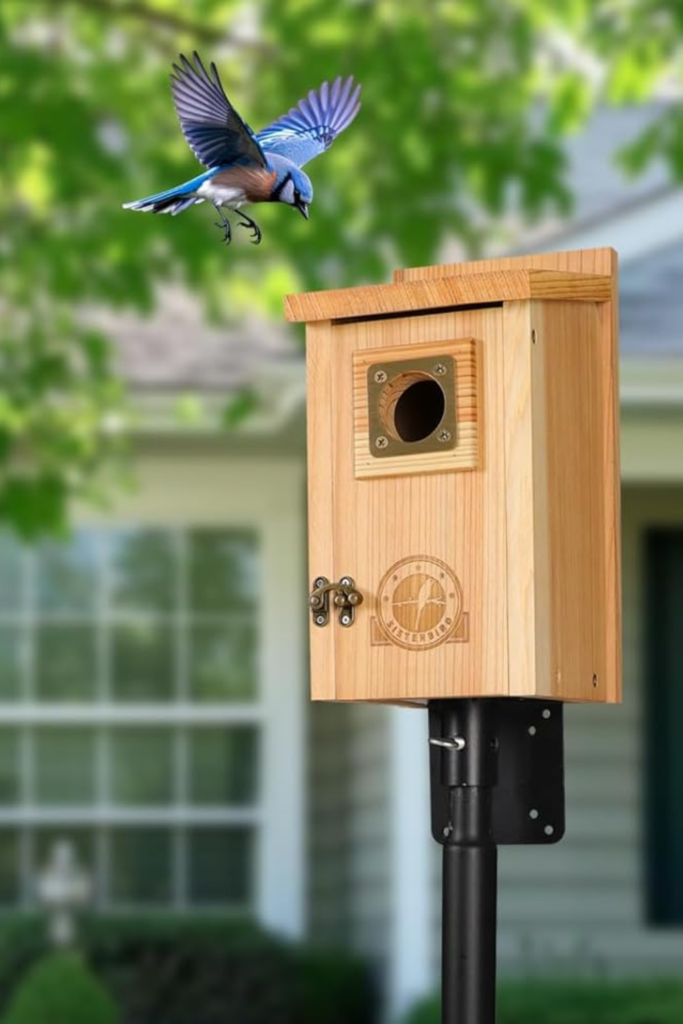
Mounting And Maintaining Birdhouses
Proper mounting and simple maintenance help ensure birds actually use the house and return year after year. A well-placed, well-kept birdhouse offers safety, comfort, and protection from predators and weather.
Mount the birdhouse at the recommended height for the species you want to attract, usually between 5 and 10 feet off the ground. Choose a quiet location away from heavy foot traffic and pets. Face the entrance toward the east or northeast so it gets gentle morning sun and avoids harsh afternoon heat.
Make sure the birdhouse is securely attached and does not sway. A stable box feels safer to nesting birds and reduces wear on the structure. Adding a predator guard to the mounting post provides extra protection for eggs and chicks.
Maintenance is simple but important. Clean the birdhouse once nesting season ends by removing old nesting material and debris. Check for loose screws, cracks, or blocked ventilation and drainage holes. Make any small repairs before the next season begins.
With proper placement and basic upkeep, your birdhouse can remain a safe, welcoming home for birds for many years.
FAQ’s About My How To Build A Bird House
What Is The Best Wood To Use When Learning How To Build A Bird House?
The best wood to use when learning how to build a bird house is untreated cedar or pine.
What Size Entrance Hole Should A Bird House Have?
Entrance hole size depends on the bird species you want to attract.
Where Should A Finished Bird House Be Mounted?
A finished bird house should be mounted 5 to 10 feet off the ground in a quiet area away from heavy traffic.

Willie Drew
I’m Willie Drew, and I’m here to help you turn your home into a space you’re proud to show off using simple projects, smart tools, and realistic budgets.