

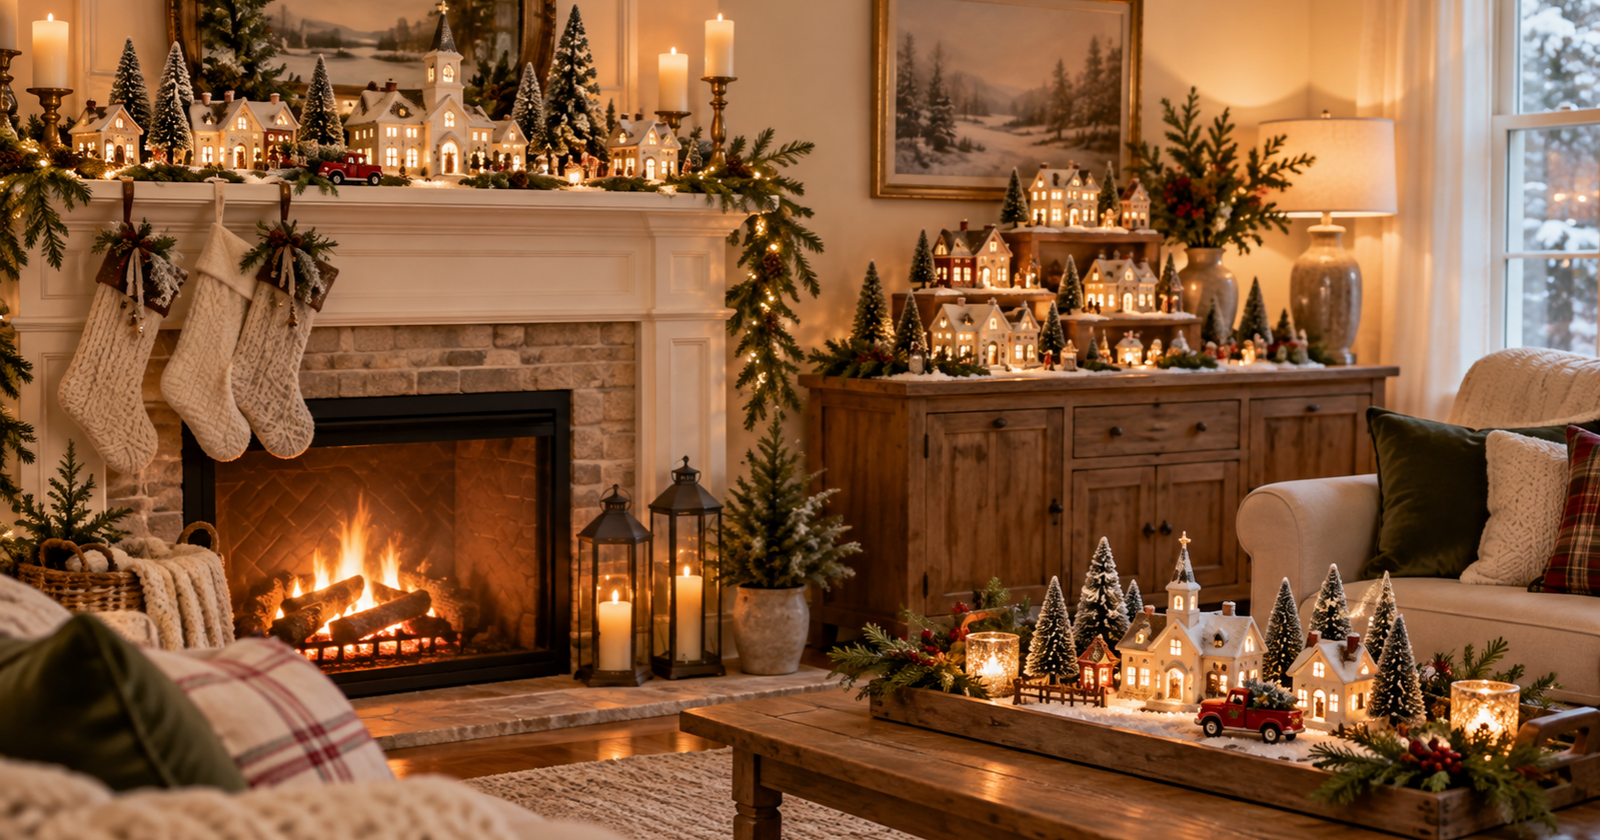
12 Christmas Village Display Ideas For Mantels, Shelves, And Tables
Your Christmas village does not need a whole room or a giant collection. Mantels, bookshelves, sideboards, trays, tables, window ledges, and stable tiered setups all make great homes for a village, as long as you place the buildings first and then add smaller accents like trees and figures for depth. That order keeps even three little houses looking planned instead of scattered.
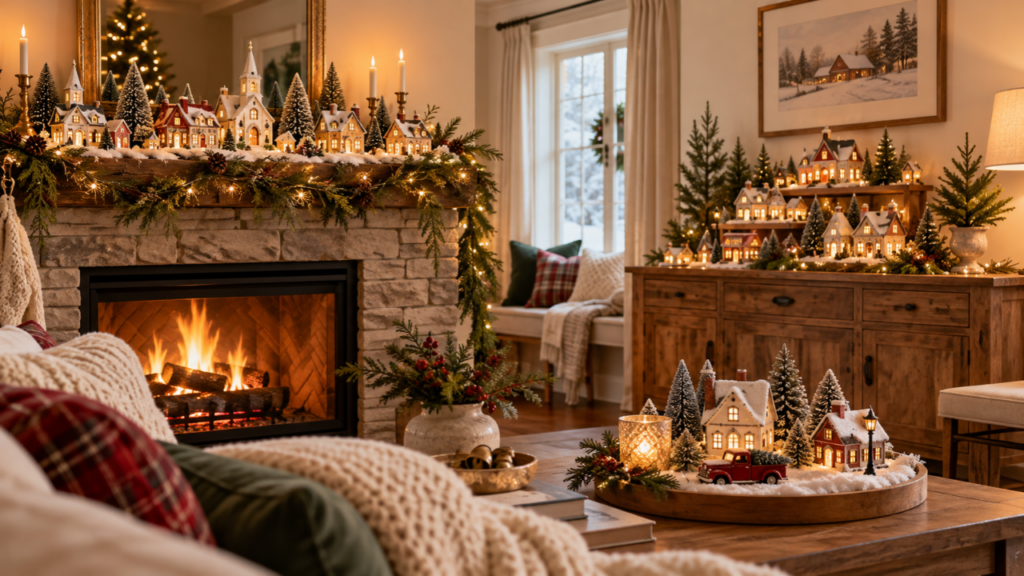
I’ve found that most people run into trouble on the opposite end. They buy snow, trees, and people first, then try to squeeze the houses in. The houses are the stars, so they get the best spots.
Every idea below shares a few simple rules. Use a flat, steady surface. Keep breakable pieces back from edges. Follow the maker’s instructions for any lights, adapters, or battery boxes that came with your buildings.
Quick Picks:
- Best for one big focal wall: the fireplace mantel.
- Best for tiny apartments: a tray or glass lantern.
- Best for kids and pets: a glass front hutch.
- Best for large collections: a corner shelving unit.
1) Christmas Village On A Fireplace Mantel
A mantel gives your village a ready made stage at eye level, which is why it’s the most popular spot. Most mantels run 5 to 7 inches deep, so plan on one row of houses with a few trees tucked between them.
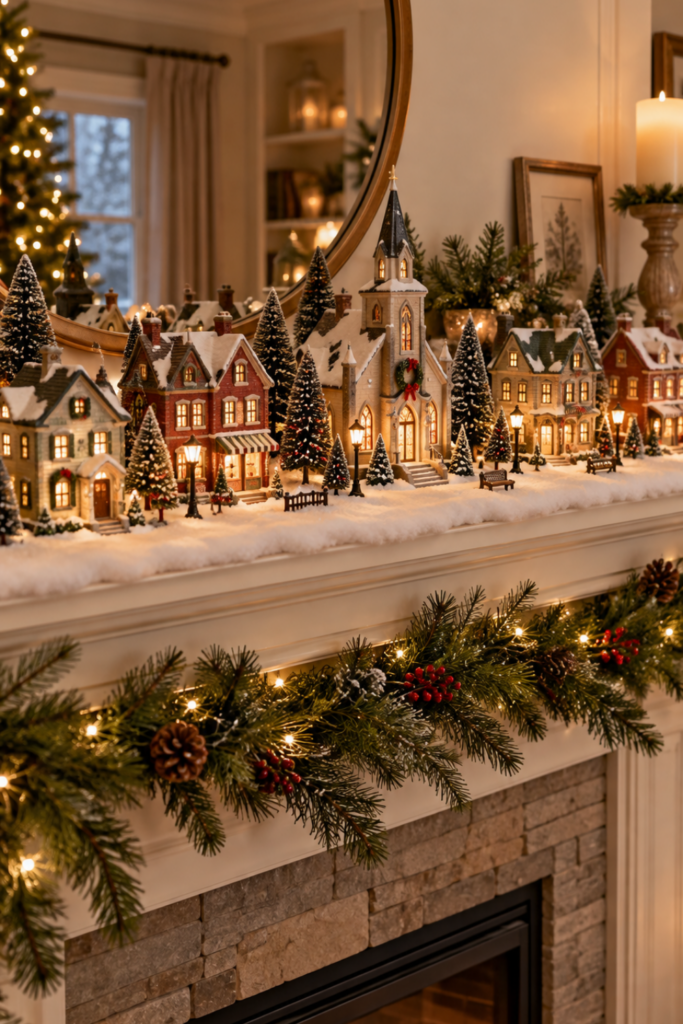
Set your tallest building, like a church or clock tower, near the center. Step smaller cottages down toward each end. A strip of white felt makes a cheap snow base that won’t shed.
Space needs: about 4 to 6 feet of length fits five to seven small buildings.
Benefits:
- Everyone sees it when they walk into the room.
- Garland draped below hides the edge and adds a frame.
Limitations:
- Heat is the big one. The National Fire Protection Association advises keeping anything that can burn at least three feet from fireplaces. If you light fires, skip cotton snow, paper, and greenery on the mantel, or save the village for a fireplace you don’t use.
- Narrow ledges leave little room for error. A small dab of museum putty under each house keeps it from sliding.
Run cords down the side behind garland, not across the hearth.
2) Tiered Christmas Village On A Sideboard
A sideboard gives you depth, often 16 to 20 inches, so you can build two or three levels and see every rooftop. This is where a mid size collection starts to look like a real town.
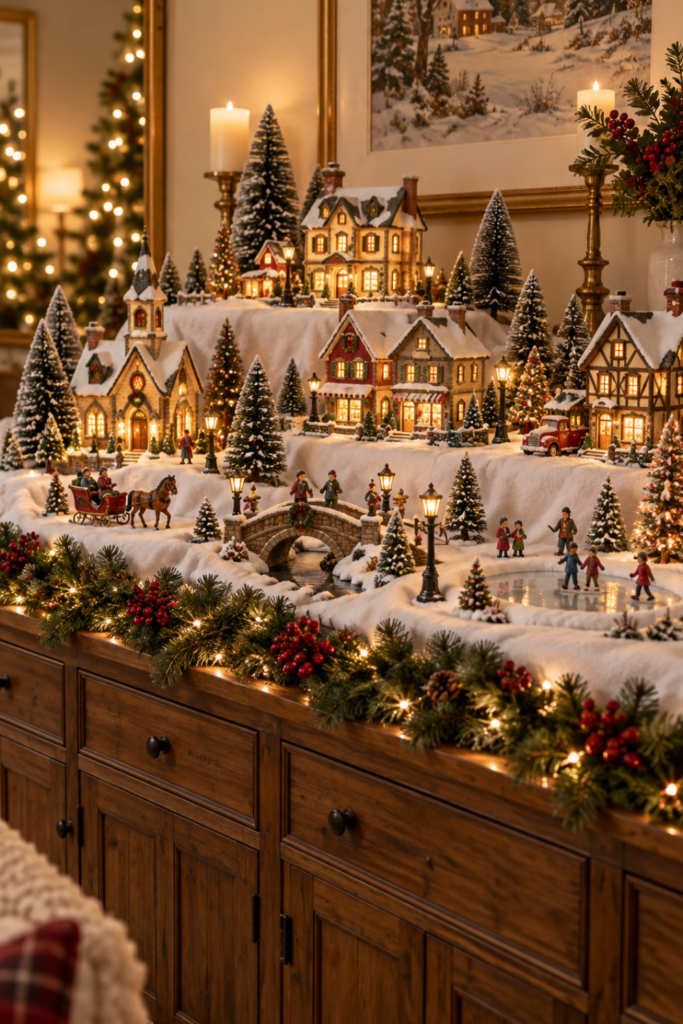
Make the back level highest. Sturdy boxes, stacked books, or wooden crates work well as risers. Drape a white flannel throw or felt over them so the steps look like snowy hills.
Space needs: a 4 to 5 foot sideboard holds eight to twelve houses on three tiers.
Benefits:
- Back row buildings stay visible over the front row.
- Drawers below make a handy spot for spare bulbs and adapters.
Limitations:
- Every riser must sit flat and not rock. Press on each corner before a building goes on top.
- It takes over your serving space for the season.
I always recommend placing the back tier’s buildings first, since reaching over finished front rows is how pieces get knocked off.
3) Christmas Village Across A Bookshelf
A bookshelf turns your village into a stacked neighborhood, one little street per shelf. It works in rooms with no mantel at all.
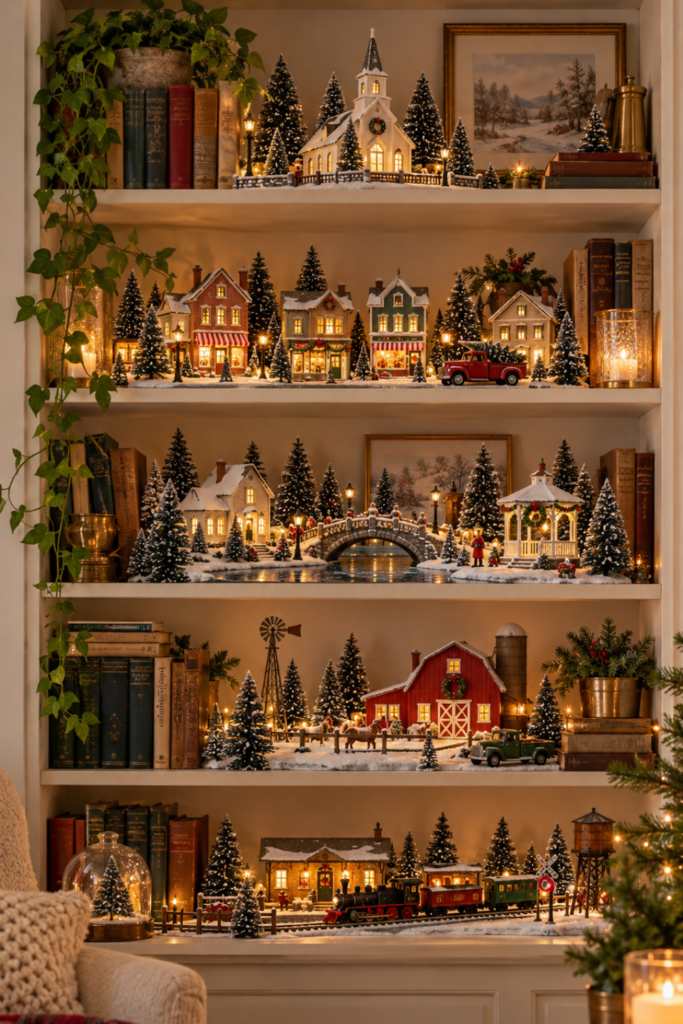
Give each shelf a theme. The top shelf might hold the church and town square. The middle could be shops. The bottom could hold cottages and a skating pond made from a small mirror.
Books stay useful here. Lay a few flat and use them as hidden risers, or stand a row behind houses as a backdrop.
Space needs: standard 10 to 12 inch deep shelves fit one row plus trees.
Benefits:
- You can show a big group in a small footprint.
- Each shelf tells its own small story.
Limitations:
- Tall bookcases can tip. Anchor the case to the wall, especially with kids around.
- Lit houses need cords run down the back edge. Drill a small hole in the back panel or use adhesive cord clips.
4) Small Christmas Village On A Tray
A tray holds a complete little scene that you can lift, move, and dust in one go. It’s perfect if you own just two or three houses.
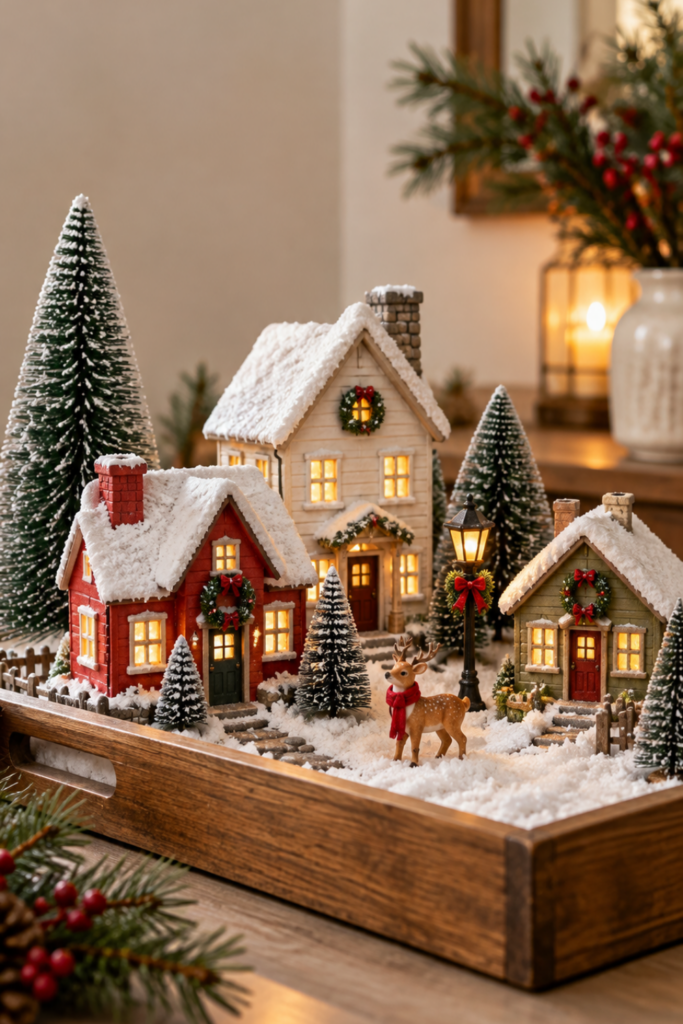
Pick a tray with a raised lip, about 12 by 18 inches. Line it with felt, add one house slightly off center, a second smaller house behind it, and a cluster of bottlebrush trees in the gaps. One figure walking toward a door brings it to life.
Space needs: a coffee table, kitchen counter, or nightstand.
Benefits:
- The lip keeps small pieces from rolling off.
- It costs almost nothing if you reuse a serving tray.
Limitations:
- There’s room for only a few pieces before it looks crowded.
- A coffee table sits at toddler and dog height.
Battery operated houses fit this idea best, so no cord trails off the table.
If you’re planning to display your Christmas village on a kitchen counter, take a look at my winter kitchen counter decor ideas for more ways to decorate without losing valuable workspace.
5) Christmas Village On An Entryway Console
An entryway console greets guests with a tiny town the moment they step inside. These tables run narrow, often 10 to 14 inches deep, so you’ll work in a long single line.
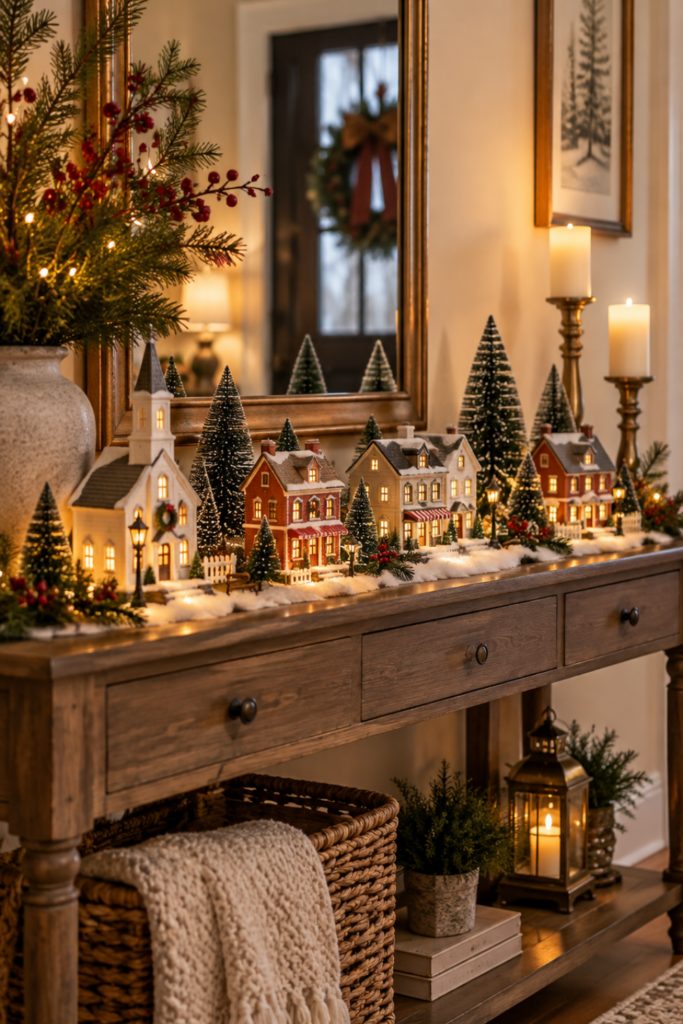
Center one welcoming building, like an inn or general store. Add a couple of houses to each side and keep the ends low so the table doesn’t look top heavy. A lamp or mirror behind the scene adds height for free.
Space needs: 3 to 4 feet of tabletop.
Benefits:
- Guests see it right away.
- A mirror behind it doubles the glow of lit windows.
Limitations:
- Coats, bags, and keys all come through here. Leave 4 inches clear at the front edge.
- Doors opening and closing send drafts and bumps.
Put a small dish at one end for keys. That keeps hands out of the village.
6) Christmas Village Centerpiece For a Dining Table
A dining table centerpiece lets your village become part of holiday meals. Keep it low and long so people can still see each other.
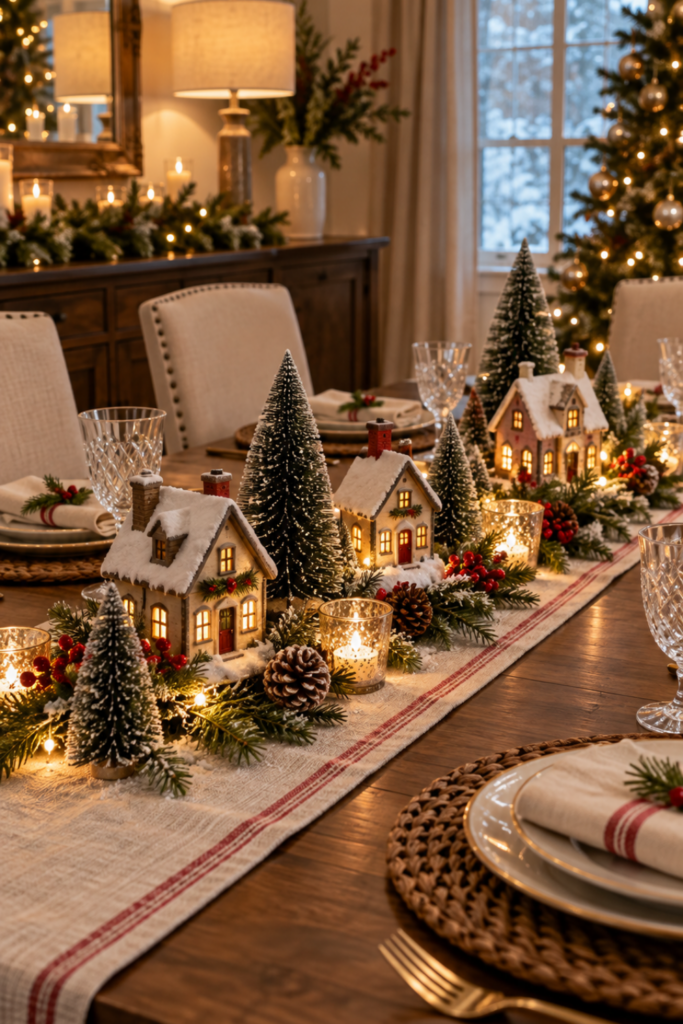
Use a runner about 12 inches wide down the middle. Place two or three short houses along it with bottlebrush trees between them. Skip anything over 8 inches tall.
Space needs: the center third of the table, leaving room for platters.
Benefits:
- Lit windows make dinner feel cozy.
- It’s easy to pack away when you need the full table.
Limitations:
- Spills happen. Avoid loose snow near food.
- Cords crossing the table are a trip and tug risk.
7) Christmas Village Inside A Glass Front Hutch
A glass front hutch keeps your village safe behind doors while still on full display. If you have curious kids or a cat who climbs, this is the spot I’d pick.
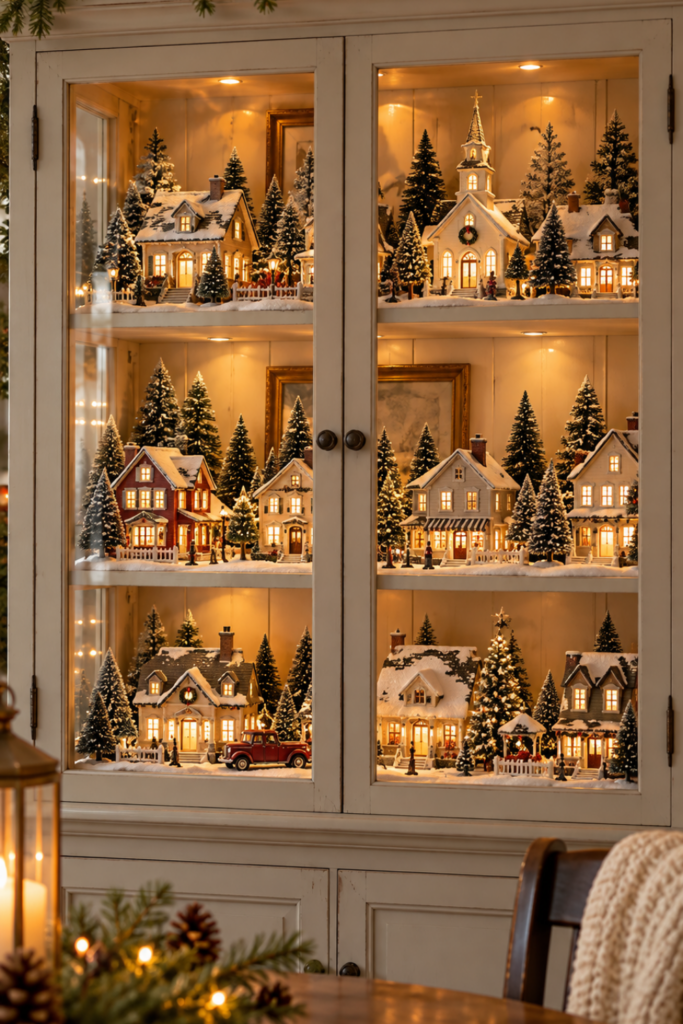
Treat each shelf as its own level. Use the glass shelves’ depth for a front and back row. Small LED fairy lights tucked along the back give soft glow without warmth.
Space needs: whatever shelves you can clear of dishes.
Benefits:
- Dust stays off, so cleaning is easy.
- Fragile and older pieces stay protected.
Limitations:
- Closed cabinets trap heat. Use LED lights only and check the maker’s guidance on bulbs.
- Cords need a path out, usually through a back gap or hinge side.
Turn the lights off when you leave the house.
8) Miniature Village On A Secure Window Ledge
A wide, secure window ledge lets your village glow for neighbors walking by at night. You need a sill at least 5 inches deep and flat.
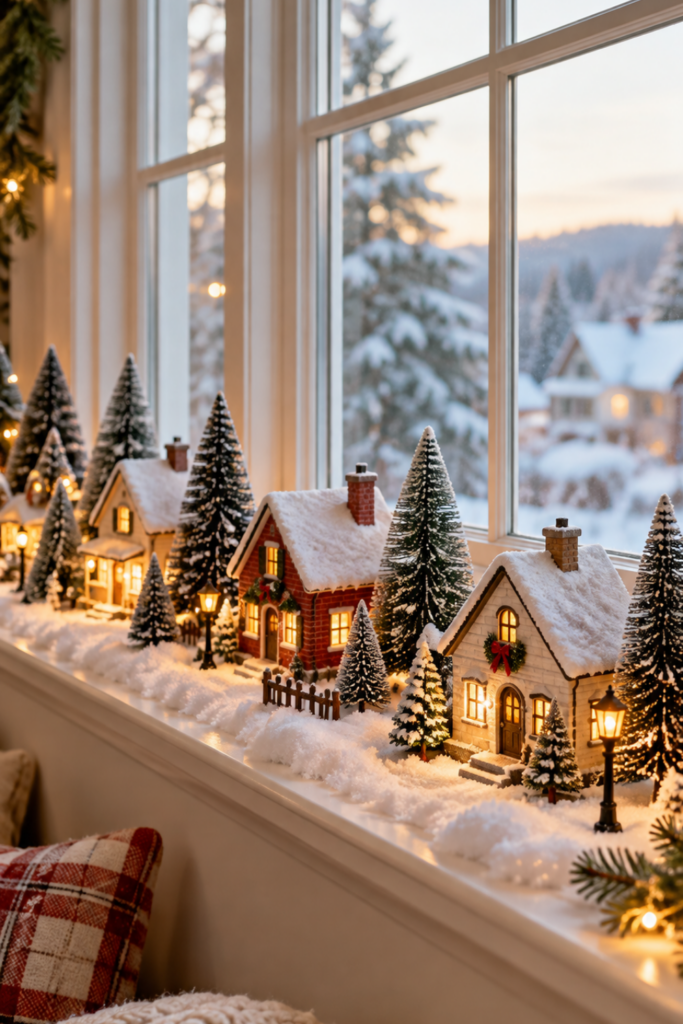
Line small houses along it with fronts facing in, or backs facing in so the street sees them. Keep the scene tight, about three to five pieces.
Space needs: a deep sill away from where you open the window.
Benefits:
- Passersby enjoy it too.
- Daylight shows off detail during the day.
Limitations:
- Cold glass makes condensation. Lift houses on a thin felt or cork strip.
- Strong sun fades paint over weeks.
- Keep pieces away from curtains and blinds pulled by kids or pets.
Skip any ledge near a space heater or radiator.
9) Christmas Village On Existing Floating Shelves
Floating shelves you already own can hold a village without buying anything new. Shelves 6 to 8 inches deep fit one row of small to medium houses.
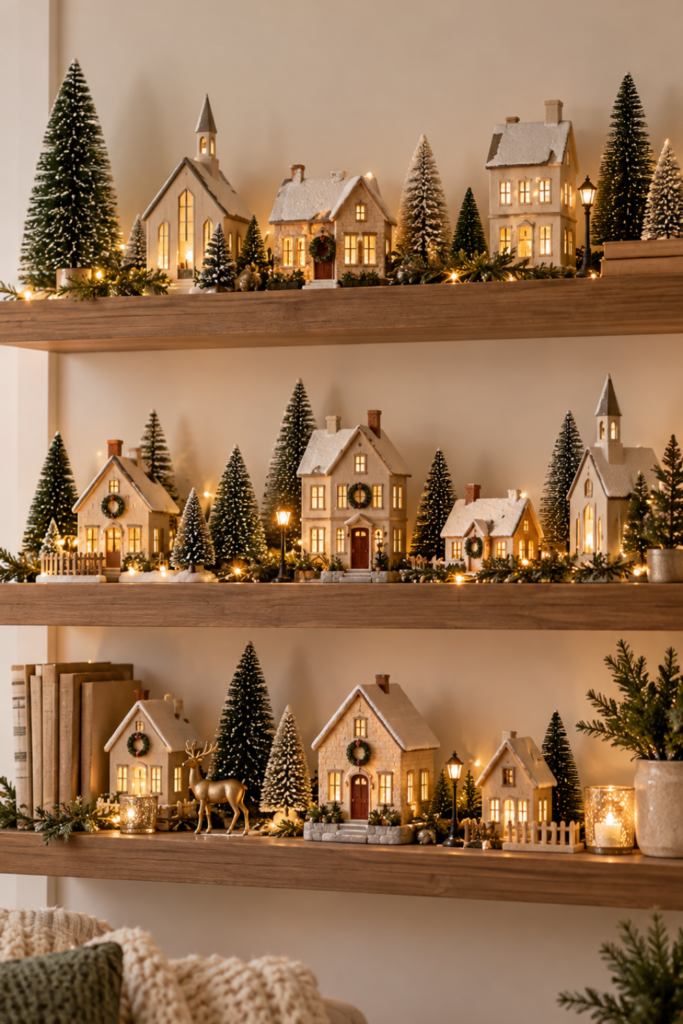
Stagger the scene across shelves so a tall building on one sits above a short one below. That zigzag keeps the wall from looking like rows of boxes.
Space needs: two or three shelves on a free wall.
Benefits:
- Pieces sit up high, away from little hands.
- It frees up tables and counters.
Limitations:
- Check the shelf’s weight rating. Ceramic houses add up fast.
- Lit houses need a cord path. Paintable cord covers run down the wall neatly.
Put museum putty under each piece, since shelves get bumped when you dust nearby.
10) Christmas Village On A Corner Shelving Unit
A corner shelving unit uses dead space and holds a larger collection than most single surfaces. The triangle shape lets you build a town that wraps around.
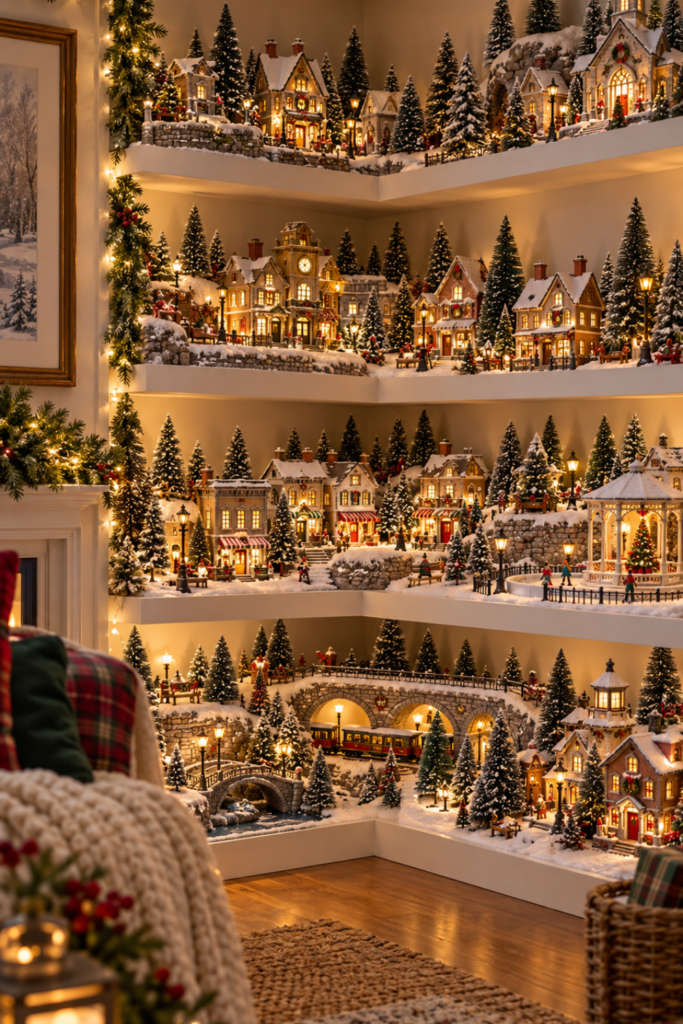
Put your focal building on the shelf closest to eye level. Use upper shelves for hillside houses and lower ones for skating ponds or train scenes.
Space needs: a 2 to 3 foot corner.
Benefits:
- Many buildings, small floor footprint.
- An outlet in a nearby wall usually keeps cords short.
Limitations:
- Corner units can be wobbly. Anchor to the wall.
- Back pieces are hard to reach for switching lights.
A power strip with a single switch, mounted to the back, solves the reaching problem.
11) Low Profile Village Beneath The Christmas Tree
A low village under the tree fills the bare spot before gifts arrive. It works with small houses that sit under the lowest branches.
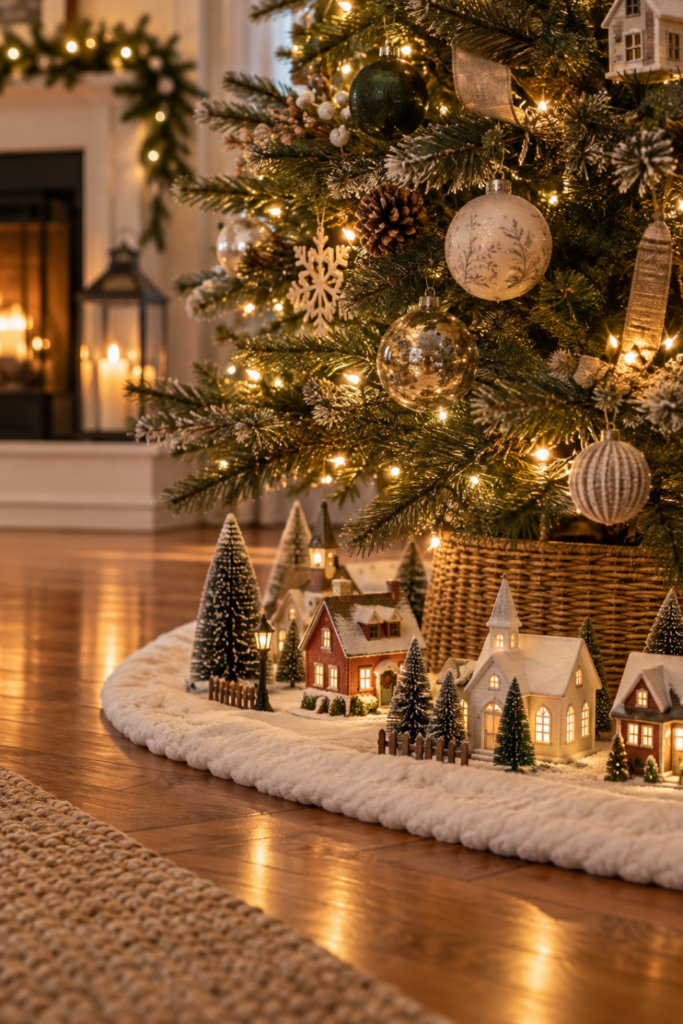
Lay a white tree skirt or felt, then circle three to five houses around the trunk. Leave openings so the tree stand can be watered.
Space needs: the open ring under the branches.
Benefits:
- It makes the tree look finished.
- Tree lights add glow, so the houses don’t all need power.
Limitations:
- Floor level means pets, toddlers, and vacuums.
- Gifts crowd it by mid December.
Water live trees often, and look for a fire resistant label on artificial trees, as the CPSC advises.
12) One House Christmas Village In A Glass Lantern
One house inside a glass lantern is the smallest village you can make, and it still looks special. It’s ideal for a studio apartment or a desk.
Set a small house on a bed of felt snow. Add one bottlebrush tree and a tiny battery string of LED lights.
Space needs: about 8 inches square.
Benefits:
- Glass keeps dust off.
- Easy to move from room to room.
Limitations:
- Only very small houses fit.
- Real candles never go in with the house. Use battery lights only.
FAQs About My Christmas Village Display Ideas
How can I make DIY Christmas village displays on a budget?
Use sturdy boxes or stacked books as risers, cover them with white felt, and add a few bottlebrush trees for an affordable snowy village scene.
What Christmas village set up ideas work best for small spaces?
A small Christmas village display looks great on a tray, bookshelf, or entryway table, especially when you group two or three houses together.
How do I arrange a Christmas village display on a fireplace mantel?
Start with your tallest building, place smaller houses along the mantel, and add a few trees and LED lights while keeping decorations safely away from fireplace heat.
Final Thoughts About Christmas Village Display Ideas
The thing I love about Christmas village display ideas is that you can make them work with what you already have. You don’t need a fancy display stand or dozens of miniature houses to create something special.
I always recommend starting with your favorite buildings, giving them a sturdy base, and adding a few trees and warm LED lights to bring everything together. Pick a spot that fits your home and everyday routine, and enjoy having your own little Christmas village to look at all season.

Willie Drew
I’m Willie Drew, and I’m here to help you turn your home into a space you’re proud to show off using simple projects, smart tools, and realistic budgets.