

Wood Burning Ideas For Beginners That Are Easy
When I first started exploring wood burning ideas, I was looking for projects that felt creative but not intimidating.
I quickly learned that wood burning is one of those hobbies where simple really can look special.
With a few basic tools and the right patterns, you can turn everyday wood pieces into cozy decor or thoughtful gifts.
This guide focuses on easy, approachable projects that help you build confidence while enjoying the process.
Woodburning Starter Tools
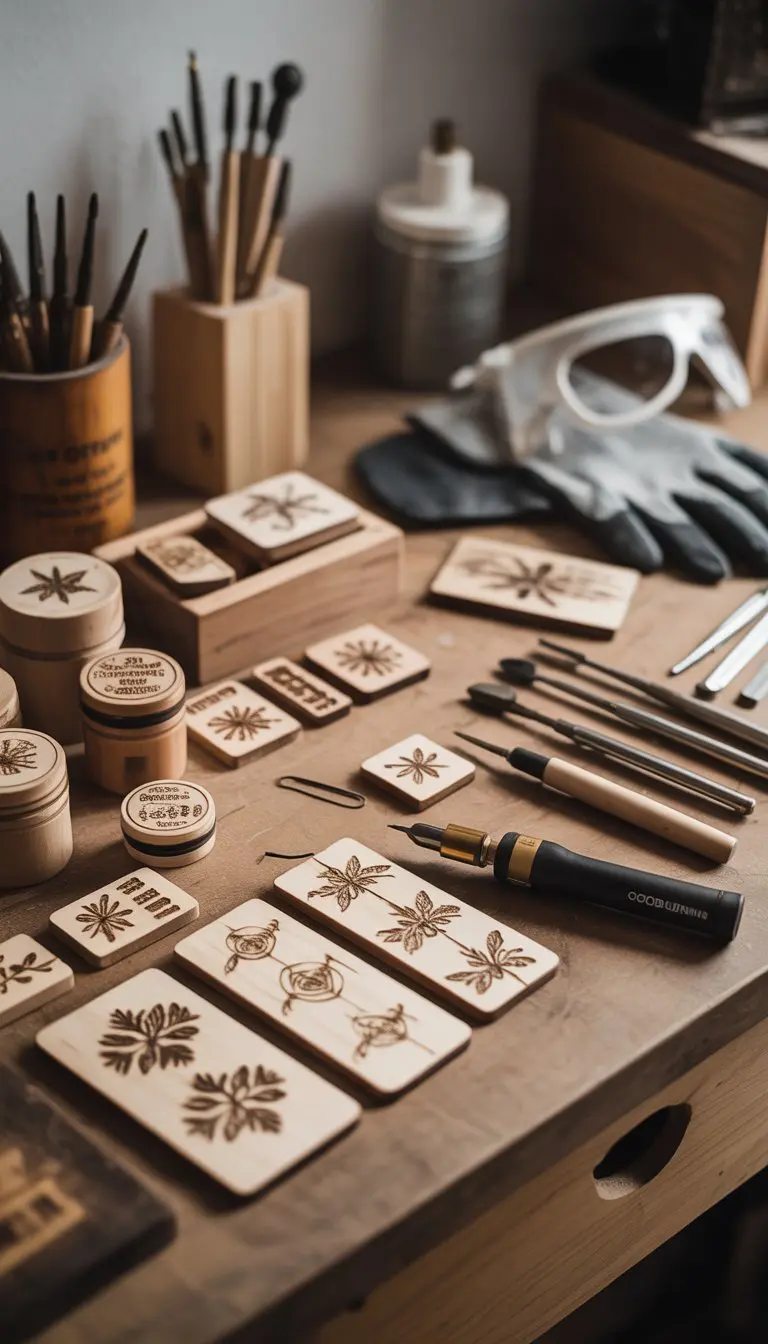
Starter Kits And Woodburning Pens For Beginners
Getting started with woodburning is easier when you have the right tools. You don’t need to spend a lot at first.
Many beginner kits come with just what you need to try out pyrography without feeling overwhelmed.
Look for a wood burning pen or pyrography tool with adjustable heat settings. This helps you control how dark or light your lines will be.
Kits often include multiple tips, which let you make different effects like shading or fine lines.
Common tip types are solid tips, which screw on tightly, and wire tips, which give you delicate strokes.
A typical beginner set includes:
- A wood burner with temperature control
- Several tips for different styles
- A metal stand for safety while the tool cools
- Some basic stencils or patterns
- An instruction manual to guide your first steps
Wire tip burners are a great option if you want more detailed designs. They usually last a long time and give you lots of creative freedom.
Don’t forget heat-resistant gloves if you want extra safety, especially when working on bigger or longer projects.
Starting small with a lower-cost kit is smart. This lets you explore without spending too much.
Once you get the hang of it, you can upgrade to fancier tools that match your style.
Which Wood And Surfaces Work Best For Pyrography?
Not all woods are the same when it comes to burning. The kind of wood you pick makes a big difference in your project’s look and ease.
Here’s a quick guide:
| Wood Type | Pros | Cons | Notes |
|---|---|---|---|
| Basswood | Soft, light color, easy to burn | May dent easily | Great for beginners |
| Birch | Harder, light color | Can be tricky to burn evenly | Good for detailed work |
| Maple | Smooth grain, pale color | Harder, needs higher heat | Produces sharp contrast |
| Plywood | Cheap, widely available | Contains glue avoid burning too deep | Watch out for fumes |
| MDF | Smooth surface | Toxic fumes when burned | Best to avoid |
| Cork | Soft, unique texture | Breaks easily | Fun for coasters or small décor |
You can also try other burnable surfaces like:
- Cork – Cozy and fun for quick projects
- Hardened gourds – Perfect for rustic vases and bowls
- Veg-tanned leather – Great for personalizing wallets or belts. Avoid chrome-tanned leather because it has harmful chemicals.
- Certain papers without ink or toxic chemicals can also be used, but wood is your best bet.
Always use untreated, natural wood. Finished or chemically treated wood releases nasty fumes and can harm you.
Protect Yourself: Why You Should Wear A Respirator
Burning wood or other materials creates smoke that isn’t great to breathe in. Even if you don’t notice immediate problems, these fumes can build up and cause health issues later.
Wearing a respirator mask is the safest move, especially if you plan long sessions of woodburning. A simple dust mask won’t cut it since it doesn’t block fine smoke particles.

Here are some tips to keep the air clean while you work:
- Use a small fan to blow smoke away from your face.
- Open windows or set up near a door to increase airflow.
- Avoid burning treated wood or materials that release chemicals.
- If you’re burning leather, only choose vegetable tanned types for safety.
For your skin, consider wearing heat resistant gloves. These protect your hands from accidental contact with the hot burner or hot wood.
Staying safe lets you enjoy woodburning longer without worrying about your health.
Think of the respirator as just another tool in your kit one that keeps your creative space cozy and clear.
Sticking with the right tools, choosing good wood, and taking basic safety steps make your woodburning journey smooth and fun. Your cozy projects are waiting!
Beginner Woodburning Techniques
When you start wood burning, using the right strokes can really change how your design turns out.
Many of the marks you make are like drawing with a pencil simple but with lots of creative options.
For example, you can try crosshatching to add texture or use pointillism to create shading with tiny dots.
Other popular strokes you might want to practice are gradients, which create smooth changes in tone, and hair or fur strokes that imitate natural lines.
Stripes and squiggles can add pattern and movement to your piece.
Playing around with these will help you find your style and make your work look more interesting.
What The Different Tips Do
Your wood burning tool likely has several tips, each one shaped a bit differently for unique effects.
Getting to know what they do will help you choose the best one for your project. Here’s a simple guide to the most common tips, so you can get comfortable with them.
| Tip Shape | What It Does | Good For |
|---|---|---|
| Fine Pointed Tip | Makes precise lines and details | Outlining, tiny details |
| Angled Flat Circle | Creates smooth shading and gradients | Shading, creating special textures |
| Flat Head-like Tip | Produces short, even lines and shapes | Basketweave patterns, borders |
| Larger Flat Tip | Similar to angled flat but easier to control | Smooth lines, filling areas |
| Flat Point Shape | Difficult to control, less useful | Limited use |
| Heart Shaped Tip | Burns heart shapes | Fun patterns, but limited use |
| Apple Core Shape | Makes unique, interesting patterns | Filling backgrounds |
| Rounded Triangle | Good for borders and background fill | Bold borders, textured backgrounds |

The fine pointed tip will become your go to for most of your detailed work. It’s perfect for the sharp lines you’ll need for outlines or tiny touches.
If you want to add soft shading or smooth gradient effects, try the angled flat circle tip. It gives a lovely look when you gently move it across your wood.
Some of the flatter tips, like the flat head or the larger flat tip, work well if you want to create repeating patterns, like a basketweave, or fill in larger areas.
They help you cover more space without losing control.
Other tips, like the heart or apple core shapes, are more for fun or special effects. The rounded triangle tip is great for making strong borders or filling backgrounds with texture.
Getting familiar with these tips and trying them out will make your wood burning projects more fun and your results more polished.
Don’t be afraid to mix and match to see what looks best on your piece!
How To Create A Wood Burned Design

Collect Your Tools And Materials
First, gather everything you need to make your wood burning project easy and fun.
Grab a piece of wood like a smooth wooden coaster or a plain wooden spoon. You’ll need a wood burning tool with a few tips to create lines or shading.
Have a cloth handy to clean your tips while you work.
You’ll also want a design, either something you draw or a simple wood burning stencil.
Use graphite paper or a pencil to transfer your design, and tape to keep it in place.
Work in a well-ventilated spot and wear a mask if you can. Keep kids and pets away from your workstation for safety.
Prepare The Wood Surface
Before starting, make sure your wood is smooth. Use fine sandpaper (around 320 grit) to even out rough spots, which helps your design look neat and burns evenly.
Wearing a mask while sanding is smart because wood dust isn’t great to breathe. Once your surface feels silky, it’s ready for your art.
Pick Or Make Your Design
Decide what you want to create.
You can draw your own design or download one online look for beginner friendly wood burning patterns like simple mandala shapes, cacti, or wooden bookmarks.
If you plan to sell your work, check that the design is okay for commercial use.
Simple ideas like a wood burned cutting board or wood slice coasters make great starter projects.
Transfer Your Design Onto The Wood
There are two easy ways to get your design onto your wood. One is using graphite paper: place it between your wood and the paper with your design.
Tape them together so nothing moves, then trace over the lines with a pencil or pen, pressing firmly.
The graphite will copy your design onto the wood. If you don’t have graphite paper, scribble over the back of your design paper with a pencil, tape it down, and trace the lines.
After tracing, carefully lift your paper to make sure the design copied well before removing it fully.
Pick The Right Wood Burner Tip
Think about the kind of wood burning you want to do. For simple line art, use a fine point tip.
For shading or filling bigger spaces, choose a wider, flat tip. Having the right tip ready will make your work easier and more precise.
Beginner wood burning projects usually start with one or two tips that are good for lines and basic shading.
Warm Up Your Wood Burning Tool
Turn on your wood burner and let it heat up. Some models have a dial to control the temperature; set it to a medium heat to start.
Place your tool on a stand or a safe surface while it warms. Be careful when hot, the tip can cause burns or damage surfaces, so handle with care.

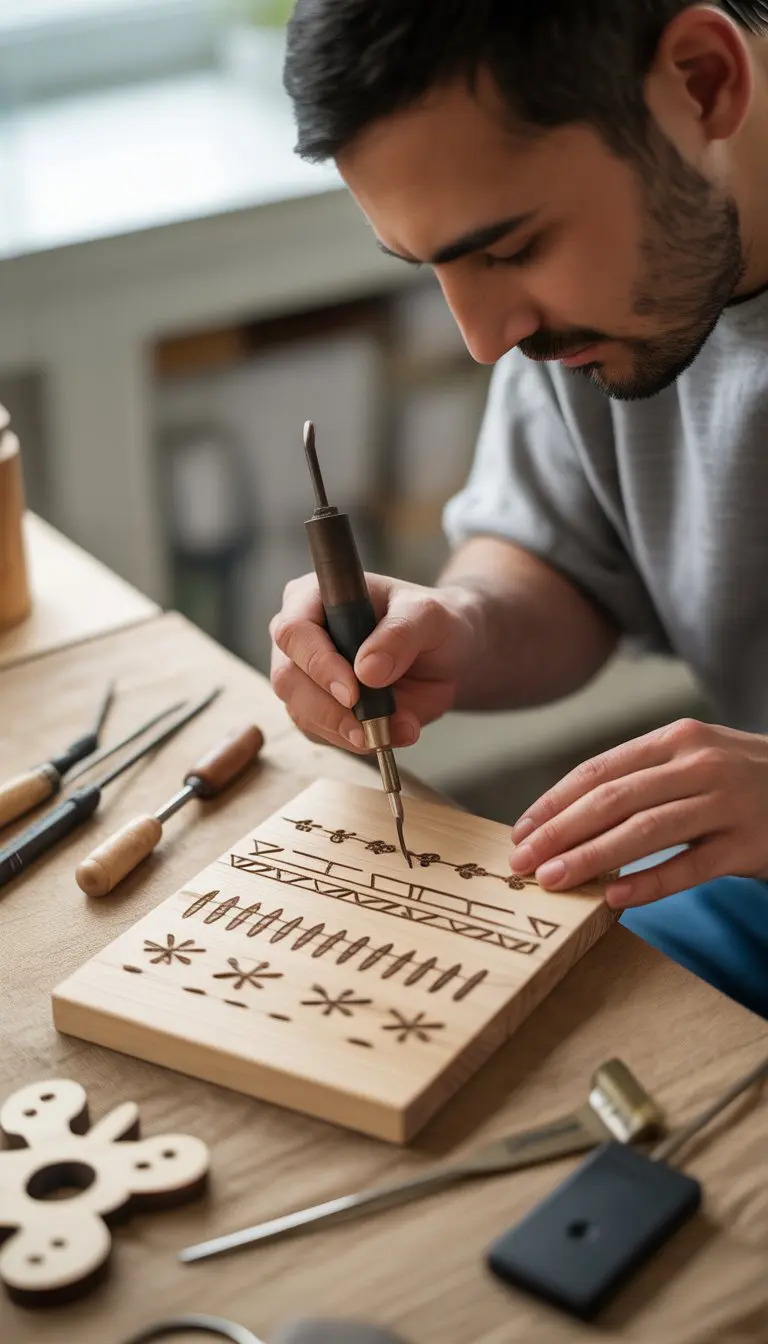
Outline Your Design First
Start by slowly outlining your transferred design on the wood. Steady your hand and work patiently to follow the lines.
Taking breaks can help keep your hand from shaking. Outlining first gives a clear frame before you fill in the details.
Fill in Your Design With Shading Techniques
Now, add shades and textures using your wood burner. Try simple techniques like cross hatching, dots (pointillism), or smooth gradients to bring your project to life.
These methods add depth and interest to your wood burned coasters or any other pyrography project you choose. Don’t rush; nice effects take a bit of practice.
Remove Any Leftover Pencil Marks
Once you finish burning, some pencil lines might still show. Use a clean white eraser to gently rub off these marks without damaging your wood or design.
This step makes your work look clean and ready to show off.
Protect Your Finished Piece
To keep your design looking great, add a finish based on what you made.
For kitchen items like wooden spoons or cutting boards, apply a food safe mineral oil to seal and protect.
For decorative items, options like lacquer, polyacrylic, or tung oil work well. Wooden bookmarks or coasters get extra protection with polyacrylic to prevent water damage.
If your project will live outside, use a durable urethane finish to guard against sunlight and moisture.
FAQ’s About My Wood Burning Ideas
What Are The Easiest Wood Burning Ideas For Beginners?
The easiest wood burning ideas usually start with small, flat projects like coasters, bookmarks, or signs.
Can Wood Burning Projects Be Used As Gifts?
Yes, wood burning gifts are one of the most popular ways to use this craft.
Where Can I Find Wood Burning Patterns To Use At Home?
There are many places online that offer wood burning patterns free for personal use.
All Set
You’ve created a lovely piece of wood burned art!
Whether it’s a simple wooden coaster, a custom cutting board, or a delicate mandala pattern, you’re on your way to enjoying this creative and rewarding craft.
Keep experimenting with easy wood burning ideas for beginners and soon you’ll have a whole collection of handmade wood burning designs to share or gift.

Willie Drew
I’m Willie Drew, and I’m here to help you turn your home into a space you’re proud to show off using simple projects, smart tools, and realistic budgets.